Jump to navigation
Jump to search


| Vanilla Dome 1 | |
|---|---|
 | |
| Level type | |
| Entrance | |
| Exit | |
| Secret Exit | Vanilla Secret 1 |
| Time at Start | 400 |
Walkthrough[edit]

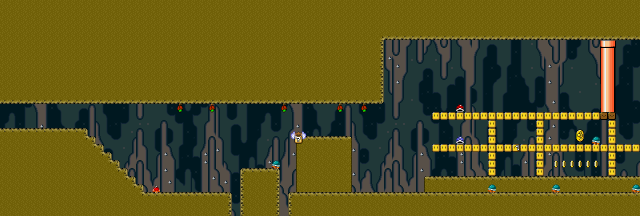
- In the beginning, you will be safe from the Swoopers if you stay at the very bottom. Catch the ? block that flies by to get a flower.
- You'll come across a puzzle in form of a turn block maze. There's one easy way to get through: climb up to the top, run to the orange pipe, spin jump down to the middle level and use the Buzzy Beetle to get through the turn blocks to the right. (Cape Mario can just use his cape to do this.) It is difficult but possible to bring Yoshi through this puzzle; you'll need to dismount and remount him several times.
- There are a few goodies hidden inside the turn block maze. The sole ? block contains a flower. One of the turn blocks (top level, sixth one from the right counting from the orange pipe) has a feather. After the orange pipe, the first turn block on the middle level contains a 1-up mushroom.

- Use the Buzzy Beetle and kick his shell against the ? block on the ground to receive a flower.
- Enter the pipe on the ground to get to the second area.

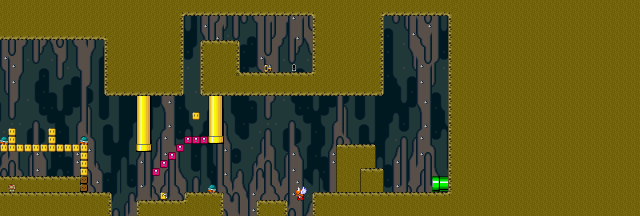
- The yellow stone sinks down into the lava as soon as you step on it.
- The ? block right before contains a Starman. Get it, jump on the yellow stone and quickly run to the other side. With luck, you should make it without getting roasted.
- Enter the pipe to get to the third area.

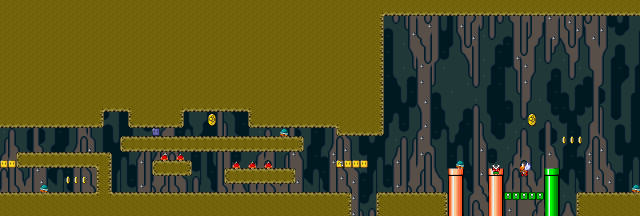
- You have only one chance to reach the midway tape. If you fall down, you'll have to complete the rest of the level without it.

- Another maze can be found here. To get up at the beginning, jump at only one of the turn blocks and use the other to get to the upper path.
- At the second fork, the top path is the easiest, but it can only be taken by Small Mario. The blue block can be picked up and kicked away to defeat the lone Buzzy Beetle on the way. Otherwise, you'll need to take the other one and deal with Spike Tops.
- You can get another flower from the ? block in this section.

- The slope can only be climbed by jumping repeatedly. You should wait until the Buzzy Beetle goes down the slope, otherwise you will just run into it.
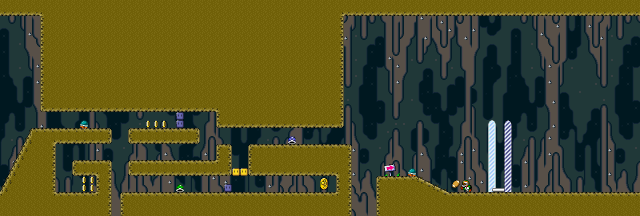
- This maze is slightly easier than the previous ones. Remember that you can grab the blue blocks and kick them away.
Secret Exit[edit]
Right after the turn block maze, the key and keyhole are next to each other, hidden inside an alcove. A turn block containing a vine allows you to climb up to it, but you cannot normally reach that turn block. There are basically two ways to get up there.
- You can wait until you complete the Red Switch Palace. The red switch blocks will form a staircase and make it really easy to reach the key and keyhole.
- The other way is by taking Yoshi, swallowing the blue Koopa shell at the beginning of the turn block maze and getting him all the way to the other side so he can simply fly up to the key and keyhole. This is rather challenging as Yoshi likes to eat the Koopa shell prematurely, meaning you have to spit it out and swallow it again on the way.
Dragon Coin locations[edit]
The five Dragon Coins in this level are located as follows:
- Inside the turn block maze.
- In the area with the sinking yellow stone, near the end.
- Inside the top path at the first fork (only reachable as Small Mario).
- Between the orange and green pipes; bounce off the Paratroopa to reach this one.
- Near the end of the level, inside a dead end reached by taking the bottommost path in the maze.