Area 9 goes back to starting you off with a Blue Lander checkpoint. Head to the left to enter the area proper, and follow the path that it leads you on.
X6 Y6
This room is occupied by a slime runner. Do your best to take it out so that it doesn't fill the room with too many slimes. Then take the path below the red barrier to the left.
X3 Y6
Green asteroids actually rain down from the top of the screen in this room. They actually stop after a minute or so. Regardless of whether you choose to wait or not, head for the item capsule in the middle of the room and shoot it open to reveal a Blue Lander. Collect it to boost your health meter up to 20. From here, double back to the right, and follow the path above the red barrier.
X5 Y6
On your way back to the right, watch out for the multitude of bouncing balls. Take a detour in this room and visit the room above. There, you will find an empty room with a door on the left. Shoot it open and head inside to receive a hint on how to open the gate to Corridor 9. Then return the way you came, and continue to follow the barrier as it bends and leads you north.
X6 Y5
The top of the barrier resembles a question mark. Continue your progress north.
X6 Y3
Take out the three small darting creatures and the blue bats that occupy the room, and open the item capsule in the center. You will find a defense upgrade inside. You defense level should be maxed out at this point with seven shields. Any more that you collect from this point on will have no effect. Head to the left from here.
X5 Y3
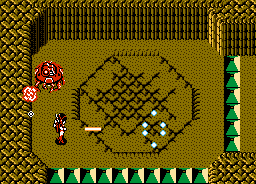
It's easy to accidentally miss the mini-boss that occupies the room here if you quickly move from the right side to the bottom, but you won't want to miss it if you didn't purchase the Wave Attack upgrade from Area 7. This is where you find it for free. The mini-boss is the familiar red dome machine. Any of the usual strategies will work, including chasing it around the room with the Saber Laser. Destroy it and the item capsule will appear in the middle of the room, and inside you'll find the final Wave Attack upgrade. This upgrade is extremely useful in corridor battles, against regular enemies as well as bosses. Head south from here make your way to the entrance to Corridor 19.
X4 Y4
The entrance to Corridor 19 awaits you here. Jump in and complete this Corridor and when you return, you will receive another shield, only it's unlikely that this one will help you if you've collected every other shield that the game has to offer. You can only upgrade your defense six times before it maxes out. At least you'll get a small boost in health when you collect it. From here, you can go west or north, but west will simply lead you back around to red barrier below, so head north.
The new and final theme of the game is a desert wasteland. You will be greeted by a series of skulls that appear throughout the stage. They start out red when they are inactive, and turn blue when they get close to you. While blue, they slowly chase after you. Red spinning diamonds will join the skulls, and they are incredibly tough like the blue orbs that soon follow. After a while, the laser shooting robots and laser shooting ships will start showing up, so be careful and dodge the lasers as best as you can.
Falling and circular asteroids will appear on the screen while the slow blue crystals materialize and chase you. As you proceed, you will begin to see the skulls of fossilized dinosaurs animate and approach the center of the screen while spitting bullets out at you. They aren't hard to destroy, but you'll want to focus your attack on the quickly before they have a chance to overwhelm you. Spinning blue ships will join the fight, and falling green asteroids also appear before long. At a certain point, you may wish to consider using the Enemy Eraser just to clear the screen out and create a break in the action. When it seems like you're down to the green asteroids and they peter out, you will encounter four pairs of dinosaur skulls just before you reach the boss.
The boss for this corridor is a red version of a boss you last faced many areas ago. The red Bombarder is just like the silver one you faced back in Corridor 13. Although it has more health, the strategy remains the same: wait for it to appear somewhere on the screen, then focus all of your attack on it for the brief duration that it sticks around. The Saber Laser, Wave Attacks, or Fireball are all good choices since they can simultaneous do a lot of damage while the Bombarder is present on the screen, as well as clear out the barrage of missiles that it fires at you before they have a chance to spread out and damage you. The destroyed missiles will likely leave item capsules behind to help you restore any damage or lost chips. Once the boss is defeated, you will return to Area 9, where you can collect another defense upgrade.
Two blue dome machines await you when you arrive. You're not obligated to fight them, and you won't receive any special reward for beating them, so it's up to you whether you fight them or not. Either way, continue west.
X3 Y3
In another room full of bouncing balls, make your way to the item capsule in the center. Shoot it to discover a welcome prize: the last Red Lander available in the game. With this Red Lander, your chip capacity will reach the highest maximum of 4000, giving you little reason to fear running out of chips. Follow the path to the left from here.
X0 Y2
You've often ignored the advice of arrows and this time will be no exception. Explore the room to the south first.
X0 Y3
Not the most exciting prize, but you'll find an Energy Tank in the item capsule in the center of the room. Collect it to restore all of your lost energy, and then start traveling north.
X1 Y0
The path along the way is mostly devoid of enemies until you turn the corner and reach this room crowded with bouncing balls of various colors. Use your Saber Laser or the Repeller to quickly clear them out of your way, and open the item capsule in the center of the room to reveal a pack of Enemy Erasers. Continue heading east.
X2 Y0
It's time to fight the second mini-boss of the area. It's a powerful version of the boss that briefly appears in some location before releasing a batch of roaming creatures where it once stood. The roaming creatures that appear from this boss are quite fast actually, so it's a good idea to stick around and make sure that you clear as many as you can before they begin rushing around the room. Focus all of your firepower on the boss when it appears, and you'll take it out within the first couple of appearances. The item capsule it leaves behind in the center of the room will contain a Blue Lander. Collect it for the always welcome increase in health. From here, follow the path west and then south.
X3 Y1
This time you should follow the arrows advice, and explore the room to the left. It will lead you to the entrance to Corridor 9.
X2 Y2
The method to open this gate is rather simple: stand on it. As soon as you set foot on the gate, it will open immediately. Hop in and clear out the corridor. Upon your return, you will obtain the very last weapons upgrade that you need, the final upgrade to the Area Blaster. This will should put all of your weapon systems at Level 3. Be aware, however, that the final upgrade to the Area Blaster is very expensive to use, at a whopping 120 chips per use. It's powerful, but the heavy price limits its usefulness in all but only a very select situations. Choose them wisely.
The corridor starts out with falling green asteroids right away. They are soon joined by the resilient red diamonds. This is followed by a new type of red dinosaur skull that spits out regular skulls. In addition, large skull structure on the ground will also spit out regular skulls. Both the red skulls and the ground structures can be destroyed. Blue laser firing ships appear once the skull spitting structure pass. Then mounds appear in the ground that quickly produce large blue mouths that try to collide with the Guardian.
More ground skulls will appear while blue orbs arrive at the top of the screen. Spinning blue ships dive across after the ground skulls end. Enemy Erasers are quite effective through here. Blue crystals materialize while trios of the blue mouths pop out of the mounds in the ground. When the mouths end, laser firing robots appear in either lower corner. When the crystals stop, a column of ground skulls appear just right of the center of the screen. Line up with them so you can take them all out while the last of the robots appear. Particle-bursting balls begin to drop from the top of the screen. Firing off an Enemy Eraser as soon as the particle balls burst is a great way to survive the attack as well as produce helpful item capsules. The balls are soon joined by more mouth mounds, and a red dinosaur skulls that float across the screen just before the boss arrives.
You'll face a new boss at the end of this corridor. The Eyegore may remind you a bit of the Grimgrin, but it's actually far easier to deal with. It showers the screen with lasers and skulls, but while it moves up and down it remains in the center of the screen, never veering from its lateral position, which makes it incredibly easy to take advantage of weapons like the fully powered Hyper Laser, Cutter Laser, or Repeller. To use the Cutter Laser, merely fly as close to the side of Eyegore as you are comfortable doing without causing any damage to the Guardian. The Cutter Lasers should also remove many of the skulls that appear, and you won't have to worry about the lasers. If you're not comfortable with this tactic, the spread of the Hyper Lasers should keep you safe from harm, and the wide path of the Repeller will do substantial damage to the Eyegore without putting the Guardian in range of Eyegore's lasers.
Pelt Eyegore with your guns until it's defeated, and collect items from the capsules left behind by defeated skulls. You will earn the seventh and final key before returning to Area 9, where you can collect the final upgrade to the Area Blaster. At this point, all your weapons should be maxed out, as should your defense and shot speed; your attack power should be one off max. Head out of Area 9 and return to Area 0. The entrance to Area 10 is a very short distance away, and can be found at X11 Y8.