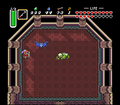
Initially, the great tower on the west portion of Death Mountain is closed to explorers. Only after rescuing all seven of the maidens and receiving the seven Crystals can you enter the tower. Once you have all seven Crystals, return to Ganon's Tower and the way will open up.
This impressive structure is said to be where Ganon spent most of his evil reign over the Dark World. Legend says that you can only break the seal of the tower after collecting the seven Crystals which Ganon has hidden in the dungeons of the Dark World. The seven maidens held captive in the Crystals can use their power to make the seal disappear. You are then free to explore the tower and search for Ganon. But you won't find this master of evil until after you survive battles with four creatures that you have already encountered in the Light World. Your long journey is close to completion.
Just as with the Tower of Hera, you will enter Ganon's Tower on the second floor. There are two stairways to the floor below, and one that leads up above. You will not be ready to explore the upper floors until you have collected the Big Key. The map and the Red Mail will also be particularly useful. You must begin by exploring the maze that lies below on Floor 1. Start out by heading down through the left staircase to room 1K. When you have collected the necessary items, you can return here and head to Floor 3.
Note: It is not necessary to explore every room on this floor. A number of rooms are merely traps. Ideally, start with room 1K.
1A
When you warp into this room from room 1V, you'll be on the left side of the room. Two blue Baris hover above a series of conveyor belts and pits. The conveyor belts arrive at a series of Star Tiles which alter the arrangement of the pits to force you to rely on the conveyor belts. The exit to the room is locked, and aSmall Key is hidden beneath one of the skulls at the top of the room. You'll need to pass them by once and step on a Star Tile to rearrange the floor in order to gain access to them. Then you can unlock the door and head to room 1B.
1B
The bridge trap in this room can be very unforgiving. You have a very limited amount of time to run down from the left side of the bridge to the right side. Don't bother traveling up since you will get trapped up there. You must remove the skull in your way, run down to the next skull, and avoid two fire bars and a spike trap; not an easy feat. If you manage to reach the second skull before the bridge collapses alongside of it, you can access the remainder of the room, guarded by one blue Pon, and exit through the lower left door to room 1F.
1C
This room, occupied by one blue Bari and a Tail Worm, is covered with floor tiles, but only one has any effect. Find the right tile, and the wall dividing the north and south portions of the room will be destroyed. You may then explore the north portion where you will find treasure chests that contain generous supplies of bombs and arrows. When you're done, head back through the hole you created to room 1G.
1D
You will warp into this room from room 1T. There are four fire chain Winders wrapping around the wall segments. You can use the Magic Cape to avoid contact with them as you make your way to the left. You will come across a solitary block that can be pushed in any direction to make a treasure chest appear on the left side of the room. With this chest in place, you can use your Hookshot to grapple over to the chest, open it, and collect anotherSmall Key. Use it to unlock the door to the south and proceed to room 1G.
1E
When you enter this room, the door will shut behind you, and will not open until all three red Stalfos have been defeated. There are four fireball traps that will make life difficult for you whenever you swing your sword. There are four treasure chests in the room, but they merely contain supplies of bombs, arrows, and Rupees.
1F
At first, there is no clear way to access the warp tile in the center of the room. As it happens, there is a Star Tile underneath the movable statue on the left side of the room. Pull it out of the way to step on the Star Tile, and fill in the gap. Watch out for the blue Pon that guards the tile. Step on the tile to be warped to room 1Z.
1G
This room and its many warp tiles are intimately associated with the warp tiles in room 1Y. You will need to traverse a number of them to proceed. Start out by stepping on the left tile and warping to the upper left corner of 1Y. You will return from 1Y in the upper left corner of the room. Before you step on the warp tile below, you may bomb the left wall and expose an opening to room 1C. When you return, step on the lower warp tile to end up in the center along the left wall of room 1Y. Upon your next return to this room, you should arrive just left of the center of the room. Walk down and left to the warp tile in the bottom left corner back to room 1Y.
1H
Following the walkthrough, you will first arrive in this room by warping in from the right portion of room 1Y. You will be contained in a small boarded-off portion of the top of the room. Take the warp tile above back to 1Y to reach its exit. If you entered this room from 1N below, it will appear as little more than a petting zoo for common dungeon enemies and you'll have to return south.
1I
When you arrive from room 1J, you will be standing near a series of island platforms over a chasm. Each island will have a block or two situated on it. The idea is to use your Hookshot to maneuver yourself across the pits and around the room. You may optionally head through the top door to room 1E, but you must ultimate make your way to the bottom of the room. When you reach the bottom, deal with the Stalfos. Then unlock the door to the right and collect the map from room 1O. When you return, you must lower the blue fence blocks. Then place a bomb by the switch and run below the blue fence blocks before they rise again. Enter the door below to room 1S.
1J
First, collect theSmall Key hidden beneath the skull in the lower right corner of the room. Then step on the conveyor belt and utilize your Magic Hammer to crush the bobbing pegs situated around the center block. When enough pegs are out of the way, push the center block out of the way to reveal a Star Tile. Stepping on the star tile will fill the gaps in the floor created by the pits, giving you access to the left door. Head through it to enter 1I.
1K
The first room that you explore on this floor contains two torches and two Stalfos. A fireball will hug the right torch, upon which aSmall Key has been situated. One dash bash into the torch will knock the key to the floor for you to collect, but be careful of the fireball. There is no reason to use the key on the right door since you can freely access that room through the right staircase in Floor 2. Instead, head left to room 1J.
1L
You will arrive at this room if you took the right staircase. The path laid out in this portion of the walkthrough is entirely optional, and is only necessary if you wish to collect the Compass. The left treasure chest contains arrows while the right one contains bombs. A switch on the wall may appear to be the answer to opening the shutter door, but pulling it will make bombs rain from the ceiling. Instead, a switch can be found in the lower right corner which opens the door to room 1M.
1M
This room contains a number of traps, including spinning floor tiles, a Bubble, a "Bunny Beam" trap, two fireball traps, and worst of all, a Wallmaster hand. The treasure chest at the top contains aSmall Key. Collect it and use it to open the right door and enter room 1N.
1N
Presuming that you entered this room from room 1M, there are three other exits from this room. The north exit close to you, leads to the nonfunctional portion of room 1H. Lower down is an open door that leads to another dead-end room 1R. The only exit that is truly of value is the shutter door to the south. There is a Gidbos, a red Stalfos, two blue Baris, and a Wallmaster in this room, but defeating all of the enemies won't make the door budge. There are, however, four torches that can be difficult to light all at once, but if you are able to do it, the door to room 1X will open. Start by clearing out all of the monsters in the room. There are two blocks in an upper right corner of part of the room. The lower of the two blocks can be pushed left. Once this block is moved, you must quickly light all of the torches from the top of the room to the bottom and escape through the lower door before one goes out.
1O
Two fire bars spin around a treasure chest, and various pits make accessing the bottom of the chest even more difficult. The Magic Cape or Cane of Byrna can help you here. Reach the chest and open it to discover the dungeon Map. Then return to room 1I and proceed to room 1S.
1P
You should arrive here after defeating the Armos Knights and collecting the Big Key. Fortunately, this is also where the large treasure chest resides. Push the single block aside, and dodge the spike traps and the fire chain Winders to reach the chest. Open it up, and claim the greatest defense item in the game, the Red Mail. Once you collect this treasure, you are free to enter room 1K above, and begin your exploration of the upper floors.
1Q
Bubbles and a fireball occupy this otherwise deserted room. A number of skulls contain bombs, and there are a number of cracks on the floor. Naturally, you may wish to investigate these cracks by placing bombs on each of them. It turns out that the crack below the skull and next to the treasure chest can be blown open, revealing a hole to the floor below. After you open the treasure chest alongside it (which contains arrows), fall through the hole to Basement 1.
1R
This room is occupied by a fire bar and a Wallmaster. Several of the blocks around the skulls can be pushed aside, and you will find hearts underneath two of them, but in all likelihood, you may lose more health in the process than you stand to gain. Ultimately, you must return to room 1N through the right door.
1S
With the orange fence blocks lowered, you can access a good portion of the room. Everything, in fact, except the locked door to the right. Start by collecting theSmall Key from the skull in the bottom right corner. Now you need to deal with the blue fence blocks. Two Crystal Switches are situated side-by-side. At first, this may not appear to be much of an issue. But one bomb positioned close to both switches will in fact trigger the switches twice, resulting in no change. You need to place a bomb at just the right distance to trigger only one switch and not both. Make sure that as it explodes, you are safely beyond the orange fence blocks. Unlock the door and head to 1T.
1T
Hit the Crystal Switch when you enter the room in order to lower the orange fence blocks and allow passage to the right side of the room. Travel along the top or bottom and make your way to the right wall. Run up to the warp tile when the passage is safe. You will be transported to room 1D.
1U
Ether magic can light the way, but only briefly This room contains two pathways, one visible, and the other predominantly invisible. You need to take the invisible one to proceed. By walking up the visible path to the top wall, you will be able to see a torch on the opposite side of the room. Shoot at it with your Fire Rod to make the invisible path visible for a short while. Do your best to maximize the visibility of the path, which starts from the two skulls at the end of the visible path. If time runs out while you are still on the path, you have a couple of resources. The blue Pons will never willingly fall off the path, so you can use their position as a reference. You can also use the Cane of Somaria to create and push blocks that will fall off the ledge when you reach a boundary. Make your way to the right door along the top wall and proceed to room 1Q.
1V
In this room with one blue Pon and one red Pon, defeat them before pushing the lone block near the Warp Tile to make four treasure chests and a series of holes appear. The upper left treasure chest contains the Compass, while the remaining chests contain arrows and Rupees. Step on the warp tile to be sent to room 1A.
1X
Three Gibdos wander around this room, segmented by fence blocks. The only Crystal Switch in the room is beyond a wall partition over which you can not fire any weapon. A conveyor belt, however, leads straight up to it. So it is possible to pitch a bomb over the low portion of the wall, and let the belt bring it closer to the switch before it explodes. Use this technique once to get beyond the blue fence blocks (if they start out raised when you enter), and use it one more time to get beyond the orange ones by quickly running behind the blue fence blocks before the bomb explodes. Another option is to use the Cane of Somaria, which can be thrown and exlodes when unsummoned. Deal with the Gibdos carefully (or just use your Fire Rod), and enter room 1V to the left.
1Y
Following the walkthrough, you will first warp into the upper left corner of the room from 1G. Accordingly, you will step on the only available warp tile back to the upper left corner of room 1G. When you return along the left wall, use the left active warp tile below the skulls back to room 1G. Ultimately, you should arrive in the bottom left corner of the room, from which you can travel right to the remainder of the room. Two blue Pons make combat around the pits difficult. In order to escape, you must step on one more warp tile. This one takes you to room 1H. Once you return, you can proceed through the right door to room 1U.
1Z
Like room 1U to the left, there are invisible pathways from the left side of the room where you arrive to the right. Lighting the torches in the room can help you see the paths. However, a straight walk to the left will also bring you safely to the door on the left that deposits you in room 1U.
You will arrive on this floor from room 1Q above. You will land on an icy floor, where you will experience a return visit by the Armos Knights; the boss of the Eastern Palace. The strategy is exactly the same as before, only if you have already collected the Silver Arrow from the Faerie in the Chamber of Wishing at the Pyramid, you will be able to destroy the knights with a single arrow. They should pose little threat to you at this point in the game since their behavior is fairly predictable. Once you defeat the knights, the shutter doors will open. Proceed through the top door.
You will enter a treasure room with three chests. Opening the back two will reveal supplies of arrows and bombs, but the lower chest contains the Big Key. Collect it and return to the room below and head left. In the room with four torches, you may choose to head immediately up the staircase to room 1P. However, it's worth your while to explore the north wall, which may be bombed to expose a route to the room above. In it, you will find four fairies hovering over a pit. If you intend to catch them with your net, you'll have to wait for them to fan out a little bit, but if you simply wish to collect them right away, throw your Boomerang at them. Then head back down and climb the stairs to room 1P.
Upon your arrival to this floor, you are immediately presented with a Crystal Switch puzzle with fence blocks surrounded by a bed of spikes. To make matters worse, one green and one red Goriya occupy the room, as well as a Bubble. The door to the room below is shut, and the only way to open it is to safely arrive at the block on the left side of the room and push it. Use your boomerang to create safe pathways from the entrance to the block, and then to the door below, while fighting or avoiding the Goriyas.
You will now be in a room with two red Goriyas, and two red spike traps. If you wish to diminish the amount that the spike traps interfere with your progress, you can pull the nearby statue to the right, and push it down to block the higher spike trap, but it's not completely necessary. All that you must do is kill the two Goriyas with arrows in order to open the shutter doors and advance to the room on the right.
Two more Goriyas accompanied by two sentry statues must be dealt with in order to open the doors in this room. Take them out as quickly as you can before you get shot at by the statues too much, then advance through the door above. Cross the empty corridor and unlock the door above to continue.
A shutter door stands at the end of a long passageway with an exposed lower level. A switch in the back of the lower level opens the door, but to reach it, you must pass through an area with many spike traps. If the orange blocks were already up when you entered the room, it will keep many of the spike traps at bay. It is difficult to arrange it so that all of the traps are behind the orange fence blocks. Rush to the top of the room, and lower the orange blocks when you reach the end. Two Eyegores, one green and one red, will wake up and advance upon you. Shoot their eyes with your arrows, and locate the switch in the middle of the row of skulls. Step on it and return to the ladder at the bottom of the room. Climb up, and run around the top layer to the door.
Dash Bash the blocks to bounce backwards
One last room stands between you and the next floor. A long bridge is surrounded by cannons that move back and forth, firing across the bridge. You can dash across with very little to worry about and run right up to the stairs, but the map indicates that there's one extra room to the south. A platform on the bottom leads to a wall with a crack on it, but there does not appear to be a way to reach it. It turns out that if you dash bash the blocks at the very end of the bridge, the force of the bash will be enough to knock you back, across the gap, and on to the platform, where you can lay a bomb and pass through the hole to the southern room. In this room, you will find two fairies as well as a full magic refill under one of the skulls. When you return to the room above, use your Hookshot to return to the bridge and continue on to the next floor.
At the top of the stairs, you will encounter four enemies, two Stalfos and two Zahzaks, walking along conveyor belts. Attack them and defeat every one of them to open the shutter door on the left. In the next room, three red Stalfos stand guard over a sentry statue situated on the conveyor belt. You must once again defeat all of the Stalfos to open the shutter doors and advance to the room below.
The next room contains, not one, but two sentry statues on a rotating conveyor belt. This time, they are guarded by three blue Zahzaks, and a set of immobile spike traps rest in the center. Defeat the three Zahzaks to open the door and continue south. The next room builds upon the complexity of the previous by adding ice floors, and more spike traps. Now you only have two red Zahzaks to defeat in order to continue.
You will finally end up in a room with an iced-over floor. One (stationary) sentry statue and a fireball trap occupy the room along with a Stalfos and a Zahzak. A fireball revolves around a set of skulls containing health and magic, so they are worth investigating. Defeat the enemies to open up the door on the left. When you enter the next room, a "Bunny Beam" trap will instantly rush towards you from the center of the room. Unless you quickly duck behind one of the Ganon statues, it will hit you. Simply wait for its effects to wear off before entering the next room.
When you arrive, you will be treated to a repeat battle with the three Lanmolas, the boss from the Desert Palace. This one should go much more quickly since your sword is more powerful, and they have the same defense and health as when you first encountered them. The only difference with this battle is the Snake Medusa in the corner, just to make life difficult. Defeat the Lanmolas to access the room above. After a quick restock of supplies, you may climb the stairs to the floor above.
When you climb the stairs, you are deposited on a platform in front of a seemingly vast empty room. Skull wearing Wizzrobes will appear, attack you, and fade away. The truth is, an invisible pathway exists, but there are no torches to light the way. You can accomplish two things at once, kill the Wizzrobes and light the path, by using Ether magic when the Wizzrobes are fully visible. Cross the invisible path to the doorway below.
The next room contains a bridge guarded by two Tauros, as well as a pair of eye beams on the wall. You can dash past all of them, if you like, to reach the other side as there is little reason to stay and fight. Enter the door to the room above. More skull masked Wizzrobes will appear to fight you on a series of conveyor belts with a spike trap. You must defeat them all to open the shutter door at the top. Proceed through the door when the enemies are removed.
The next room contains another long bridge guarded by four Tauros. When you enter, the solid tiles in the center of the bridge will begin to fall away, but the conveyor belt remains. Either dash up the middle before the bridge disintegrates or stick to the conveyor belt to reach the top, dashing through the Tauros along the way. When you reach the top, head up and over to the right and enter the next room.
The next room contains a shutter door and four torches. You will once again need to light all four torches to gain access to the room below. A very narrow ledge leads to a platform on which a fire bar rotates. You need to move around with the bar, and shoot the top and right torches as soon as you can. Then rush back to the left, lighting the left torch, and fire across the chasm to the bottom torch. You should have just enough time to reach the shutter door before it closes again.
In this final room, you will find a heart and a full magic refill before you climb the ladder and arrive at floor 6. The giant room below is only accessible if you fall off the floor fighting the Moldorm in the floor above. It contains a number of spikes, four regular Wizzrobes, and a Bubble. Climb the stairs in the upper right corner to return to the fight with Moldorm.
When you arrive on this floor, you only have a few moments to rush around, and light every torch in the room in order to open the door at the top before the falling tiles prevent access to the various corners of the room. Start with the bottom right torch and work your way around the room in a clockwise direction. You should have enough time to light all four torches before the falling tiles catch up to you. Enter the door to the room above.
Two Helmasaurs guard this spike-filled room. Defeat them and one will drop aSmall Key that you can use on the door to the left. The two treasure chests in the corners both contain bombs (as do both skulls). The room on the left may appear to be a dead-end, but the crack on the bottom wall indicates otherwise. Unfortunately, a conveyor belt runs along the wall, as do a large and small spike trap. Deposit a bomb along the belt such that it explodes when the belt brings it close to the crack in the wall so that you can proceed south.
A Crystal Switch puzzle room hides a vast number of traps that you'll wish to avoid. The treasure chest in the center contains aSmall Key that you'll need to open the door to the south. If you get hit with the "Bunny Beam", simply wait for the effects to wear off before proceeding.
You will arrive at a recreation of the original Moldorm's nest from the Tower of Hera. The strategy is the same as before; you must constantly direct your attacks on the tail end of the Moldorm. If you get knocked off the floor in the heat of the battle, you will arrive in a singular room on floor 5, from which you can escape and return to the upper right corner of the room so you can continue your fight. If you beat the Moldorm, a treasure chest will appear on the platform to the south. You can Hookshot over to it to continue. All that it contains is a red Rupee. Push the blocks that you encounter out of the way and reach the left exit.
Battle Tip: Use the cape to turn invisible while fighting Moldorm. Once invisible, quickly focus attacks on the tail.
The last room before the climb to the final floor of Ganon's Tower contains a huge variety of elements designed to make reaching the top as difficult as possible. Everything from ice, to spikes, to conveyors and bumpers are employed, and a set of Helmasaurs guard the room. There's no rush, so approach each portion of the room slowly, and attack the Helmasaurs as they approach you. Reach the stairwell at the top and climb up to the final floor.
After all of your trials, you are greeted to a torch lit hallway that wraps around from the stairwell to the locked door at the very end. Ensure that you have all the health and magic that you need, and proceed through the door to fight against the master of this tower.
Even though you fought him far earlier in the tower of Castle Hyrule, you never truly defeated him. And he intends not to lose to you twice. This time, in exchange for his lightning magic, he will invoke a duplication spell that sends two clones of himself around the room. All three images of him will attack you at once, although the solid image is the only one that's vulnerable. Keep your eye on the solid image, and be sure to swing at every large fireball that he or the clones send your way. They must reflect and strike the solid image to do damage. Be careful of the ice attack which cannot be reflected, otherwise, Agahnim will fall down at triple speed. Continue to reflect Agahnim's spells back at him until he sustains too much damage and the battle ends.
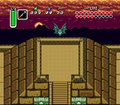
If you were expecting to meet your ultimate foe on top of the Tower, you are in for a surprise. First you run into Agahnim, miraculously returned from his earlier defeat at Hyrule Castle. Only after Agahnim falls for a second time does Ganon appear out of the ashes, but the battle is not yet to be. You must watch as Ganon transforms into a bat and flies off to the Pyramid of Power. You will then utilize your flute to summon the very same bird (but how does it appear in this world?) who will oblige by dropping you off at the top of the Pyramid. When you arrive, you will find that a hole has been created in the top. Inside, Ganon is waiting. The only way to get inside the Pyramid seems to be to jump into the hole.
Without Silver Arrows, the fight is nearly impossible.
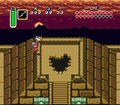
The final battle with Ganon takes place in the Dark Pyramid. Ganon, in the form of a giant black bat, smashes through the top of the pyramid. You must jump into the hole he has created. Before entering, make sure you are properly equipped. It is incredibly more difficult to defeat Ganon if you don't have the Silver Arrows.
Ganon first attacks with his Trident and then he attacks with his Blazing Bats. He will also jump up and come smashing down, causing the edges of the floor to break away. Stay toward the middle and be careful not to fall off the edge of the floor.
After he invokes the technique of darkness, you must ignite both of the lanterns at the bottom of the room with the Lamp or Fire Rod to break through Ganon's secret technique of Darkness. After a while they will darken again so you will need to relight them.
When Ganon appears, strike him with the Sword. He will turn blue and freeze for a second. When you see Ganon turn blue, immediately fire a Silver Arrow at him. Repeat this process until four Silver Arrows have struck him. If you have come this far without the Silver Arrows, you will need to use a Spin Attack at the exact moment he is teleporting, and to finish him requires 12 strikes.
If the fight is proving difficult, it would be prudent to make a quick trip back to the Light World and head to the Witches' Hut in order to stock up on potions. In order to retreat, intentially fall off the floor edge and you will find a path leading to the exit. There is also a message plate indicating that Silver Arrows are required.
After his defeat a path opens to the north. Go in, and you will be treated to the ending.


 Small Key is hidden beneath one of the skulls at the top of the room. You'll need to pass them by once and step on a Star Tile to rearrange the floor in order to gain access to them. Then you can unlock the door and head to room 1B.
 Map. Then return to room 1I and proceed to room 1S.
 Red Mail. Once you collect this treasure, you are free to enter room 1K above, and begin your exploration of the upper floors.
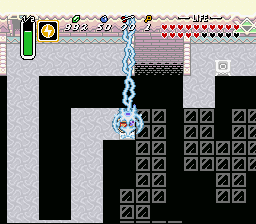
 Compass, while the remaining chests contain arrows and Rupees. Step on the warp tile to be sent to room 1A.