| A | 
|
|---|---|
| B | 
|
| C | 
|
| D | |
| E |


|

|
||
| Pera Skull | Dopipu | Kikura | Nipata |
|---|

|

|

|

|
| Gaguzul | Fire | Zado Fly | Mantle Skull |
|---|
Powerful enemies[edit]
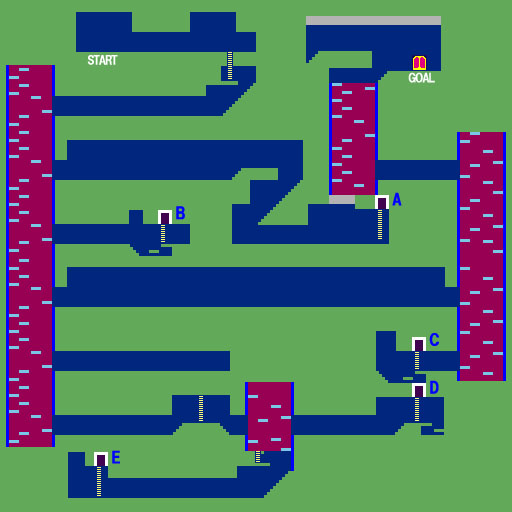
This is when the difficulty ramps up tremendously. There are going to be a lot more boss-class enemies roaming the hallways, and some of them are going to be incredibly difficult to avoid. Although there is a Spring of Strength, it is in a remote section of the stage, much closer to the exit, so you won't have a chance to visit it until later. Furthermore, this is the last Spring that you will encounter until Stage 13. Although this stage is large, there are no warp doors to make progress through it confusing. However, considering the sheer size of the stage, you may wish that a few warp door were included. You'll have to do a lot of backtracking in this stage.
Recommended route[edit]
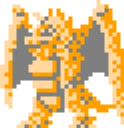
Right off the bat, a Gaguzul will rush towards you. Don't try to fight it, just jump over it. Even if you destroy one, another will probably come along and replace it. If you have to get hit, get hit by a fireball. Climb down the ladder, progress to the left, and drop down to the very next available floor along the left shaft. When you begin walking to the right, you will encounter another Gaguzul. Avoid this one as well and climb up the steps. Drop down to the floor below. At this point, you can sit and attack Dopipus in an effort to collect potions. When you're ready proceed to door A, which is actually the boss room for this stage (see below).
When you exit the room, you'll need to cross paths with a Gaguzul again to return to the left shaft. If you have completely run out of MP, you may wish to drop one level and travel to door B to pick up the Scroll which restores 500 MP. If your HP is dangerously low, you may wish to take a detour and travel all the way over to door C now, but if you can afford to wait, the best use of your time is to drop to the very bottom of the shaft and head down the right hallway to pick up the two magic weapons located behind doors D and E. (There is another series of Dopipus that you can battle for potions near the ladder that leads nowhere.) Collect the Magic Bomb and Flash and return to the left shaft.
Now climb up to the hallway that is two levels above the bottom hallway. Cross the long hallway, and be careful of the Zado Flies which appear at the very right end. If you have a good amount of HP, then don't worry too much about hitting them since you are about to visit the spring and get your health back. When you reach the right shaft, drop down to the bottom, and head left to visit door C. After refueling your health at the Spring of Strength, begin climbing up the right shaft, getting off to the left at the top and climbing up another series of platforms until you reach the stage goal, which is on your right. (There is a Mantle Skull that hangs out to the left.)
Be aware that this is the last Spring of Strength that you will encounter until Stage 13. As a result, Stage 12 can be extremely difficult to pass if you are not careful. From the end of this stage until the spring in Stage 13, be extremely cautious and avoid taking as much damage as you possibly can.
Boss: 50 Nomajis[edit]

|
| HP: 210 Power: 30 |
A Nomaji may seem like a particularly weak boss to face at this point in the game, but you have to defeat no less than 50 of them in order to gain access to the stage Ball. Obviously, 50 Nomajis will not appear all at once; they will stream onto the screen as you defeat some of them. When 50 have been defeated, a sound effect will play and the background music alters slightly. This means you can enter the inner chamber.
The strategy used for this fight is quite simple: squat down and swing the Flame Sword. At the highest level, you will be able to defeat them with one hit, and you can typically defeat more than one at a time with a single swing. You could also attempt to use Flash only if you have a large amount of MP, but your remaining HP is a concern.
When you attack using the Flame Sword, you should advance into the room until the Nomajis just begin to appear. Then squat down and wait patiently for them to approach you. Even if they make large jumps, they should land in front of you and close enough to be taken out with Flames. It's difficult to avoid taking any damage at all, as a couple of Nomajis will certainly end up jumping on you. However, since they can only do 30 points of damage to you at a time, it isn't as terrible a threat as many of the other bosses. Don't advance too far, or the Nomajis may begin to appear on either side of you. You do not want to get pinned in on both sides. It's much easier to remain facing one direction.