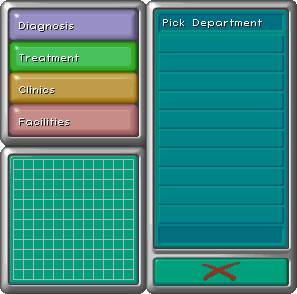
There are a total of 23 rooms in Theme Hospital, each with their own purpose. Read below for a description of what each one's for, and who you need to work there.
By clicking a room's door, you open its information screen, which will let you handle the queues in that room.
- You can move people to the back of the queue by dragging and dropping them on the arrow sign.
- You can reduce the maximum queue size to balance queues between similar rooms. Setting the queue size to zero will turn the room off if you don't want anyone (a member of staff or a patient) visiting it.
- You can drag people from the queue to another similar room if one room has a longer queue than the other. This can be very useful in emergencies.
Building Rooms[edit]
Outline[edit]
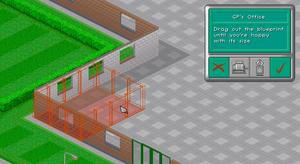
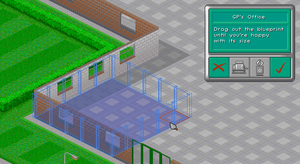
Once you've selected the room you want to build from the menu, drag the outline to the size and position you want. Each room has a minimum size, and the outline will turn blue once it's large enough to fit all the essential equipment for its function - but often it's better to make it a bit bigger than the game's recommendation, just so you have room to put things where you want. Larger rooms also make staff happier to work in them.
When you've got it the size you want, click the tick button on the build window and you'll then be required to place the doors and windows.
Doors and windows[edit]
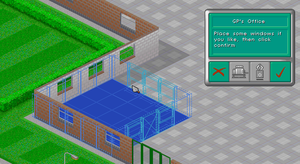
Click once to place the door, and again to place as many windows as you like. Neither doors nor windows can be placed along the building's exterior walls, and they can't be placed too close to the corner of the room. The only exceptions are the Ward, Operating Room, and DNA fixer, which have large swinging doors three squares wide.
So that it is easier to place the equipment in the room, it is often a good idea to place the door as close to the corner as possible, though. Also try to place the door in such a way which minimises the distance patients have to walk from other rooms. Also pay attention to where you can place chairs in the corridor and from what direction your patients will be coming from. It is a good idea to place as many windows as possible as they make staff happier - and makes it easier to place or edit the furniture in the room.
Click the tick button on the build window to add furniture and equipment to the room.
Adding furniture[edit]
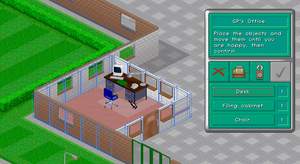
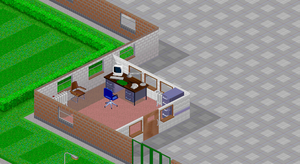
Adding furniture to a room is more or less the same as adding windows; click where you want to place the item, and the next one in the list will automatically appear under your cursor to be placed in the room. If a piece of furniture or equipment doesn't fit where you've got your cursor, it will be greyed out.
Additional furniture items can be added by clicking the cash register button, which brings up a list of all the items you can buy. Certain things, like fire extinguishers, radiators, or bins can be selected for any room, but won't appear in the default equipment - you've got to add them to the list manually.
Click the tick button on the build window once you've positioned everything to finish the room building process and open it for use by staff and patients.
Editing complete rooms[edit]

Once you have built a room, you can still edit it in many ways depending on what you need. You can add items, move a room, resize it, or delete it.
You can add fire extinguishers, plants and radiators just like you'd add them in the corridor. The staff and patients don't have to leave the room while you add these things. You can also remove them by right-clicking on them.
If you want to add other items or do other editing, click on the question mark button and then the room. The staff and patients will then have to leave the room and while they do that you can't perform any actions &emdash; or you can empty the room yourself before you start editing it. Once the editing screen opens, you can buy and add new items or move existing items to other places. If you click "Cancel" (X), you can then resize or move the room by dragging at the corners or sides. You can even drag a room to the opposite end of the hospital by dragging the room from a centre square of the room grid. Moving a room to another place like this will cost you nothing. To delete a room, click cancel twice and confirm. You will get only some of your money back.
Diagnosis rooms[edit]
GP's Office[edit]
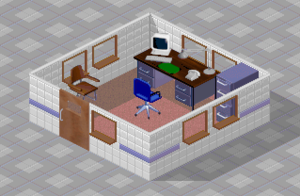
When patients arrive, they are sent from the reception to GP's Office for diagnosis. If diagnosis fails, the patient will be sent for further examination and will then return to GP's Office. Because of this, the GP's office the most important room in the hospital. One strategy is to occupy the room with a consultant who will most of the time get the diagnosis right during the first visit. Patients will be cured more quickly and less burden is placed on diagnosis rooms. You may require multiple GP's offices to ease bottlenecks at later stages when demand for initial diagnosis is high. A possible tactic is to have some GP offices dedicated to diagnosing incoming patients, and other GP offices positioned around the rest of the hospital in diagnostic areas, so that partially diagnosed patients will not return to the - likely crowded - intial reception area.
Requires any Doctor. Does not require maintenance. Minimum size is 4x4.
- Doctor movement: File cabinet → desk → file cabinet
- Patient movement: In → seat → out
Based on this, to mimimise the time spent for each patient, the seat should be postioned facing the door, at either side, or one block away in front. The patient can therefore sit down immediately after entering the room.
- A GP successfully diagnosing a patient (light bulb) gains 1 skill point and may become eligible to a Doctor or Consultant promotion. GP is the only way for Consultant to raise its own skill.
General Diagnosis[edit]
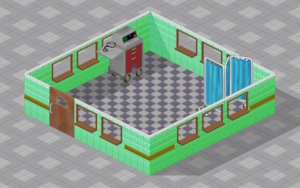
A more advanced diagnosis room. If the GP's Office can't diagnose something, the patient is sent here.
Requires any doctor. Does not require maintenance. Minimum size is 5 by 5 squares.
- Doctor movement: Stands next to crash trolley
- Patient movement: In → behind the screen → in front of the crash trolley → behind the screen → out
Not so fast diagnosis simply because patient need to change clothes. VERY favoured by patients yet a bit too cheap. If you want to force patients to use more expensive diagnosis rooms, DELETE this room.
Cardiogram[edit]
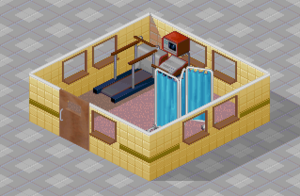
Machine used for diagnosis. Quite effective.
Requires any doctor. Requires maintenance by a handyman. Minimum size is 4 by 4 squares, with the longer dimension being the bottom left to the top right.
- Doctor movement: Stands by the treadmill
- Patient movement: In → behind the screen → on the treadmill → behind the screen → out
A slow diagnosis room thanks to both changing clothes and treadmill running.
Scanner[edit]
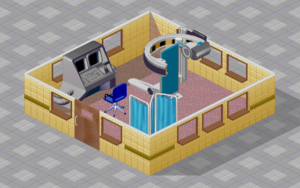
The Scanner can diagnose almost every disease in the game.
Requires any doctor. Requires maintenance by a handyman. Minimum size is 5 by 5 squares.
Most of the time the patients, if having money, like this option very much. If there's ever a diagnosis room with full queue, it's this room. Consider its position carefully, and if the queue is too much(7+), you might want to place another nearby.
- Doctor movement: Sits at the console
- Patient movement: In → behind the screen → in the scanner → behind the screen → out
Ultrascan[edit]
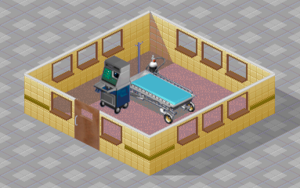
An expensive machine but one which is very effective at diagnosing diseases and also costs the patient a lot. Requires maintenance and a doctor.
Not very favoured by patients.
Blood Machine[edit]
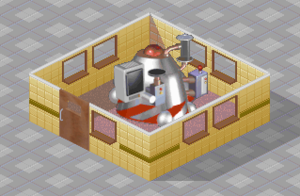
Takes blood samples for diagnosis. Has a wide range of diseases it can diagnose. Expensive to buy. Requires maintenance and a doctor.
Slightly faster than Scanner, and somewhat favoured by patients.
X-Ray[edit]
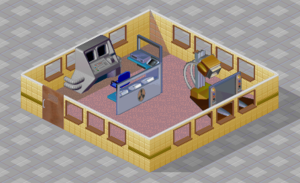
X-Rays the patient as part of the diagnosis procudure. Costs the patient a lot but takes a lot of room in the hospital.
Requires any doctor. Requires maintenance from a handyman. Minimum size is 6 by 6 squares.
- Doctor movement: Enters the console from the open side
- Patient movement: In → enters the X-ray machine from the open side → out
Very fast among expensive diagnosis option.
Treatment rooms[edit]
Pharmacy[edit]
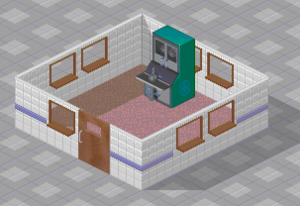
Another curing room. Medicine is distributed to patients by a nurse.
Requires a nurse. Does not require maintenance. Minimum size 4 by 4 squares.
- Nurse movement: Stands at the cabinet
- Patient movement: In → stands to the left (if cabinet is facing SW) or to the right (if facing SE) of the cabinet → out
Quite fast treatment for multiple diseases. Could easily create a queue due to number of patients need this room.
Psychiatric[edit]
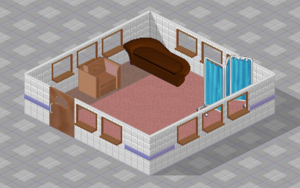
A curing and a diagnosis room. Here people can be cured of some conditions by being talked out of it. More Skeletons and Bookcases help speed things up.
Requires a psychiatrist. Does not require maintenance. Minimum size is 5 by 5 squares.
- Doctor movement: Bookcase (if there is one) → chair
- Patient movement: In → couch → screen (if applicable to disease) → out
The Patient "enters" the couch from the bottom part, where the patient's legs will be. Thereforce you can position the couch so that the patient enters the room with the "entrance" to the couch immediately in front of them. There is no requirement for the doctors chair to be close or facing the couch. Providing the door is placed on either of the lower sides, the objects that the patient interacts with (couch and screen) can be place in the vicinity of the door, while the doctor' chair can be placed on the back wall, flanked by bookcases on either side. This then means the distance between the chair and the bookcases is minimised.
A popular diagnosis option aside from treatment. Depend on which map it could easily create a queue. Generally one room is enough to answer the demand, and the second room create only to response to a specific emergency.
Ward[edit]
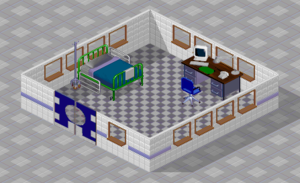
Also a Diagnosis room, where a nurse monitors a patient and a place for people who are having/have had surgery to stay.
Requires a Nurse. Does not require maintenance. Minimum size is 6 by 6 squares. Beds can only be placed against a wall.
- Nurse movement: Wanders around → desk
- Patient movement: In → bed → out
6 bed is about the max capacity of a nurse can manage and patient flow.
Operating Theater[edit]
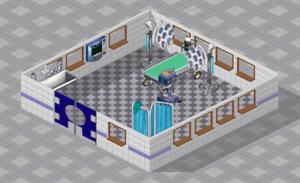
People go here to have surgery.
Requires two surgeons. Requires maintenance by a handyman. Minimum size is 6 by 6 squares.
- Doctor movement: In → behind the screen → sink → operating table (one to each side) → behind the screen → out
- Patient movement: In → behind the screen → on the operating table → behind the screen → out
Sometimes the patient flow is such that you need to create 2 OP to deal with 8 patient queue. A fire extinguisher is a must because you dont always to be able to repair it in time.
Clinics[edit]
Inflation[edit]
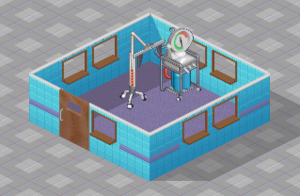
Place where Bloaty Head is cured. Quite funny to watch as it is burst and then re-inflated.
Requires any doctor. Requires maintenance by a handyman. Minimum size is 4 by 4 squares.
- Doctor movement: Pops the inflated head on the opposite side to the gas bottle → in front of the gas bottle → inflates the head in front of the patient
- Patient movement: In -> enters machine opposite to the gas bottle -> out
DNA Fixer[edit]
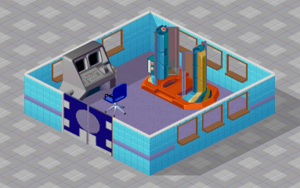
Acquired in the last level of the game, and used to convert Aliens back into humans. Requires a qualified Research Doctor.
Emergency only.
Hair Restoration[edit]
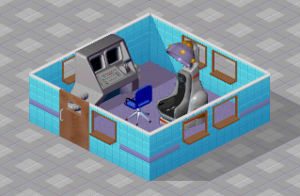
For Baldness. Requires a Doctor and Maintenance.
Requires any doctor. Requires maintenance by a handyman. Minimum size is 4 by 4 squares.
Slack Tongue Clinic[edit]
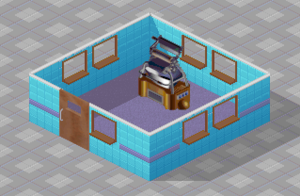
For, you guessed it, Slack Tongue.
Requires any doctor. Requires maintenance by a handyman. Minimum size is 4 by 4 squares.
- Doctor movement: Doctor stays on the side of the handle while operating.
- Patient movement: In → in front of the machine → out
Fastest treatment room around. Pity its patient is not very numerous.
Fracture Clinic[edit]
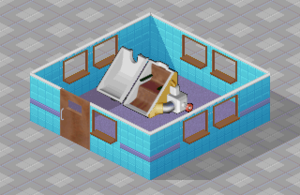
For Fractured Bones.
Requires a nurse. Requires maintenance by a handyman. Minimum size is 4 by 4 squares.
- Nurse movement: Stands near machine cover
- Patient movement: In → sits in machine → out
Sometimes emergency is such that we must create a second room. Also, nurse in this room can be taken out to patrol corridor against epidemic in a pinch.
Electrolysis[edit]
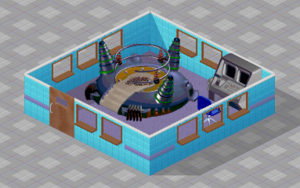
For Hairyitis. Requires a Doctor and Maintenance. Minimum size is 5 by 5 squares.
Jelly Vat[edit]
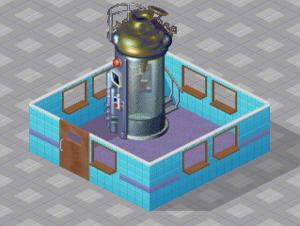
For Jellyitis. Requires a Doctor and Maintenance.
Patient climbs stairs -> exits door -> out
The machine can hide a lot of space, so take care with its placement that it wont hide the door of the room nearby, or patient sit on a bench.
Decontamination[edit]
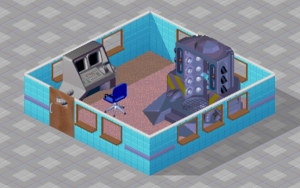
For Radioactivity. Requires a Doctor and Maintenance.
Facilities[edit]
Staff Room[edit]
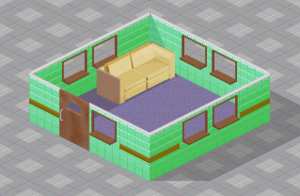
Staff rest room. Helps keep your staff at their best. Resting your staff here results in fewer mistakes, reduces demands for pay increases and keeps them happy. There should be at least one couch, video game or pool table per staff member in the room, or it will take significantly longer for staff to rest. When there is limited space, the pool table is not necessary. The space it occupies can be used for 3 video game machines.
Does not require maintenance. Minimum size is 4 by 4 squares.
- Staff movement: In → sits on couch, plays pool, plays video game, or stands around if none are free → repeat previous until zero stress → out
If can place video games, dont place pool (ungainly and ruin staff flow). Ratio 4 sofa = 2 video games = 6 staff.
Research Department[edit]
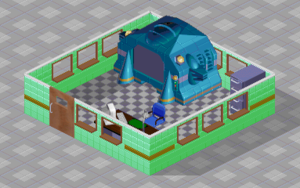
Here is where you discover new cures, rooms etc. for your hospital. There should be at least one desk or computer per researcher or it will take significantly longer to research.
Requires at least one researcher, but more will help you research faster. Does not require maintenance. Minimum size is 5 by 5 squares.
- Researcher movement: In → uses computer or desk → repeat previous until too stressed → out
In 2019 dosbox version it is unsure of researcher movment. It include the atom machine and filing box. Unsure of the order, too.
Toilets[edit]
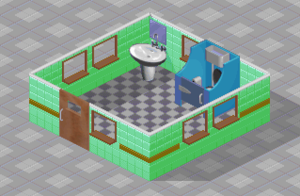
Self-explanatory. The more drinks machines you have the more of these your hospital should contain. Make sure you build these or else you'll see patients going home or wetting themselves. Patiens spend significantly longer using the toilet than the sink, so having more toilets than sinks is possible. Does not require maintenance. Minimum size is 4 by 4 squares. It's most useful for Operating Theatre for a combo: OT queue-Drink-Toilet-OT queue. It's also useful for a trio of GP room nearby each other, or a very busy Scanner room. As such if you concentrate GP and diagnosis rooms in one area, it's advisable for one toilet there.
- Patient movement: In → toilet → sink → out
Training[edit]
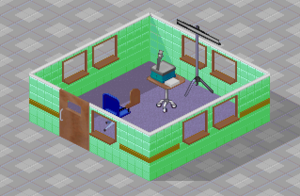
Allows a consultant to train up juniors or doctors. One lecture chair is required for each student. Minimum size 4x4 squares. Does not require maintenance.
- Teacher movement: In → lowers projector screen → uses projector, bookcase (if available) or skeleton (if available) → repeat previous until too stressed → raises projector screen → out
- Student movement: In → sits at open desk → out (when too stressed)
- A 4x4 room is best, with a 4x4 Staff Room next to it and a heater in both rooms.
- Consultants without a specialty teach faster as they focus on general skill. They are the best choice for training students already qualified in psychiatry, surgery and research.
- Training is equally spread between all students. Training more students takes longer but can be beneficial for juniors.
- Students cannot exceed the teacher's general skill level. It is therefore recommended to max out a consultant before making them a teacher unless they have one or more specialties you want to pass over. Higher general skill for the teacher also means higher learning speed for the students.
- Students will try to learn all available skills from the consultant as well as gain general skill.
- Points are gained at random intervals - 20 general skill points (2%) and 5 specialty points.
- Research qualification requires 50 specialty points, psychiatry 65, and surgery 80.
- A consultant with multiple specialties keeps teaching them even after the student gets their qualification. As such, learning speed for other specialties remains the same.
- Juniors learn at the fastest rate. Doctors learn slower. Doctors with consultant proficiency (800+ skill) learn at the slowest rate.
- Consultant promotion only happens on a new year. It is possible to get a doctor to 1000 skill by training them early in the year.
- Tiredness affects learning speed if over 50%. Keep it below 30% to avoid underpaid happiness issues.
- While bookcases and skeletons help, the teacher needs to take a full trip back for it to count. Only get one of each if you have to.
- Once placed in a training room, consultants and students assume they have to go back to it and will ignore staff requests unless moved out manually. Moving them to a Staff Room will make them go back to the Training Room after they are rested.
- Doctors promoted to consultants or extra consultants placed in the room will automatically leave and start wandering around.