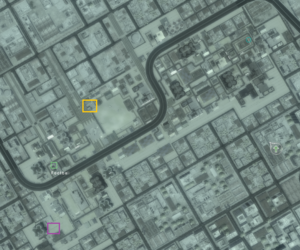
On this mission, you will be a lone soldier deployed a distance from the football, with assistance from a drone. The football is recorded as 800m from your location.
Approaching the football[edit]
From the starting location, you can choose to move around the north of the building, or the south. The northern path is covered by a roof-top sniper, but a quick shot will take him out before he fires. The southern path is not covered by a sniper, but you will encounter two ground soldiers before the turn. You may still have to kill the sniper as you reach the other side of the building, depending on how far south you travel.
The northern approach to the football has fewer enemies, but there are at least two rooftop snipers on the large silo building. They can be detected by the drone.
There are two watch towers just beyond the overpass, each containing one soldier. They cover both major passes when going under the highway, which you will need to cross.
Drop point[edit]
When you reach the highway overpass, you will receive information that there is a scramble going on. As such, you will be directed to a drop point to resupply.
You will need to travel under the underpass. This reagon is near a few railway tracks covered by the two watch towers (as described above), and with patrols under the freeway. They are not visible to the drone.
The drop point is behind the industrial building. While helpful, you can attempt to collect a ZEUS-MPAR, but it is not required to complete the mission. You will encounter two tanks on your way out, but they can be evaded.
Guardrail IX[edit]
After getting resupplied, you are directed to destroy the large antenna visible to the west, locates across the field. Soon after the helicopter leaves, the scrambler will start, leaving you without the ability to have enemies marked on your hud. However, you can still attempt to use the drone to spot enemies for you, to less of an effect.
There are a large number of nearby enemies covering the open ground, along with a few machinegun nests on the direct approaches to the tower. To safely approach, continue along the road to the north of the open terrain. when you reach the northern-most wall, you can safely advance with minimal enemy interference. However, there is a watch tower that has a clear shot down that alley.
When you reach the corner before entering the antenna building, there will be a few solders waiting around the corner. Climb up the steps until you reach the top of the building; throw a grenade into the room to take out that machine gun nest, and head back down to the antenna. Plant a C4 charged on the marked location, and run down the stairs.
Enemies are reported to be closing on your position, but there is no visible activity nearby beyond already present soldiers. You will be directed to the extraction point to the southwest.
Extraction[edit]
Next to the antenna is a trainyard with a few soldiers in wait. There is also an enemy tank that will park itself near the train yard. You can avoid it by trying to hug the north wall when possible, and running when you are in its view. Continue until you are safe to the west.
A large number of enemy rebels will be stationed at the large building near the extraction. When you come near this building, a second tank will start to approach from the west. Duck into one of the buildings to avoid the tank, or take it out with an anti-tank weapon (if you are carrying it).
Continue to the western wall, and reach the helicopter. There will be one last soldier at the LZ that will try to stop you.