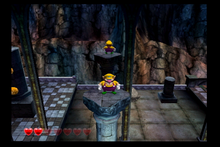
The first level of Sparkle Land, Mirror Mansion, primarily focuses on mechanics involving mirrors, and heavy use of controlling the camera with the C-Stick is suggested.
Wario begins in an underground area, leading the player to the left down a path. After passing an Ankiron, there is a series of rising and falling Stone Blocks on the path. Taking the bottom path is the only way to proceed, but standing on the blocks as they rise allows Wario to reach several collectibles.
Trapdoor 1[edit]
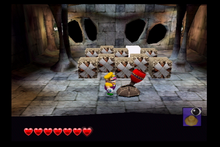
This wood trapdoor is similar to a trapdoor found in Shivering Mountains. After pressing the switch, the ten stone blocks will flash in a particular order. If all blocks are pressed in the correct order, the Red Diamond and a Golden Statue Part will appear. Should the blocks not be pressed in the correct order, the player must leave and re-enter to try again.
Red Button and Treasure[edit]
The Red treasure button is located directly outside the first trapdoor. The treasure itself can be found next to Trapdoor 2.
Spriteling 1[edit]
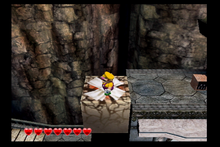
The first Spriteling can be found by following the leftmost Stone Block up to the higher ledge, before the gate blocking the way forward. After saving the Spriteling, use an enemy from the nearby generator to spin the wall panel to get through.
Trapdoor 2[edit]
This steel trapdoor is somewhat hidden in view past the gate. The player will need to use a Ninja Crow or another enemy from the Enemy Generator to enter. This trapdoor features many large rings that spin back and forth in varying speeds. While it is simple to pass the first few rings at the same time, the ring speed becomes so fast at the back half that attempting to cross while they are moving is too risky. Standing perfectly still on a ring as it spins should not fling the player off, so playing slow and steady is the safest way to collect the Red Diamond and Gold Statue Part.
Yellow Button and Treasure[edit]
The yellow button can be found in the large room with rolling pink wheels, behind the Ankiron. It can be best seen in the mirrors, although the button itself is on the fourth wall. The treasure is at the very end of the first floor of the mansion, just after the mesh wall.
Spriteling 2, Chartreuse Button and Treasure[edit]
The button for this treasure is found halfway across the spike pit found after the yellow button. The treasure is located on the next floor on the mirrored floor past several Ninja Crows.
The second Spriteling is found next to the chartreuse button and will give advice about the upcoming Terrible Portrait enemy.
Mini-Boss: Terrible Portrait[edit]
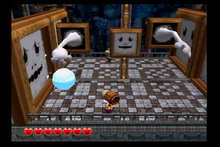
This boss encloses Wario in two walls, and emerges with two hands and a face. The hands will attack with four attacks, either with homing fire or electricity magic, or by dropping a large stone or snowball. The best method to avoid these attacks is to remain moving at all times. Occasionally, the face of the Terrible Portrait will spawn a Barrel Buddy. This Barrel Buddy should be used underneath one of the two hands to damage it. After two strikes, regardless of what hand is attacked, the Terrible Portrait is defeated. The face cannot be attacked, and it will dodge out of the way of both direct attacks and Barrel Buddys.
Immediately after the Terrible Portrait is a hole to fall down to the next floor. This is a point of no return! After dropping down, there is no method to come back up without replaying the level.
Trapdoor 3[edit]
This steel trapdoor is directly under the hole to reach the second floor. It can be entered either by using the Magician or the two stone pillars. This trapdoor is very simply a series of blocks to jump and climb across. After collecting the Red Diamond halfway through, there is a moving block staircase to reach the Gold Statue Part.
Green Button and Treasure[edit]
The green button can only be seen in the mirrors on the floor after Trapdoor 3, and is best hit by ground pounding above it on the climbable mesh section. The treasure is found to the left of the upcoming Battle Ring, above the spike pit.
Trapdoor 4[edit]
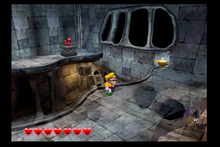
This wood trapdoor is found at the end of the second floor, just before the hole to reach the third floor. It features a staircase that leads to the Red Diamond, although every few seconds the blocks will all rotate in unison, to throw off Wario. After familiarizing with the pattern of rotation, it should be fairly simple to time jumps to avoid being thrown off. The Gold Statue Part can be reached by using a Corkscrew Conk to the opposite ledge.
Similar to the last hole to descend floors, there is no way to return to this level without playing the stage again.
Battle Ring[edit]
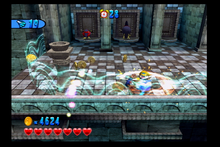
After falling down to the third floor, Wario is immediately dropped into a Battle Ring. Unlike others, this arena is not a full circle and only features two pillars instead of four. Some enemies, particularly Ninja Crows, will appear from the doors in the back of the arena. Too low on health to fight? Standing on top of either pillar will provide enough distance to not be hurt by most attacks. After the Battle Ring ends, there is both a left and a right path to take, but heading left first is more useful.
Dark Blue Button and Treasure[edit]
The button can be found on the far side of the spike pit to the left of the Battle Ring. By punching the strange paper lion, it will slowly travel over the spikes for Wario so he does not need to sustain damage. After this, the treasure is past the Battle Ring on the right side.
Spriteling 3, Light Blue Button and Treasure[edit]
This button and treasure are essentially opposites of the Dark Blue treasure. The button is to the right side of the Battle Ring over the spikes, while the treasure is to the left.
The Spriteling is located next to the Light Blue button on a grassy platform over the spike pit.
Trapdoor 5[edit]
This steel trapdoor is located to the right of the Battle Ring, and features large spinning rings of standard blocks and drop blocks. Carefully line up your jumps and focus on moving clockwise around the rings to reach the Red Diamond, and then turn towards the center platform to obtain the Gold Statue part.
Gold Statue Part 5[edit]
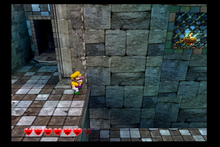
There are two methods to obtain this part. The first is to follow the mesh path from above Trapdoor 5 across to directly collect it. The second, more difficult method is to use a Corkscrew Conk from the Battle Ring platform to jump up and collect it.
Trapdoor 6[edit]
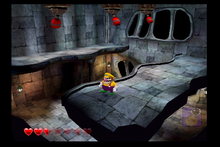
After moving back left of the Battle Ring, the sixth Trapdoor can be found down a small hole to the left of the glue globes and right as the large mirror wall starts. This wood trapdoor places Wario on one of the elevated ledges instead of the floor. By utilizing Corkscrew Conks, three floating switches must be pressed in order to reveal the Red Diamond and the fourth Spriteling.
Gold Statue Part 7[edit]
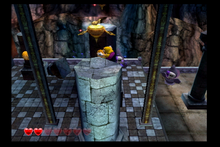
This gold statue part is found on the second pillar from the left. It can be climbed via glue globes hidden on the fourth wall. After collecting this, attack some of the invisible Witches seen in the mirrors (or use the Wario head statue) to spin the spinner to open the gate on the far left side. There is a Garlic Dispenser here, as well as the hole to the fourth and final floor.
As with the others, there is no returning to the earlier floor once dropping down.
Trapdoor 7[edit]
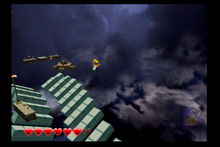
The next trapdoor is found to the right of falling down to the fourth floor. It is similar to a trapdoor in Wonky Circus that features momentum from Glue Globes on rods. After some trial and error, it should be simple to jump as the rod is moving to fling to the Red Diamond. The next challenge is to collect the final Gold Statue Part: The rod is moving very quickly for a small distance. It is somewhat easier to be on the top or even be towards the back of the Glue Globe than the front. Wario can ground pound to completely cancel his momentum, so use this in order to land on the platform and obtain the Gold Statue Part. This should complete all the Gold Statue parts for this level.
Mini-Boss: Terrible Portrait 2[edit]
There is another Terrible Portrait to the left of the seventh Trapdoor. While this fight is no different than the previous one, it is possible to skip this battle by just carefully jumping around the left side wall. This is tricky, and ill-advised if the player is attempting to collect the pink treasure as they will need to return to this area.
Purple Button and Treasure[edit]
The Purple Button is found just past the Terrible Portrait. The treasure is directly next to Trapdoor 8 and a Garlic Dispenser.
Trapdoor 8[edit]
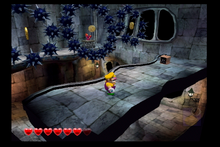
This Trapdoor is to the left of the Stone Doohickey and is a wooden door. It is fairly simple to complete, just use a Corkscrew Conk to jump through the spike rings and get the final Red Diamond. The last Spriteling is here also.
Pink Button and Treasure[edit]
The final collectible is the pink treasure, who's button is located right above the purple button. The treasure itself can be found next to Trapdoor 7.
Boss: Mean Emcee[edit]
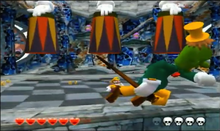
This peculiar boss has two primary forms of attack. The first is to wait after being punched a few times before spinning wildly off the stage. The other is to spin in place, and try to hit Wario with his cane. After being punched enough times, Mean Emcee will hide under one of three large cups in the arena. They will shuffle themselves, and then Wario will be made to select one of the cups by punching it. Selecting the right cup will emit a red flash, and Wario must jump and punch the cup again to drop a stunned boss. Selecting the wrong cup will summon a few enemies, which could include Magicians or Ninja Crows. As the fight progresses, the cups will move faster. While there is no set formula for the pattern Mean Emcee takes, typically if he enters a cup on the end, he will end on either the left or right cup. If he enters the center cup, typically he will move back to the center cup. Once defeated, Mean Emcee will allow the player to move on to the next level, Pecan Sands.
The color of the Spritelings in the background is determined by the last rescued Spriteling, although this has no impact on the fight.


