Blue woods[edit]
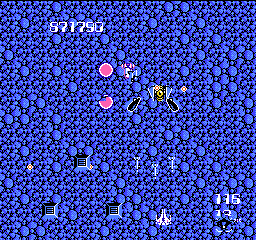
At the start of this stage, you fly over one of the planet's more unusual features: a forest populated by blue trees and plants. But you won't have any time to admire the splendor. Right off the bat, a number of enemy aircraft will fly on to the screen. You will be facing a full scale assault before the "ARER 4" sign disappears from the screen, so be at the ready.
Hidden fairy[edit]
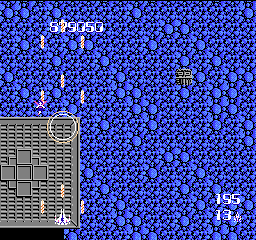
Just because the Terriers that contain fairies are no longer visible after Area 3, doesn't mean that you can't find them and make more fairies appear. The next fairy can be found very early on in a quiet section of Area 4, and it's location coincides with the first Icon statue. Since the Icon statue is more visible, you will be drawn to the right in an attempt to shoot at it and make an Enemy Eraser appear. Instead, stay to the left, and fire at the platform that you fly over when the first Icon appears on the screen. With a wide enough arsenal, you should be able to make the fairy appear with little trouble. When to use the fairy is another matter. Collecting it early will help you advance to the end quicker, but the most difficult fortress is the one at the end. If you can afford to save it, do yourself a favor and hold off collecting it until after the second fortress.
Multiple enemies[edit]
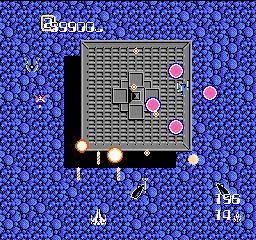
Before the first fortress, you will be set upon by a variety of enemy attacks, including but not limited to three particular enemies. Valkyries are the newest enemies to appear. These round orbs remain stationary while they warp into position. They are only vulnerable to attack when they are fully red. They slowly chase after the Zanac ship, but are easy to overcome. Mortars (or Takuwashis), which debuted in the previous Area, return with another outpouring of Sig missiles. And the type of E-Fain that employs Mios to create a force field will appear almost in an effort to defend the other ships. Add type 1 ground turrets to that and you'll have to push your offensive capability to the maximum if you wish to destroy every one of these crafts. Otherwise, take out what you can, and keep moving to avoid the rest.
1st Fortress[edit]
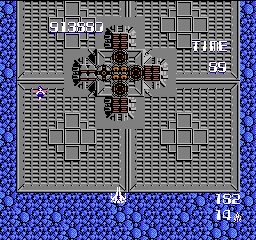
- Core composition: 4 Round Cores, 4 Panel Cores, 1 Combo Core
- Time limit: 90 seconds
- Bonus: 30,000 points
Offensively, this fortress can be very tough. Defensively, however, the cores are all gathered together in the center, so you have to move relatively little in order to hit many of the cores at one time. Preferentially, you should focus on the four Round Cores positioned around the Combo Core in the center. Of course, in order to hit any of them, you'll have to take out the front Panel Core. The Panel Cores present much less of a threat and can be saved for last. If you really find yourself under-powered offensively, use the fairy to your advantage.
2nd Fortress[edit]
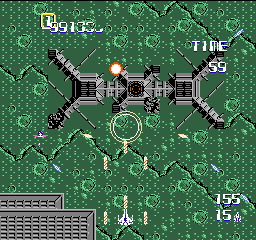
- Core composition: 1 Round Core, 2 Panel Cores
- Time limit: 60 seconds
- Bonus: 15,000 points
You will face the second fortress of the area not long after you have faced the first. This fortress is actually a step backwards in difficulty, as you have already faced this particular composition of cores in the second area. Apply the same exact strategy, and you will have little problem advancing beyond this fortress and on to the final section of the area.
Enemy aggression[edit]
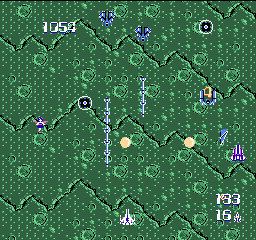
Depending on your level of expertise, you may find the area after the second fortress quite difficult to survive with one life, maintaining your offensive power level all the way to the fortress. However, the final fortress requires that you have a good degree of firepower, especially firepower that is capable of destroying Leads. Therefore, you should play rather defensively, in an effort to hold on to all of your weapons, and don't take any unnecessary risks to power up your Zanac.
Central and Side turrets[edit]
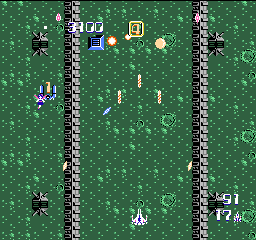
Shortly after you begin to see gray barriers placed across the landscape, you will begin to face turrets at regular intervals. First they appear in the center and shoot Light Bars. These turrets can easily be destroyed when staying near the center of the screen. Once the barriers begin to move closer to one another on the left and right, central turrets will be replaced by pairs of turrets positioned on either side, shooting at you from opposite directions. Your best approach is to pick one side or the other, and destroy whatever turrets appear on that side, while dodging the bullets of the turrets on the other side.
Center turrets[edit]
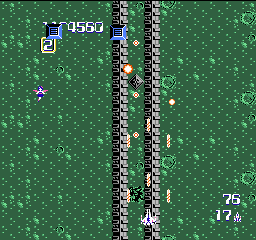
Once you clear the section described above, the barriers will narrow to the width of one turret. The gap will then be populated by one single turret in the center of the screen at the same regular intervals as before. However, these turrets fire Leads. If you have a Special Weapon that can destroy Leads, position yourself in the center and blast away. If your Special Weapon is not capable of destroying Leads, do your best to destroy the center turrets early, and move out of the Lead bullets' way as late as you can afford to without getting killed. You can also position yourself so that Leads fired by turrets move straight down, but not hitting you while you being able to hit them below without retaliation. Maintaining your offensive power level is still the priority.
Final Fotress[edit]
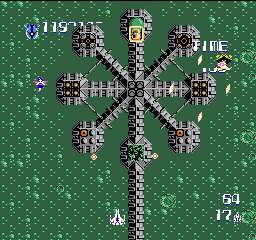
- Core composition: 2 Mono Cores, 2 Round Cores, 2 Slit Cores, 1 Combo Core
- Time limit: 110 seconds
- Bonus: 30,000 points
Not only does this final fortress have seven cores, but each of the cores are rather spread out, making it difficult to fire at more than one core at a time. If you managed to make the fairy appear early on, and kept it on the screen throughout the entire stage, this is definitely the time to use it. It will instantly obliterate the fortress. If not, choose one side of the fortress and work your way across to the other side. For example, take out all three cores on the left side, then take out the Combo Core in the middle, and end with the three cores on the right side. Do not save the Combo Core in the middle for last, especially if your Special Weapon cannot destroy Leads.