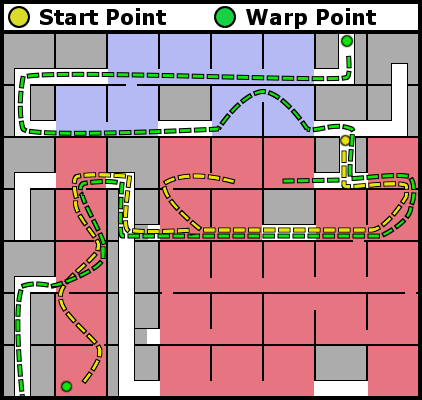
The middle levels have red walls and harder drones. The enemies in this section move faster and can shoot upwards, making platforms above them unsafe. This section will also introduce you to the auto-gun turrets.
From the elevator, head to the right. Unless you need another ID card, the room to the left doesn't have anything you can get to right now.
Row 5, Room 8[edit]
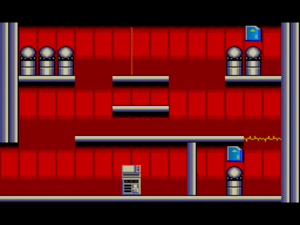
As soon as you enter the room, drop down and begin firing to take care of the two Norsa drones that will pounce on you. This room is standard, with all the keycode canisters being accessible and a hard to see security sensor in the middle of the top platform. Don't bother turning off the laser barrier field until after you've input the room code, because the elevator appears behind it. When you're ready to leave, you can turn it off with ![]()
![]()
![]()
![]() .
.
Row 6, Room 8[edit]
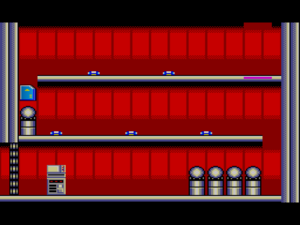
It pays to be good at jumping mines in this room, because there are five of them on the way down to the bottom of the room, and you have to get by them while two drones are shooting up at you. Don't stop to get the canister on the way down, as all the keycode canisters are at the bottom, and it's more important that you get those drones first. You can go back up and get the ID card after you've taken care of them, if you feel it's worth it trying to jump over whatever mines you didn't already blow. It's also possible to jump up and shoot a few of the mines first by jumping from below the platform, then shooting when your gun lines up with them, even if using a lower level gun. This tactic will come in handy later. Head left when the barrier is down.
Row 6, Room 7[edit]
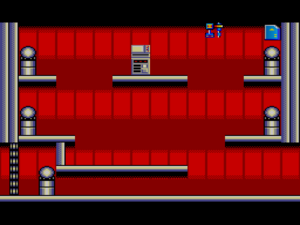
This room contains the first auto-gun running along the ceiling. It fires infrequently, so the only trouble you may have is crawling over to the canister on the bottom left. If you really must, you can turn off the turret with ![]()
![]()
![]()
![]() . There are two ways out of this room, but you want to head left first. After an empty hallway you'll find another room with a drone in the entry.
. There are two ways out of this room, but you want to head left first. After an empty hallway you'll find another room with a drone in the entry.
Row 6, Room 5[edit]
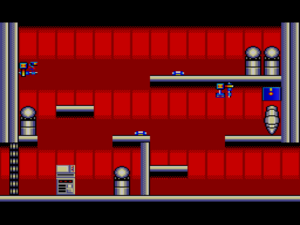
This room has auto-guns going along the left wall and across the bottom of the top platform. It can get a little tricky, so use ![]()
![]()
![]()
![]() if you need them disabled for a short time. Both mines in this room can be destroyed with your level two Zillion as long as you can hit it just right while jumping. The level three canister has a floppy disk in it, so remember to come back here when you upgrade your Zillion. Head to the left when you've unlocked the barrier.
if you need them disabled for a short time. Both mines in this room can be destroyed with your level two Zillion as long as you can hit it just right while jumping. The level three canister has a floppy disk in it, so remember to come back here when you upgrade your Zillion. Head to the left when you've unlocked the barrier.
Row 6, Room 4[edit]
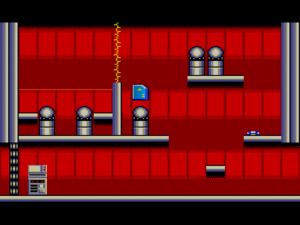
This room is a little tricky, since you're forced to go through a security sensor, and when you do, the drones drop down right on your head. It will cost two ID cards to turn off the sensor and laser barrier with ![]()
![]()
![]()
![]() and
and ![]()
![]()
![]()
![]() , but it's probably worth it - especially if you're low on health. An elevator will open at the top of the room and the barrier to the left will come down. Going up will lead you to your teammate Apple. It's not necessary to retrieve your teammates, so if you want to skip her, head left, shoot the wall out and take the elevator up, then go left into Row 5, Room 2.
, but it's probably worth it - especially if you're low on health. An elevator will open at the top of the room and the barrier to the left will come down. Going up will lead you to your teammate Apple. It's not necessary to retrieve your teammates, so if you want to skip her, head left, shoot the wall out and take the elevator up, then go left into Row 5, Room 2.
To continue on to rescuing apple, take the elevator up. It's recommended that you get Apple now, if you can, because it wastes a lot of health and you'll be getting a level up soon. It is possible, after turning off the laser barrier with ![]()
![]()
![]()
![]() to stand on that tiny lip and jump to the elevator without falling into the security sensor.
to stand on that tiny lip and jump to the elevator without falling into the security sensor.
Row 5, Room 4[edit]
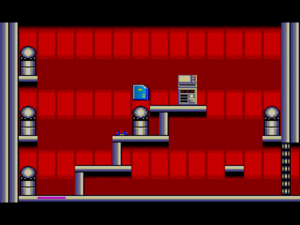
As soon as you get into this room press ![]() slightly to lower your elevator a bit. When you're below the floor of the room, the drones won't fire at you, but you can still hit them. After taking out the enemies, destroy the mine and then open up the barrier and head to the room on the right to rescue Apple.
slightly to lower your elevator a bit. When you're below the floor of the room, the drones won't fire at you, but you can still hit them. After taking out the enemies, destroy the mine and then open up the barrier and head to the room on the right to rescue Apple.
Row 5, Room 5[edit]
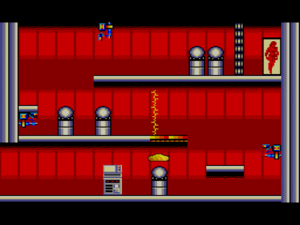
In this room there is a stationary auto-gun on the left wall and moving ones on the right wall and ceiling. It's a good idea to turn them off with ![]()
![]()
![]()
![]() as well as the laser barrier with
as well as the laser barrier with ![]()
![]()
![]()
![]() . You have to collect the keycodes behind all these hazards to unlock the room code and then go back through them again once the barrier's open, so expect to burn a few ID cards here. Remember that if you are using the invincibility cheat, you'll want to make sure JJ is selected when you exit the status menu, or you'll be stuck with Apple for the rest of the game or until you rescue Champ.
. You have to collect the keycodes behind all these hazards to unlock the room code and then go back through them again once the barrier's open, so expect to burn a few ID cards here. Remember that if you are using the invincibility cheat, you'll want to make sure JJ is selected when you exit the status menu, or you'll be stuck with Apple for the rest of the game or until you rescue Champ.
When you're done, use Apple for a while if you're too low on health for JJ, and head back over to the room on the left and down one. From this room take the exit out to the left. Out in the hall you'll need to lie down and shoot the wall to open it up. Once you're through, head to the top and go into the room on the left.
Row 5, Room 2[edit]
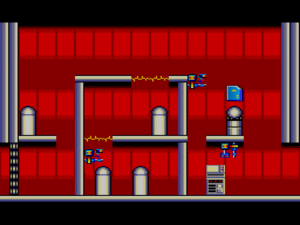
This is a simple dodge-the-auto-gun room, but you can also turn them off with ![]()
![]()
![]()
![]() . If you're running low on health, you can take the left exit and shoot the hidden power up on the right side at the bottom of the elevator shaft. It's probably not worth it, because it's pretty hard to jump across the laser barrier at the top of the screen. If you do go out to the left, just be careful of the drone right outside the room. When you get back, or if you don't need the power up, turn off the laser barriers with
. If you're running low on health, you can take the left exit and shoot the hidden power up on the right side at the bottom of the elevator shaft. It's probably not worth it, because it's pretty hard to jump across the laser barrier at the top of the screen. If you do go out to the left, just be careful of the drone right outside the room. When you get back, or if you don't need the power up, turn off the laser barriers with ![]()
![]()
![]()
![]() and take the elevator down.
and take the elevator down.
Row 6, Room 2[edit]
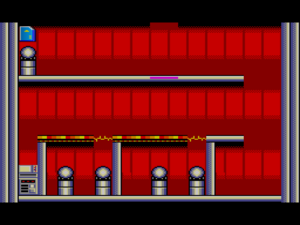
In this room you'll be sandwiched between two drones, so just do your best to take them out quickly and limit the damage they do. There's an ID card up top and all four keycodes are in sections guarded by laser barriers and moving walkways. Unless you're a very poor jumper, you should be able to get away with just turning off the laser barriers with ![]()
![]()
![]()
![]() . On your way to the computer console you'll be running against the walkways, so just press and hold
. On your way to the computer console you'll be running against the walkways, so just press and hold ![]() while pressing
while pressing ![]() at the very ends and you'll make it. When you're going the other way, after you've input the room code, just stand still and let the walkway move you. When you get to the end, press and hold
at the very ends and you'll make it. When you're going the other way, after you've input the room code, just stand still and let the walkway move you. When you get to the end, press and hold ![]() and press
and press ![]() quickly at the end. When you're getting the keycodes, remember to get the canisters on the left first, so you're not wasting time going against the walkway while the lasers are off. If you really need to turn off the walkways, you can use
quickly at the end. When you're getting the keycodes, remember to get the canisters on the left first, so you're not wasting time going against the walkway while the lasers are off. If you really need to turn off the walkways, you can use ![]()
![]()
![]()
![]() . Head down into the next room when you open up the elevator.
. Head down into the next room when you open up the elevator.
Row 7, Room 2[edit]
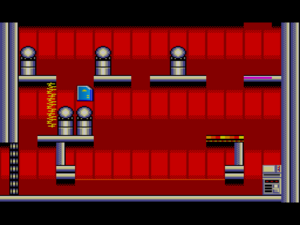
This room can go quite easily if you don't trip the sensor running along the bottom of the screen. When you first enter, jump across the platforms to the left and get the canisters. When you have the keycodes, come back the same way across the platforms at the top. Start pressing ![]() as soon as you drop down to the moving walkway so you don't get pushed over to the sensor. For the canister right next to the laser barrier, just note that you don't have to be directly in front of it to get the keycode. If you go slowly, it's no problem to get the ID card right next to that canister as well. When you've unlocked the room code, take the elevator down.
as soon as you drop down to the moving walkway so you don't get pushed over to the sensor. For the canister right next to the laser barrier, just note that you don't have to be directly in front of it to get the keycode. If you go slowly, it's no problem to get the ID card right next to that canister as well. When you've unlocked the room code, take the elevator down.
Row 8, Room 2[edit]
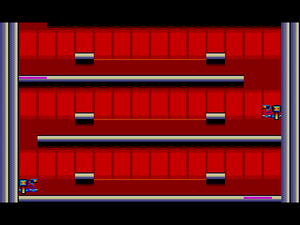
No canisters to get in this room; just avoid the auto-guns while crawling under the sensors on each level, then take the elevator down.
Row 9, Room 2[edit]
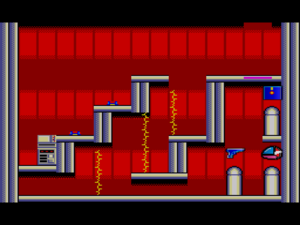
In the bottom room you'll find three level two canisters and three laser barriers. Avoid the mines and head to the computer console to turn off the laser barriers with ![]()
![]()
![]()
![]() . This room is a jackpot room, with a floppy disk, a level up and a Zillion upgrade. Make sure you change back to JJ to get those items if you've been playing with Apple. When you've gotten everything, head back to the computer and type in the Warp A code
. This room is a jackpot room, with a floppy disk, a level up and a Zillion upgrade. Make sure you change back to JJ to get those items if you've been playing with Apple. When you've gotten everything, head back to the computer and type in the Warp A code ![]()
![]()
![]()
![]() to head back to the beginning elevator.
to head back to the beginning elevator.
Finishing up[edit]
This route is recommended, as you can pick up a few level ups that you couldn't get before, and it bypasses trying to go back up the way you came. From the beginning elevator, head down and go over four rooms to the left, stopping in the third to break open the level three canister for a level up. In the fourth room, either take the elevator down and go to the room on the left, or take the left exit and take the hallway and elevator down to that room.
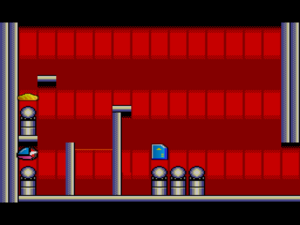
In this room you'll be able to get over that wall on the right side of the room for another level up, which will max JJ out. When you've gotten it, head right until you can take an elevator down from a hallway. Take the elevator down, and this time head to the room on the left and get the level up at the bottom left corner for Apple. Keep in mind as you're going on now, that you can shoot out mines with your level three Zillion from the prone position.
Head back out into the hallway, and go one room right, one room down and then all the way to the left until you get to the room with the level three canister to get another floppy disk. From here, go back out to the elevator two rooms to the left. At this point you cans skip the rest of the middle levels, because there's nothing else you need. If you've been using JJ the whole time, he's maxed out already, and you'll only be missing out on unneeded level ups and a scope.
Take the elevator up to the top again and head left into the room. Go down two more rooms, and in this room, don't even worry about tripping the sensor, because you can get out of the room to the left before the response drones can hurt you. Out in the hallway take the very long trip down to the bottom of the Norsa base. Stop in at the first hallway to the right and grab a level up and a power up in the room there. If you're extremely low on health take the level up for yourself, but it's better to give it to Apple, since she'll be taking damage for you when she can. Don't fall for the trick down the second hallway though. The canister is empty and it's a deathtrap in there. You are now on the lowest level of the Norsa base and in the last and biggest section.
