Again the section names are the passwords to access each stage, where the first password is for the Japanese version and the second password is for the European version, but only for the first eight puzzles of this stage. After that, all puzzles are new for the European release and cannot be found in Lolo no Daibouken, and so therefore only one password will be provided for each.
Furthermore, the order of the last five puzzles of the Japanese version was changed for the European version, saving the original 46th and 47th puzzles for 49th and 50th instead.
 Castle of Egger (5 rooms) Gentry Parade (5 rooms) |
 |
3I9HDK — P17QZJ[edit]
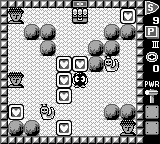
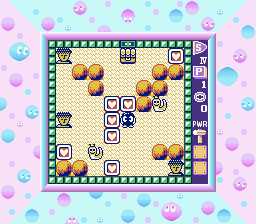
Of the four hearts surrounding Lolo, three are unguarded, so take all of them but the one on the direct left. These three hearts provide a hammer, and the lower of the three also provides shots. Use the hammer on the rock just above the upper-right Snakey, creating room to push it down first after you turn it into an egg. Push the egg down two tiles, left one tile, then down again to block the bottom-right Medusa and collect the heart in that row. But then you will need to quickly use another shot to turn the left Snakey into an egg and push it up two tiles to block the lower-left Medusa while also finding a moment to shoot the right Snakey egg before it hatches. Remember, to make this easier, you could have left the right Snakey egg a half-tile away from the bottom to enable you to shoot it from the left side safely.
As you collect the center heart, leave the remaining Snakey where it is to continue to protect Lolo traveling up and down the room, just so long as no part of it is below the Medusa's row. When the upper-right Snakey returns, push it down two tiles and all the way left to get the heart underneath the Medusas, then shoot the egg away again as soon as Lolo is out of that column. When that Snakey returns for the second time, you only need to push it down one tile, left two tiles, and all the way up for protection in reaching the final heart and the jewel box.
O73AVR — 0JΔMFZ[edit]
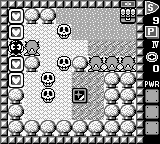
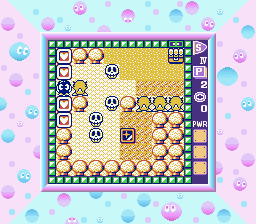
Only the hearts below Lolo contain shots, so leave the very top corner heart until you've got all the enemies locked up. The upper Skulls should each half-cover two of the Gols on the right: First push one to cover the rightmost Gol and the center Gol within the upper flowerbed, then push the other one right beside it to cover the center Gol and left Gol in the same row. Move the lone emerald out and around to half-cover both those Skulls from above: They will now each be trapped by half the emerald, half a flowerbed tile, the Gols, and each other. (Slightly different configurations are also possible here, as a Skull on the right can still be sufficiently trapped wandering the desert by the emerald and jewel box while still blocking the Gol's shots.)
The lower Skulls you can simply push into the corners of the lower flowerbeds, trapping them between whole flowerbed tiles. Now when you collect the final heart, you will need to remember to walk around the tree behind the nearby leftmost Gol to avoid getting fried, and don't bump that emerald out of place.
5♥♥49I — NGFHBB[edit]
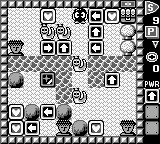
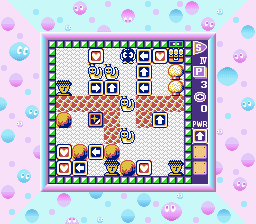
With the shots from the top-left heart, you will need to move the upper pair of Snakeys in eggs to allow you to cross to the lower-left area. Push one Snakey down and onto the right-arrow tile, push the other Snakey left and down beside the nearby Medusa's right, and keep pushing the egg on the right-arrow down to cross the river.
Continue downward to push the emerald until it blocks the lower-left Medusa's side, hurry to the bottom-left hearts, and hurry back to board the floating egg on the right. When it's about to sink, you will be lined up to make the lowermost Snakey an egg, so push it just two tiles to the right, underneath the lone up-arrow tile. Quickly turn around and head back up, make the center Snakey an egg, and push it right through the uppermost up-arrow. Then push it down and, while standing on the river, turn the arrow tile so that you can push the lower egg all the way down before the upper egg sinks and before that lower egg hatches, giving you access to the final heart.
Head back to the upper area again so that Lolo is above the center Snakey when it comes back. By then the uppermost Snakey will also be back, so push it onto the right-arrow and down into the left river again once the center Snakey is back or nearly so. Push that center Snakey down two tiles and then board the floating egg. When it reaches the bottom, you can push the other egg all the way to the right to protect the jewel box from the lower-right Medusa.

In the European version, the next puzzle is #CL48♦♦ — AEM1V7.
QQG♥RP — ZVH♥QC[edit]
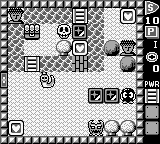
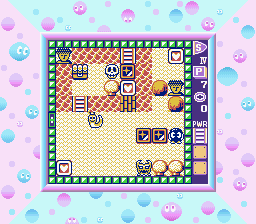
You can safely trap Don Medusa on the right end with the two emeralds nearby. Push one so that it's only touching a tree diagonally, push the other one tile to the left of that, and push it down when Don Medusa reaches the right.
Cross the break-tile bridge all the way up to push the emerald into the top row and receive a bridge you should place on your right. Cross straight back down and make Snakey an egg with a shot you also just received so you can push it all the way left and reach the bottom-left heart safely. Go up to Skull's left side to make it an egg and push it all the way to the right across your self-made bridge to finish protecting the top-right heart the same way. From here you will have plenty of time to return to the jewel box before Skull hatches.
7WAF4W — MS37M8[edit]
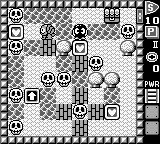
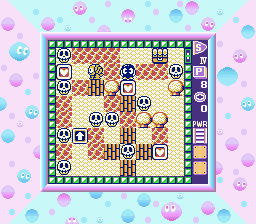
There's a number of ways to approach this puzzle from the standpoint of safety, but if you would like to have all enemies blocked off before taking the last heart, start by stepping upward for a moment to allow Alma to wander away. Take the first heart and build the bridge to the left from the nearby center break-tile, turn the Skull on the right into an egg, and get onto its right side to push it four tiles to the left across your new bridge, collapsing the break-tile in the process and blocking Lolo off from Alma while you prepare your next move.
Take the top-left heart, and after crossing the break-tile bridge back down, fire at the Skull directly below to ride it into the water and step off onto the side. You can start stepping on the break-tiles around the bottom-center Skull at this point, but you need to leave one use of the tile below it and one use of the tile on its left until you goad Alma to cross back to the left along the bottom, using that left break-tile to step out of the way. Then just make sure to collapse that bottom tile and the break-tile on the same Skull's right before you take the final heart to the right, and you can then make your way to the jewel box at your leisure.
Alternatively, you can save time by placing the bridge directly to the left of the start position to take the top-left heart and immediately return to the right. As you make your way to the rightmost column, put Alma in an egg as it comes up and push it down out of the way. When you take the last heart, the Skulls' questionable AI will cause them to move away from the path to the jewel box at first, giving you enough time to reach the jewel box before they truly give chase—and remember that you still have one spare egg shot for if you do get into a jam.
In the European version, the next puzzle is #XA926K.
CL48♦♦ — AEM1V7[edit]
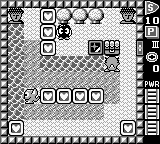
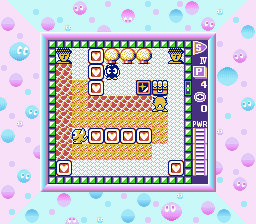
Take the two unguarded hearts on Lolo's left and use the bridge to cross the center river to avoid touching Leeper. Collect the other three unguarded hearts that aren't adjacent to Leeper. At this point there are many ways to solve the puzzle through combinations of the emerald, Gol, and leading Leeper around to block Medusas, but here's a sequence without too much waiting.
Place the second bridge beside Gol, put it in an egg, and push it all the way to the right wall (and optionally all the way up for safety from mistakes at the end.) Push the emerald up one tile, right one tile, and up again to the right Medusa's left side.
Find a safe distance from which to shoot Leeper into an egg, take the heart beside it, and push the egg all the way up to block the left Medusa's right side. Take the top heart, place your third bridge onto the first tile below the left Medusa, and run to the bottom. Wait until Leeper hatches, and when it steps onto the bridge below the Medusa, step onto the bottom-left heart likewise to get protection from Medusa through Leeper's parallel movement and immediately step back to the right. Now you can collect the bottom-right heart and the treasure without issue.
XAΔ2G5 — LB8WAJ[edit]
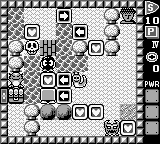
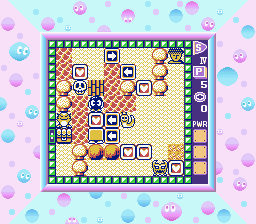
Take the heart below Lolo, and after Rocky has pushed Lolo over the bridge (but before being pushed all the way into Medusa's sight), turn both Rocky and Skull into eggs, and push Skull into the river. Push Rocky's egg all the way up and all the way to the right—It is preferable to break the break-tile bridge so that Skull will have a longer route later, and if you need room to get below Rocky, just cross Skull's egg to get to the right before it sinks.
Proceed down from Rocky's egg, collecting one more heart but stopping short of the next; you should be across from the lowest arrow pass and above the right heart of a pair. Wait for Rocky to get close, then step to the left. Be careful not to step all the way through the arrow: Step halfway through, and Rocky will then move across from Lolo so you can put him into an egg. Push the egg all the way to the right wall when Don Medusa is not approaching the gap, then quickly turn Snakey into an egg and push it two tiles right and all the way down through the gap. Collect the corner heart and quickly push the egg left enough to collect the remaining hearts safely.
As Skull approaches, be prepared to shoot it when it's across from the arrows. Line that egg up with the higher arrow of the pair and push it all the way left onto the river. Once on the river, quickly shoot Gol while you're still lined up with it so that it can't shoot Lolo before collecting the treasure.
E0HJYC — ♦XAS+0[edit]
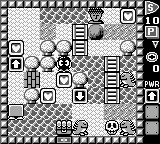
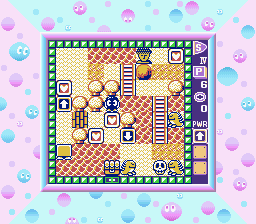
Take the two hearts nearby, but don't cross the break-tile bridge yet, for you will need it intact later. Instead, work your way around through the down arrow, up the two bridges, and all the way left so you're directly above Rocky, where you will lure it through the up arrow as you grab the third heart. Step aside before Rocky pushes you all the way into Medusa's sight. Let Rocky walk up as far as it can while you're one tile to its right and half a tile away from the top, then walk down to between the trees and allow Rocky to continue walking around to just above Lolo, right beside the flowerbed. Turn up, turn Rocky into an egg, and push it through the flowerbed as far as you can to the right. Turn the up arrow with your newly acquired power so you can cross the break tile, get to the bottom of the longer bridge, and turn Rocky into an egg again when it is above you. Push that egg all the way up to collect the top-right heart safely.
This will cause Skull to wake up and start making its rounds, so run to the far left edge again from the upper bridge before it next gets there. Shoot Skull when it's below you, push it all the way down, and ride the egg along the river, avoiding the break tile entirely because it would put Lolo in the line of Gol's fire. The egg will sink before it reaches the jewel box, however, so you will need to disembark above for now. At this point you just need to wait for Skull to reappear so that you can turn it into an egg again and cross the water tile just above the treasure with it. It should be safest to wait in the flowerbed in the lower right, shooting and pushing to the left once Skull's in that row.

Password: ZTBDC3
In the European version, the next puzzle is #QQG♥RP — ZVH♥QC.
XA926K[edit]
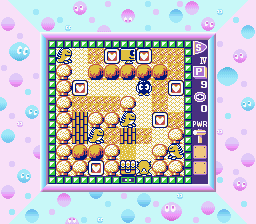
You can go ahead and collect all five hearts that are out in the open to begin this solution. Now that you've obtained magic shots, travel down the pair of break tiles and face the back of the lower-left right-facing Gol which you will turn into an egg. Push the egg three tiles right, one tile up, and all the way back down two tiles so that it blocks both Gols most closely guarding the jewel box, ignoring the rocks along the way for now, as this solution saves the bottom heart for last.
All three break tiles should have one use left at this point, so go back up and around to the left to travel down the pair of break tiles one more time. Break the rock directly above the heart so you can grab it, then use the last remaining break tile to reach the treasure.
K♥CHM0[edit]
♥9IDIC[edit]
YR4♦18[edit]
9O♥8XK[edit]
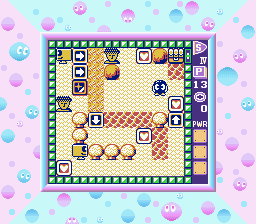
WMDND0[edit]
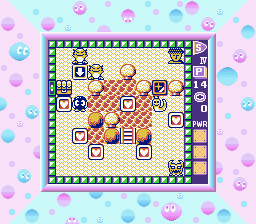
Stage 5: Grand finale surprise JJZJXC