The section names are actually the passwords to access each stage. The first password is for the Japanese version, the second password is for the European version.
 Souvenir Photo (5 rooms) Flying Rocket (5 rooms) Roller Coaster (5 rooms) Castle of Egger (5 rooms) |
 |
CΔWBRY — EEAYLB[edit]


If you want the perfectly safe outcome, start by collecting all the Heart Framers except the one right beside Rocky. This will be enough for a bridge, which you should place between the jewel box and the left-facing Gol. Push the Emerald Framer one tile left, then down, then right to block the lower-left Gol under the jewel box. Now with the shots you got from the top-left heart, you can go back to the right side of Rocky to put it in an egg, push it to the left, then back to the right a bit to be able to push the egg down onto your bridge to protect the jewel box from the right.
If you want to skip that backtracking, you could grab the heart beside Rocky first and only block the lower-left Gol with the emerald. After collecting the final heart, step halfway onto the jewel box from above and step back up immediately to draw the Gol's fire, and then step all the way on to collect the treasure just as the fireball has passed. Or you could save the heart under the jewel box for last, and just before grabbing it, fire one shot at the upper-right Gol from the jewel box—because egger shots can't pass over jewel boxes in this game—and fire the other shot at the lower-left Gol from its left side, keeping them both in eggs as you clear the room.
YSR451 — 6CHUH7[edit]


With the shots from the first heart in your path, you should push Snakey straight down against Medusa and Alma straight up from one column to the right of that to block Gol from within a flowerbed enclosure. Either time pushing Snakey down so that Alma is around the corner and won't roll back right away, or shoot Alma from above first, timing it so that Alma has reached the top of that open column.
To avoid having to sneak in front of Don Medusa at all, walk up around the rock first and push the emerald down just a half-tile before pushing it left. Now you can safely take all the hearts, provided you never step below where the bottom hearts were.

ΔHL♦N8 — TYNP1J[edit]
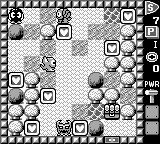
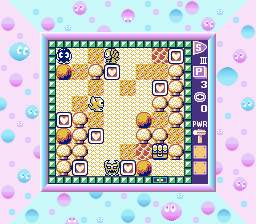
Take the heart directly below Lolo first for shots to turn Alma into an egg from the left. Push the egg into the water on the right to collect the top-right heart.
If you want to eventually trap Don Medusa permanently, you can continue by taking the heart below the water, but leave the heart under where Alma was alone for now to keep it trapped when it returns, and avoid Leeper until you can line up a shot where it's above the right end of Don Medusa's path. Push the Leeper egg down to block Don Medusa's right side to collect the heart on the right which provides another pair of shots. Use the hammer on the rock on the right, then run up above Leeper's column. When Leeper hatches, it'll free Don Medusa by traveling upward, so just shoot Leeper again and push the egg back down and to the right to trap Don Medusa in the bottom-right corner. After collecting the hearts Don Medusa was guarding, you'll need to stand against the egg until it hatches for Leeper to fall asleep blocking Don Medusa. Now grab the heart by Alma when you have enough room to flee, let Alma chase you down a bit, then turn Alma into an egg to cross the water beside the jewel box.
If you want a quicker solution with less egg-pushing, then after you collect the heart from the top-right island, go ahead and take the heart in Alma's area when Leeper's just below it to receive cover from Don Medusa there and to trap Alma with the sleeping Leeper. Sneak down to shoot Don Medusa with careful timing, and if the egg is in the way of collecting a heart or you just want more time, then blast it away with the shots you grab on the right. Now all you need is the hammer to reach the treasure.
KNFW1F — 4VT8XZ[edit]
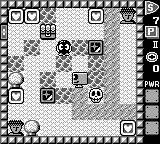

The hearts in the top-left corner are unguarded and yield four shots. First you should shoot Skull from the right and push the egg straight to the left to cross the water to push the emerald out to the left. Walk all the way around the water to push the emerald down so that you can push it left above the bottom-left Medusa for a heart. When Skull returns, make it an egg again, but push it all the way right below the top-right Medusa, where it will be trapped behind the flowerbed.
When Rocky is on the right side of its area, shoot it and push it up into the water so you can cross to push the other emerald right one tile. You'll eventually want to push it all the way up to block the Medusa's left, but don't spend too much time now as you need to be above Rocky's starting position when it returns, back at the top of that inner triangle. At that time, shoot and push Rocky all the way downward so that both the egg and Skull are blocking both Medusas that guarded the bottom-right heart, and you can easily collect everything before Rocky escapes.
1CY9JM — RTC4DB[edit]

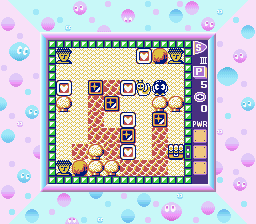
You can collect three hearts straight down the middle, the lower two of which provide shots. Push the lowermost emerald all the way up to the top to collect the heart beside the rock, then push that same emerald all the way to the left. You can also push the rightmost emerald to the right for later, but the other emeralds are trapped against the river. For these you will need all four of your shots to turn Snakey into an egg to cross the river four times altogether.
- Push the Snakey egg straight to the left to be able to push the higher emerald out to the left. Push that emerald two tiles down.
- When Snakey returns, make it an egg again, but this time push it only one tile left, then two tiles down, then left again to cross the one tile of water that lets you push the emerald from step 1 left to block the bottom-left Medusa from above.
- The next time Snakey returns, push it up one tile and left three tiles, because you need to enter the left column of water from above to push the remaining emerald out to the right. As you need to enter the top row to do this, this is why you needed to push the first emerald against the top-left Medusa already! Push your new free emerald up two tiles and all the way to the left, and you can finally collect the last heart, unless you made this emerald your step 2.
- While waiting for Snakey, make sure the rightmost emerald is all the way to the right to block the top-right Medusa. Push your final Snakey egg down and into the water on the right to cross to the jewel box.
M2S3+D — EAIZW7[edit]


Take the two hearts nearby, stand just above the center Snakey, and watch Alma, the monster you need to block Medusa. You can't afford a shot to turn Alma into an egg yet, so use your Snakey egg to cross the river precisely when Alma is two tiles away from crossing the left-arrow tile, and Lolo and Alma should safely cross paths. Quickly take the emerald you've pushed out all the way to the right to block Medusa and take the bottom-right heart, then face up toward the left-arrow.
Shoot Alma just as it steps onto the arrow, giving you an egg blocking Medusa there for a while. Quickly shoot the Snakey on the left and push it right and up to cross back up the river. Finally, use the upper-left Snakey to cross up to the jewel box; Gol's flame will not reach you before it's destroyed by your collecting the treasure.
RVM+EK — 5♦OFSJ[edit]


For this solution, go ahead and take the heart right under the jewel box first. Now you'll want to put the Leepers to sleep where they will block the bottom Medusas for later. Approach each one from above, but wait to take the final step against their row until the Leeper is already moving away from the inner column, ensuring they'll sleep halfway inside the Medusas' columns. You still need to block the top Medusas before collecting any more hearts, however.
There's a number of ways to corral the Almas into the upper area, but for one of the safer ones, start by pushing the left emerald one tile to the right when you have enough distance from the Almas. Go up, over and down onto the flowerbed between the emeralds and wait for both Almas to pass up through the opening you've made. If one Alma is rolling against the emerald in your row, walk a half-tile up and immediately back down whenever the other Alma isn't just above Lolo. With both Almas above, push the left emerald back to the left just a half-tile to keep them up there, then walk down and over to stand halfway on one of the side hearts.
Wait and watch for an Alma to step under the Medusa guarding the heart, which is when you will collect it by moving in sync with the Alma and turning straight back. Do the same for the other side. Now stand underneath the left emerald and wait until neither Alma is to the left of it, then push it up one tile. When just one Alma heads up above it, push the emerald up another half-tile, just enough to trap it in front of the upper-left Medusa without opening Lolo up to attack.
Now push the right emerald up a full tile when the other Alma is not to its right, and when it goes up into the top row, push the emerald up again the same way as the first. At this point you can get into the jewel box's column and head straight up yourself.

8K1E8R — C+♥A♦Z[edit]


One heart in the middle, right beside the Skull, contains shots; but because it's what's holding back the left Alma, you'll want to push the emerald left and down to trap it in the bottom-left corner first. With one shot you can push the Skull right three tiles and down to block in the right Alma the same way. If you only push it halfway into the bottom row, you will also be able to come back from taking the heart on your right, as a half-step across a break-tile bridge won't count toward its destruction. Now you can take the heart on the bottom from the left.
The key here is to finish by taking a heart that is not beside either Skull. You'll need your other shot to come back from taking the two hearts in the upper-right via Snakey, though there are a few ways to do it. If you push Snakey into the water on the right, a current will carry it around the bottom of the tree, which seems to be the intended way to reach that lower-right heart, so long as a break-tile on the left hasn't been fully crumbled already.
If you already took that heart and went for the top heart before the upper-right heart, you could just push Snakey down to get back. Remember to use break-tile bridges defensively: Leaving the leftmost heart for last gives you time to ensure that the two bridges that allow the upper-right Skull in are collapsed first to trap it there. But if you go for the top heart last by pushing Snakey right first, you could still collapse the two bridge tiles behind yourself to trap the Skull in time, saving a bit of time in having to go back for that left heart.
TQZ7QY — 37D+8B[edit]


For this solution you will need to leave the center heart for last. As you collect all the others without moving any emeralds yet, you will have to move a Skull up to block the right side of Medusa with a shot from the heart below the heart it's guarding.
Push the upper-right emerald up a tile and a half, where it will both half-block the upper Skulls on the left and half-block the right-facing Gol. Push the emerald just below the center heart rightward two-and-a-half tiles, just a half-tile away from the up-facing Gol. Walk around to the emerald directly left from that one and push it three tiles to the right. Push the lowest emerald just a half-tile down, and you should have formed a cage around the two lowermost Skulls with no more than half-tile gaps. Push the remaining emerald on the left just a half-tile left, which will finish trapping the Skulls in the upper area.
Now step onto the center heart from the left, and when Lolo is more than halfway across, you can turn that remaining center Skull into an egg. Push the egg right over the Gol, and you'll have plenty of time to get to the jewel box before it hatches.
AFT141 — QPJ5O7[edit]


Cross the break-tile bridge to take the heart immediately on Lolo's right. You need to stop Leeper underneath Medusa for the next step, which can involve approaching it during its retreat to the right, but depending on your solution, you may be able to spare a shot to make this easier. Go down and shoot Alma from the left so you can push it to the right and safely collect the hearts as you use the egg to cross downward.
The intent here seems to be that Lolo uses one Snakey to cross the river to push the emerald left, walks around the breaking bridge again to push the other Snakey down to block the other Gol, and waits for the first Snakey to come back to cross again. But there are quicker ways, even setting aside the ability to cross back on the same Snakey egg to save a trip over the bridge.
If you shoot the right-facing Gol first, you can collect the bottom heart without blocking it. Now you only need to use one Snakey to cross and push the emerald over the other Gol.
F48YM8 — DNQL8J[edit]


Both of the nearby unguarded hearts provide shots, making 4 in total. First you should make Rocky an egg and push it to the right to get the upper-right heart. When it hatches, lure Rocky into the column with the jewel box, make it an egg again, and push it down against the jewel box, where it will block the same Medusa's left and be conveniently trapped by flowerbeds.
Now make Skull an egg and push it left and all the way up, collecting the last two hearts in the process. If Rocky has hatched already, you still have a shot left to make it an egg again and push it closer to the lower-right Medusa to reach the jewel box. (There is also current in the lower river to get past Rocky's egg, but this would require pushing Skull into the upper river and waiting for it to return.)
+Y2C0Δ — OK♦G4Z[edit]
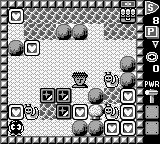

The first shot in the heart beside Lolo will allow you to use the Snakey to enter the single water tile and push the leftmost emerald up one tile; don't move it anywhere else yet! Push the middle emerald right to block Medusa from beneath for a heart and to clear the way to push the bottom emerald up two tiles, which is what will actually block Medusa's left side. Now you can push the leftmost emerald up one tile and right two tiles to block Medusa from above, and you can collect the heart against the river, but then you will have to wait for the Snakey to come back.
You can push the Snakey egg straight up into the river, collect the heart, and cross the same egg back down so long as you move without hesitation. If you don't like this method, you can maneuver the egg to the right side of the river to ride a current all the way left and back down, but this will take longer. Either way, you will now have a hammer which you should use on the rock directly above Medusa. When Snakey returns again, push its egg up three tiles, right one tile, up one tile, and right three tiles, where you will now have room to push it down against Medusa's right side.
Now use the upper-right Snakey to cross to the lower-right corner to collect the rest of the hearts with the shots you need next, but then you will have to wait, as you need to still be down there when that Snakey returns. When it does, use the lower-right Snakey to enter the water, make the upper-right Snakey an egg before Lolo sinks, and push that egg straight up into the river, running right onto the jewel box after floating up.

HN+6H6 — B6EBJB[edit]


From the one unguarded heart, push the emerald above one tile up against the Medusa, then half a tile to the left to make room for later. Push another emerald down to block the center Medusa's left side and take another heart, and push the emerald that's already above that center Medusa just a half-tile right to make room again. Push the lowermost emerald one-and-a-half tiles to the right, blocking both the bottom Medusa and the Skull against the jewel box.
The other emerald in the lower-left you should push up three tiles--stopping to take a heart in the process--then one-and-a-half tiles right, one tile up, and one tile right to block the pair of Medusas on top. Before moving on, push the emerald on the left of the center Medusa a half-tile below it to slow down the lower-left Skulls later.
The right-of-center Medusa already has an emerald above it, and you need to push it a half-tile right to get up and around it. Push the emerald just below it to the left, blocking that Medusa more closely and allowing you to push the previous emerald into the space beside the top-right heart to allow you to grab it.
Push the final emerald one-and-a-half tiles to the left to block that same Medusa from below along with the center Skull. Now when you collect the bottom-right heart, there is still an open path for the lower-left Skulls around the top of the room, so hurry across the desert to clear the room.
♦TUΔZD — 23KVF7[edit]


Of the three hearts you can collect above Lolo, one has a pair of shots. Use one to make Snakey an egg to cross straight down, collect a heart for a hammer, and cross straight back up.
To make the jewel box safe to reach later, you'll need to destroy the rock beside Medusa to free Alma and turn it into an egg to replace the rock, but you also need to get back to the left of Snakey when it returns. To make this safer, you can wait to the left of Snakey and push its egg two tiles right first, break the rock and immediately shoot Alma, then go back and push Snakey's egg down to cross to the lower-right area. With Alma's egg directly beside Medusa (or hatched and wandering above), push the emerald one-and-a-half tiles right to block both Alma and Medusa.
Collect the heart below Gol, turn Gol into an egg, and push it down and left to cross to a heart and double right back. Now you can clear the room without a problem.
Stage 4: Flamenco 3I9HDK — P17QZJ