Maps[edit]
Walkthrough[edit]
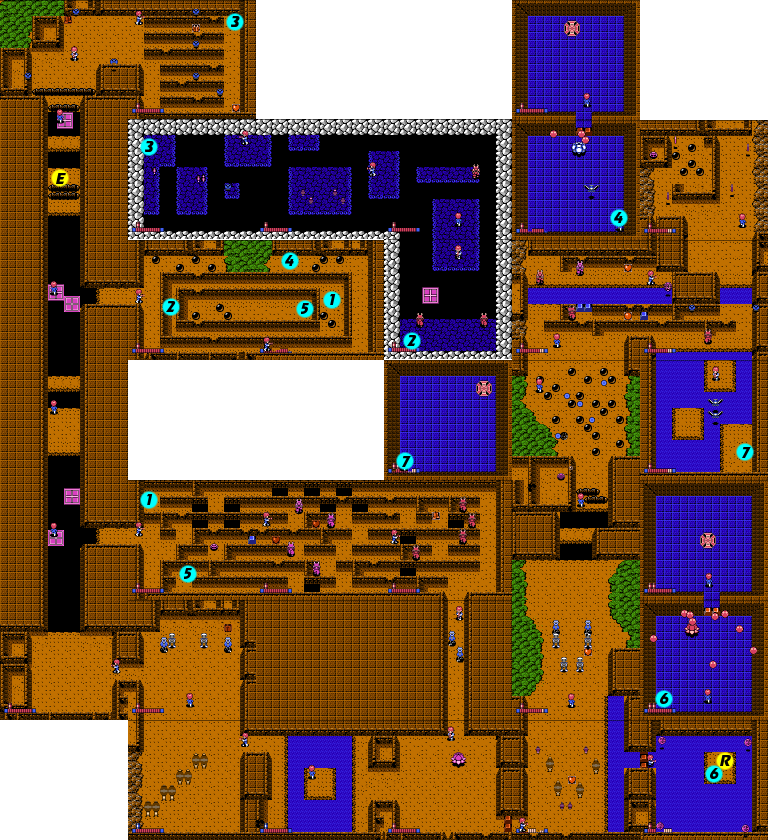
The third level is a bit more of a confusing maze than the previous two. Large sections of it can actually be ignored if you know exactly where to explore. There are three boss flowers in this level, and though one of the crystals can be collected without facing a boss, you will ultimately be forced to face off with all three.
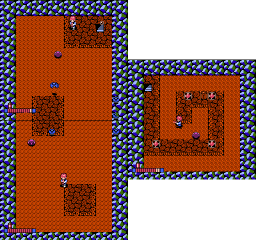
There are large opportunities to miss a jump and fall into a gap or a hole. In most cases, you will fall into a two-room underground chamber composed of two islands. Each island has a hidden item, the lower island has Astro Pants, and the upper island has Astro Wear (above the split). However, if you fall down the holes on the right side of the stage, you will fall into an alternate underground chamber composed of a single room.
First Crystal[edit]
You begin on a solitary island near the very bottom of the stage. To start out, you should go left first. The room to the left contains eight Maimais which you can easily dispose of and hopefully collect some apples to build up your health again. Then head north and watch out for the land-mine laying Kankanba-dos. They will not deviate from their path, so stay out of their way. Defeat the Skepps and move on to the left.
You will arrive at the bottom of a vertically scrolling corridor. You will have to ride floating platforms to reach destinations to the north. Along the way, you will see pathways to the right. You can safely ignore the first right pathway that you come to. It leads to a series of stairs that take you around through an underground cavern that ultimately deposits you to the north. While it is interesting to explore, there is absolutely nothing of value to collect.
Instead, continue to ride the platform up to the patch of land in the middle of the corridor. Wait for the next set of platforms to pick up up, and ride them north again. Continue past the second right pathway to the small patch of land above. Shoot the ground just above where the tears appear to discover a second Energy Tank. This will help boost your energy level before you continue. Now ride the platforms back down to that second right pathway and head through it.
Take the bottom path to the right, below the barriers that divide this screen. Continue on to the next screen and walk up and around to the black blocks above. Shoot the left-most block to reveal a staircase. Head down the steps and you will find the first Ghost Seed, as well as a Pipopipo that happens to be hanging out with him. Take the Pipopipo out first, and then attack the Ghost Seed, making sure to stand in a safe zone to either side of its center while you attack. Defeat it and head up to collect the crystal diamond from the room above.
Second Crystal[edit]
Once you collect the first crystal, you'll want to make your way back to the starting position. As mentioned above, while you could explore more of the west region of the stage, after you have collected the crystal diamond, and the Energy Tank, you really won't find anything else useful in that area. Return to the start, and move to the room to the right. (Alternatively, you could travel through the first pathway on the right that you came to, and travel down the south corridor.)
Here you will have to fight a second Ghost Seed. Use the same strategy against it as you did against the first flower. Defeat it and collect the flashing apple it leaves behind, then continue to the east. You'll find more Maimai snails, along with their diminutive cousins, the Comaimais. Defeat them all, and then jump into the water to take the path to the right. Here you will find an island with a set of stairs. Shoot the ground near the stairs to find a Range Increase power-up. Collect it, then duck down the steps.
Once again, you will face the third and final Ghost Seed flower. If you don't have a lot of health at this point, it may be worthwhile to return outside, and fight the Maimais until you recover. Defeat the Ghost Seed by finding the safe spot beneath it and shooting up at it. Collect the flashing apple it leaves, and then head up to collect the second crystal diamond from the Guard dome.
Third Crystal[edit]
Return through the stairs to the island in the water. You'll have to defeat all four Pegeges on the screen in order to lower the barrier that prevents you from returning to the left. Destroy them and return to the screen with the various Maimais. Head up one screen, and you'll encounter four Skepps with two Kankanba-dos. Defeat them, and start moving up. The screen will scroll vertically.
You'll have to leap over two gaps, but do so cautiously; the ground after the second gap will tear open. If you don't have enough Power Shoes, you'll want to jump over the second gap on the far left side, the one section that doesn't open. Beyond the tears is a field of black blocks, some of which have items beneath them. Destroy them, taking care to avoid the blue flash bombs, and continue to the screen above.
From where you arrive, there really isn't any need to explore the region above, other than curiosity. Instead, simply head to the screen on the right, and then head south to the screen below. Two Pipopipos guard a stairwell. Defeat them, or simply avoid them if you prefer, and head down the steps to find the third Crystal Diamond Guard dome, completely undefended. Destroy it and collect the crystal in order to summon the transport which will whisk you off to the next stage.


