Battlestations: Midway/Islands of Solomon
With the shutdown of GameSpy, these pages are no longer relevant. They have been preserved for historical purposes.
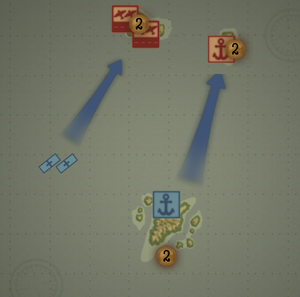
American Objectives
- Destroy the Japanese shipyards
- Destroy the Japanese airfields
Japanese Objectives
- Sink the American carriers
- Destroy the American shipyards
This battle is an interesting sea/air battle, as each team consists only of installations. The Americans have carriers, but the general premise remains the same - you spawn ships and planes, and send them at the enemy. The advantage to using shipyards instead of having a fleet is that you can respawn ships as they're sunk. This results in a possibly very lengthy battle, as the stalemate can only really be broken if one team penetrates past the enemy lines and successfully knocks out a shipyard or an airfield, reducing the number of units a player can field.
Player Slots[edit]
American Slots
- Yorktown (CV) - Enterprise
- Yorktown (CV) - Yorktown
- Shipyard (contains 20 each DDs, CAs, SSs)
- Shipyard (contains 20 each BBs, CAs, DDs)
Japanese Slots
- Airfield (contains 40 each fighters, both bomber varieties)
- Airfield (contains 40 each fighters, both bomber varieties)
- Shipyard (contains 20 each DDs, CAs, SSs)
- Shipyard (contains 20 each BBs, CAs, DDs)
American Strategy[edit]
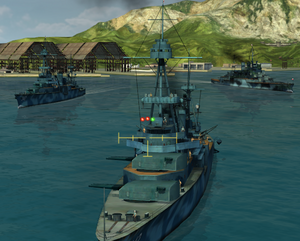
The strategy for both sides is quite similar. The Americans have a bit of an advantage in this map as the carriers can be moved, but the basic premise is the same. Interestingly, the shipyards are best taken care of by dive bombers, and the airfields are best eliminated by sea power.
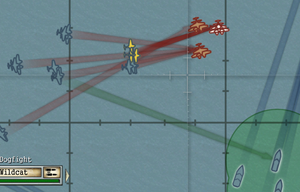
Start the mission by deciding who will launch what. The two shipyards should launch Renowns and Northamptons, Initially, the carriers should deploy fighters to defend the shipyard, Japanese players almost always blitz it with bombers. After that, it depends, the carriers should determine who launches fighters and who launches bombers. Have the bombers charge past the Zeros (which will more often than not be either armed with guns or armed with bombs to attack your own shipyards) and deal damage to the northern enemy shipyard; this is the one that spawns battleships. The Wildcats are superior planes to the Zeros, and you should be able to hold them off for a while.
Once the enemy realizes you won't leave the shipyards alone, they'll be forced to divide their air power into defending their own shipyards and attacking yours.
Your planes are considerably better than those of the Japanese, so during any lulls in the fighting have torpedo bombers try to deal some damage to the Kongo-class battleships, which are superior to your own Renowns. Always be prepared to launch fighters at a moment's notice in the enemy the enemy attempts to Zero rush you again.
For the most part, the shipyard should divide its own forces, have one or two cruisers make a beeline for the airfields, unlike carriers, they can't run away. If you can knock out the enemy airfields it doesn't matter if you lose your shipyards, since it takes significant time for the Japanese sea units to catch up to the carriers, they can take out the enemy shipyards unopposed. Additionally, if the cruiser that attacks the airfield survives, it can travel around the far side of the island and attempt to destroy the shipyards by itself, as they will most likely be undefended with enemy battleships to the South either fighting your own or chasing the carriers.
The mission becomes a ton easier once you've neutralized the enemy battleship yard. If you've managed to keep your own, you're in a good position to win.
Japanese Strategy[edit]
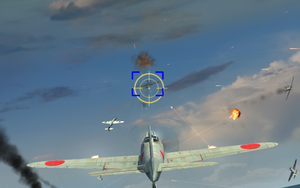
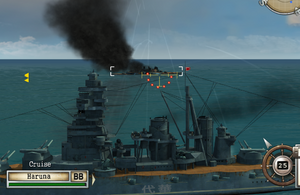
The Japanese have similar hardware, but their strategy is a little different than the American's. While the Americans have to rely on planes, you have to rely on your ships. The Kongo class battleship is much more heavily armed than the enemy's Renowns.
Again with the US though, you have to try and disable the enemy battleship yard (the most western one). Zeros carry two bombs versus the Wildcat's one, and so you can try launching the Zero rush by sending all your bomb-laden Zeros at the enemy shipyards right off the bat. Against an unprepared enemy, this can seriously turn the tide of battle by neutralizing either the BB yard or both of them; the enemy will then have to rely on their aircraft carriers.
Regardless, the destruction of the BB yard is your top priority. If enemy Wildcats are causing too much pain for your Zeros to penetrate with bombs, have them escort the battleships instead and intercept any torpedo bombers trying to even the odds. Tack your way past the enemy battleships, shoot on the shipyards, and watch 'em burn. After that just chase the CVs around the map and sink them to finish the mission. However, it is critical that you prevent the American sea units from flanking you and getting to the airfields, if they destroy the airfields you will lose, since it takes time to chase down the carriers.
