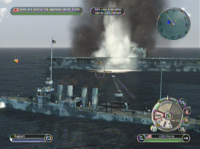
If this is your first time through the campaign and you're going for a gold medal, it's not recommended that you upgrade your Northampton to an Atlanta. Yes, you will be facing several squadrons of aircraft, but the Northampton and her 8" artillery guns are a much better choice when you're face-to-face with the Vanguard Force – a flotilla of three Japanese battleships, escorted by two destroyers. In order to earn the Gold Medal, you'll need to sink at least one of the Battleships.
Primary Objectives
- Sink the Japanese Carrier Junyo.
- Sink the Japanese Carrier Zuiho.
Secondary Objectives
- Sink the Hornet.
Hidden Objectives
- Sink a Battleship from the Vanguard Force.
Protecting the Big E
You begin the mission with minimum control over the USS Enterprise. She's being escorted by three Clemson-class destroyers (Preston, Maury, and Cushing), and is about to come under attack from Japanese strike planes.
Immediately launch two squads of Wildcat fighters and direct them in a northern direction from the Enterprise. Eventually two squads of enemy attack planes will show up on radar. Send both of your Wildcat squads to take them out. Repeat for the next wave of the attack.
After the second wave is shot from the skies, you're notified that a friendly recon plane has spotted the Junyo, and her two escort destroyers the Hayashio and Kuroshio. At this point the Enterprise will now have four aircraft slots from which you can launch planes, and you are now able to man her flak guns.
Put up attack planes to send towards the Junyo and sink her with a combined strike of Dauntlesses and Avengers. However, on Veteran difficulty, your attack planes will be ripped to shreds from a combination of the AA fire from the three ships, as well as the single squad of A6M Zeros that is constantly flying CAP around the Japanese carrier.
If you're playing on Veteran (without the TBM Avenger), leave at least one squad of Wildcats in the air. Right as you send in your attack aircraft for a bombing or torpedo run, have your squad of Wildcats move ahead in front and target the Zeros. Even if your Wildcats get shot down, this will distract the fighters long enough to keep them off your Avenger and Dauntless squads. Repeat until Junyo sinks beneath the waves.
If you have the TBM Avenger and you do not like losing aircraft, leave three of Wildcats in the air to protect your Enterprise. Then launch the TBM Avenger will 8 rockets. Fire your rockets at the carrier at a distance of approximately 1.3 to 1 mile to avoid AA gun fire. Once you've fired all 8 rockets, immediately make a 180 degree turn and wait for your rockets to refill. Repeat the attack four or five times and you'll be able to take down the carrier with minimal loss of planes.
Once Junyo is sunk, the battleship South Dakota, and her two escort ships will arrive and be under you control. Immediately within range, are the Japanese heavy cruisers Takao and Tone. Sink them both.
Direct your battleship and her escorts due north of their current position. You're going to cut off the Zuiho before she can escape off of the easternmost side of the map.
At this point you'll see a large number of incoming Japanese aircraft, all targeting your Enterprise. Man your flak and shoot down as many as you can, applying damage control where necessary.
Scuttling the Hornet and wounding the Vanguard Force
Around this time, you'll receive a radio message that the Hornet has been critically damaged. After she's been evacuated, you're charged with the task of scuttling her, so as to not let her fall into the hands of the Japanese. Take control of one of the two destroyers which are situated on either side of your now-barren carrier, and fire a full salvo of torpedoes into the Hornet's hull. Once she goes down, you will have unlocked the "Queen Sacrifice" achievement.


If you're not aiming for the hidden achievement, send your 'South Dakota' north. You'll eventually encounter the enemy carrier fleet. Send your cruiser and destroyer at full speed towards the carrier and take it down as soon as possible before the three battleships begin to sink the Enterprise. Don't even bother with the fleet that was originally with the Hornet, you don't need them.
If you aim for the hidden achievement, move your westernmost fleet due north, and launch up two or three squadrons of your choice of attack planes from the Big E, and send them towards the far northwestern side of the map. This is where the Japanese Vanguard Force will eventually appear. Leave one as CAP to protect your Enterprise. All you need to do is sink a single one of the battleships to accomplish the hidden objective for this mission. Do this with a combination of your aircraft and your westernmost fleet, led by the Northampton.
If you're not going for the "Take No Prisoners" achievement, then after you sink a Vanguard battleship it's relatively smooth-sailing. The final target, the Japanese carrier Zuiho, will be cut off by the South Dakota you sent north earlier in the mission. Ignoring each one of her escort ships, fire salvo after salvo until she's destroyed, and your job here is done.
Completing the "Take No Prisoners" achievement
If you're planning to complete this achievement then your strategy will be different from others as others do not need to destroy all three battleships.
Eliminate enemy attack wave
Once you take control of 'South Dakota' and have eliminated the ships that were with 'Junyo', turn your fleet north. At the same time, send four squadrons of Wildcats to the air and also direct them north. Around the same time things should start to happen to the Hornet. You have three monitoring tasks now:
- The incoming attack planes.
- The fleet to your north.
- The Hornet.
The reason for steering the 'South Dakota' fleet north is to make sure you'll encounter the enemy fleet on your port (left) side. It is likely that your Wildcats will encounter the attack planes before you engage the enemy fleet right below. Make sure each squadron is given a different target to maximize their efficiency. At the same time, constantly monitor the distance between your 'South Dakota' and the enemy ships. Start turning right at a distance of about 2.0 miles. When a DD gets to 1.6 miles take control of the 'South Dakota' and start firing at it. If you let the computer do the job the DDs will get close enough to release the torpedoes, and you will not have enough health to take down the battleships later.
You should be able to sink two DDs when the enemy fleet gets to about 0.8 miles. Remember to destroy the DDs first to prevent them launching torpedoes at you. Artillery causes much smaller damage to your ships compared to torpedoes.
At the same time pay attention to what's happening to the Hornet. Once the western fleet is under your control, immediately direct them east or else they'll continue to head north and be destroyed by the battleships.
Sink all three battleships
Once you sink the enemy fleet with your 'South Dakota', head north-west towards the battleships. At the same time launch two squad of torpedo planes and have them stationed at safe distance from the battleships. When you spot the battleships on your map (can be done early by launching a recon plane), direct your 'South Dakota' fleet a little bit north of the battleship formation. When you come close enough to engage at the battleships, only the middle and left battleships should be close enough to fire at you. Take down the left-most battleship (which should be on your port side again) first. It is very likely that you will lose the DD that is on the port side of your formation. Once you've eliminated the left-most battleship start engaging the center one. At the same time send in your torpedo squadrons to take down the center one as well. Fight until you lose your battleship, since it'll be impossible for you to catch up later as the enemy battleship can sail faster than you.
By the time you lose your 'South Dakota' you should have damaged half the health of the center battleship ('Hiei'). Torpedo bombers should be able to finish it and sink it for you. If not, use the cruiser that was on the starboard side of the 'South Dakota' to attack it. It was protected by the 'South Dakota' so it should still be operational, although you're very likely to lose it during the fight as well.
Now you've sunk two of the three enemy battleships. Direct the fleet that was with Hornet (should be at the east right now) west to take down the remaining one. Also deploy the DDs from the Enterprise to join this fleet. With 2-3 cruisers and 4-5 DDs surrounding the remaining battleship ('Kongo'), your target is doomed to be sunk. Launch torpedoes from your DDs once you get close enough. You should only lose one or two ships while sinking 'Kongo'.
Finish the carrier
During your fight, remember to leave two squadrons of Wildcats in the air to protect your fleet and the Enterprise. Once the enemy battleship is sunk the remaining fight should be a piece of cake. Launch a recon plane to locate the enemy carrier. Steer your fleet there and take down the escorting ships before sinking the carrier. Again, take down the enemy DDs first to avoid torpedo attack.