Probably one of the hardest campaign missions in the game, some players have compared this map to Rendezvous at the Java Sea from the previous game. This is the only mission set in the Atlantic.
- Primary Objectives
- Land in the water near the German U-boat.
- Sink the enemy convoy.
- Sink the sub-hunting battle group.
- Secondary Objectives
- Sink all enemy ships.
- Hidden Objectives
- Sink a ship by torpedoing it from both submarines.
If you obtained the gold medal in Hunt for the USS Hornet, you should have the opportunity here to upgrade to the I-400 submarine. You'll need as much help as you can for this mission, so do so. The Kaiten Carrier's kaitens are glitched and do no damage.

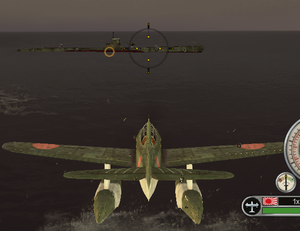
Your first objective is a simple one - land in the water near the German submarine. If you don't have the Flying Fish achievement, you'll get it now. Avoid the enemy convoy escorted by the Clemson - you'll manage to sink them later.
As you approach the German sub, you'll hear some dialogue. You'll then receive orders to land near the German sub. Head for the ocean, throttle back, and make sure your pontoons touch the water. Then pull back on the throttle, and you'll have landed. It's best to land far away and then creep toward the U-580 while applying the brakes. Give yourself enough room to avoid crashing into the U-boat.

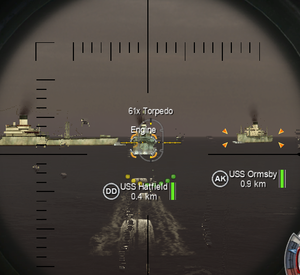
Now is your chance to get in attacks on the enemy convoy, and this is the ideal place to get the hidden objective. You outnumber the enemy escort destroyer, so perform the head-on attack to sink it quickly. Neither the Type B nor the I-400 have aft torpedo tubes, and U-580 has only one. Therefore, you'll want to avoid back attacks at all costs.

The head-on attack will prove, therefore, extremely useful when countering destroyers. A head-on attack will effectively eliminate the escorting Clemson-class destroyer. Once this destroyer is down, you can attack the rest of the convoy at your leisure. This is now the best spot to achieve the map's hidden objective. Pick a transport ship and sink it with one torpedo from your submarine, and then another from U-580.
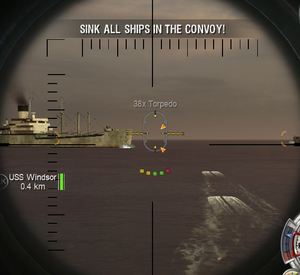
It is best to finish the rest of the enemy on the surface. Some cannonade to the magazine or fuel will, as always, start a fire that will ultimately sink the target ship.

With this convoy down, the enemy sends in the big guns - in this case, a large anti-submarine task force. Your four primary targets are the USS Bogue, a Bogue-class escort carrier, and three ASW Fletchers. These modified Fletcher-class destroyers sport the most powerful sonar in the game, additional depth charges, and the Hedgehog depth charge launcher. The enemy is also sporting a pair of Clemsons, which must be sunk for the gold medal.

If you managed to achieve the hidden objective previously, you'll have access to the naval supply Automatic Reloader, or otherwise known as simply the "Autoloader". This works on torpedoes as well as cannons, but remember there's also no way of refreshing torpedoes once you've expended them for either submarine. Using the autoloader, therefore, is a question of experience and fighting style - don't use the autoloader if you're the kind of person to try and spam torpedoes everywhere.
The escort carrier will launch depth charge equipped Helldivers for you to deal with, as well as rocket Corsairs to shoot down any seaplanes you launch.
There are many ways of sinking the anti-sub battle group, but regardless of your method of attack it is very easy for your plan to take a turn for the worse very easily. Some players like working their way from back to front with the convoy, targeting the Clemsons first, and then the escort carrier, and finally the three ASW Fletchers.
Other players enjoy working from front to back. These players start by attacking the front of the convoy first - that is, eliminating two ASW Fletchers and the Bogue, then retreating and surfacing for oxygen. By this time, the rocket Corsairs should be either off the map entirely or will be too far to help the Helldivers. Once on the surface, launch a seaplane and shoot down as many enemy aircraft as possible.

The enemy ships maintain a very tight formation - it is best to attack them two-on-one where possible. To do this, observe which enemy ship is moving to attack you, and then position the other submarine in a firing position on that ship. Similar to an underwater version of the Thatch Weave aerial manoeuvre, this technique can easily buy you several minutes by forcing the enemy to start all over and send another destroyer from the anti-sub group to attack you.
The community boards have noticed a glitch in the enemy destroyer AI. The enemy AI does not perform a three-point turn anymore to try and chase you down when in command of a destroyer. In this case, if you charge past an enemy destroyer, you can force it to chase you in reverse. This gives you plenty of time to position the other submarine in a firing position on the slower-moving destroyer, or simply escape.
If you get depth charged, be sure to use the Hardened Armour upgrade to provide extra protection. If you're particularly confident with your artillery marksmanship, you can try to engage the enemy destroyers on the surface with Hardened Armour activated. If all else fails, there is one risky maneuver you can try. Get as close to a ship as possible, then emerge from the water. Stay as close as possible to the enemy ship (almost against the ship's broadside hull) and fire on the target. It takes much practice and experience to accomplish this successfully, but if you manage to do so, the other remaining ships will, as usual, open fire. Due to a very close proximity to an enemy vessel, it can not get it's weapons to bare on you and the other ships will likely hit the destroyer you are close to instead of yourself.
Once you've sunk the escort carrier and the three ASW Fletchers, the mission is a success.