- Required items: Communicator γ (Blue), and the 3-Way gun.
Part 1
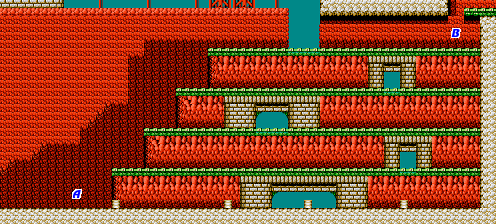
As soon as you land, you are required to blow away the metal wall at location A which prevents you from entering the area. To do that, you'll need the recently acquired 3-Way gun. Don't bring the Rocket Launcher here: it won't work. It's possible to tear down the wall with the 3-Way gun first, then escape the area and re-enter with your weapon of choice. (Remember that you can press ![]() +
+![]() +
+![]() from within any level to return to the map.)
from within any level to return to the map.)
Your goal is to make it to location B in the upper right corner. You can take any level of platform to reach that location, but every platform will be occupied by vehicles with cannons in the front. You can destroy the vehicles, but the driver will be ejected. The drivers are short, so you may have to squat down if you want to shoot them. They will leave bullets behind when defeated. If you take the right path and time your ascent, you can arrive at B with minimal interference.
Part 2
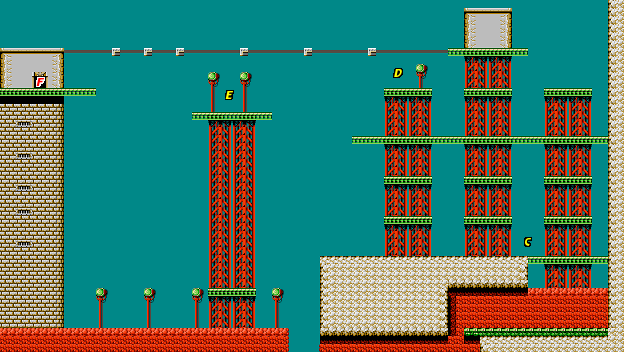
From B, climb up and attack one more vehicle. Then pull yourself up to the bottom of the open area. At around location C, an item box will parachute down. Around the same time, you will encounter a new enemy, the helicopters that fly in from above and hover above your head. The way that these enemies fly above you makes the 3-Way gun particularly useful. Without the 3-Way gun, you have no means of removing them from over your head other than to try and run away from them.
Climb up any of the sets of platforms, and make your way to the left until you are able to reach location D. From there, you must grapple swing from the small grey block above and to the left of you. While you're in mid-air, you must then fire your grappling hook and catch the next grey block, and then a third, in order to make it to the next platform. If you fail to catch these blocks, you will plummet to the bottom. Although you will survive the fall, you will be forced to redo all of the previous steps in an effort to attempt the swing again.
From location E, you should grapple up to the left lamppost, and then connect with the grey block above and to the left and start swinging again. Before you reach the door to the boss, there are two more grey blocks, in short succession. Depending on how long your grappling hook connection is with the first block, you may be able to omit the second block, but you'll definitely need the third block in order to make it to the door at location F.
Boss
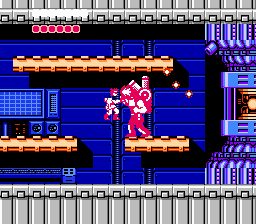
The boss of this room is identical to the boss in Template:~. The only additional difficulty will be the turret on the ceiling near the core that fires during the battle. If you came in to the area with the Rocket Launcher, you can use the same exact strategy as before and clear the area easily. If you came in with the 3-Way gun, it may be a bit more of a struggle. For one thing, despite the way it looks, you can hit neither the core or the cyborg with the 3-Way gun while standing beneath them, so you are forced to attack them from the middle level. Depending on how much health you have, you may wish to take a brute force approach against the cyborg and spam him with shots at point blank until he is destroyed, hoping that he takes damage faster than you do. You will only be able to hit him like this if you are standing extremely close to him. Otherwise, you can try to hit and and destroy him slowly, or try to ignore him and hit the core as much as possible before he shoves you off the platform.
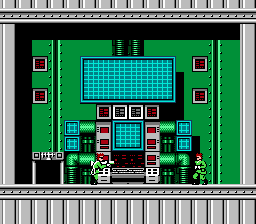
Reward: Your reward for completing this stage is simply the rescue of Super Joe. After you save him, he reveals important information concerning the enemy's activities and motives. They are building a giant laser, and they are trying to resurrect the person with key knowledge required to complete the project. (In the Japanese version, that person is Adolf Hitler.) Super Joe is going to travel to Template:~ in an effort to stop the enemy. He tells you that he has given a Machine Gun to someone named "Destroyer-3" in Template:~. That should be your next destination.
Famicom Differences
- The bottom of the open area below location E is filled with land mines. Luckily, they only deal one damage.
- One would wonder that there is no communication room in this stage. In Famicom version however, there is a hidden room at the highest tower of part B if you press
 where the door would be. With Communicator γ (Blue), you will get the following info:
- Communicate: "Try to knock the wall on the right." (You will get 1-Up by doing so with your grappling hook.)
- Wire-tapping: "Try to press A and B at the same time." (You will get the ability to summon a spinning orb, just like getting a POW pickup, but with unlimited charges and can be used in other areas.)
- Notice that, even if you have wrong communicator, you can still get the 1-Up without communicating, and as long as you try to wire-tapping in this room, you will get the ability.
- Joe will refer to the man with the machinegun as Schwarzenegger (シュワルツァネッガー Shuwarutsaneggaa?), a reference to Arnold Schwarzenegger.
