|
|
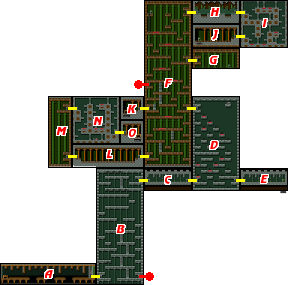
Section A

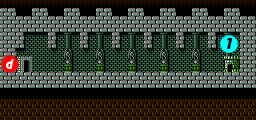
As you enter Area 2, you will be attacked by several worm-like enemies which cling to the ceiling, and drop down on SOPHIA whenever you drive beneath them. If you've picked up a few Homing Missiles from Template:~, you can use them to remove some of the worms as they drop to the floor. You'll also encounter a dome-like enemy which will disconnect from a wall and charge at you. As with the first section of Area 1, be careful not to drop off the platform and into the spikes below or they will cause tremendous damage to SOPHIA.
Section B
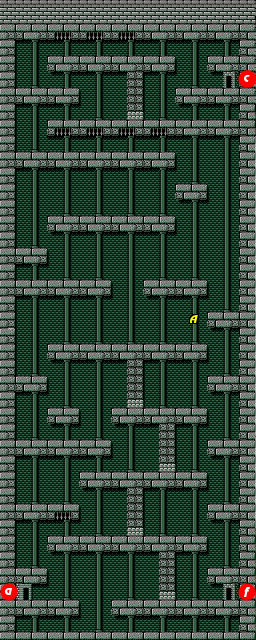
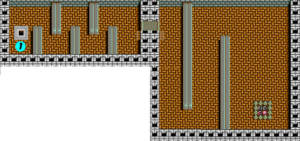
Your goal is to make it from the lower left corner, all the way up to the upper right corner, where you can advance to section C. You will encounter quite a few new enemies, from the ones that fly around near the entrance and bounce between the walls, to the round orbs that home in on you and the insects that hover around. Naturally, you'll want to avoid jumping into the spikes that appear in the ceilings.
Take note that the bottom of a few walls are composed of a different type of block. These blocks can be destroyed with the Crusher Beam, the SOPHIA upgrade that you will earn by defeating the boss of this area. Breaking these blocks can provide you with time-saving shortcuts. Since you haven't obtained the Crusher Beam yet, you're forced to go the long way through this area at least once.
Once you reach the mid-way point, you'll have to continue your climb by driving from one side to the other in order to find the platforms that will elevate you up to the next level. Use Homing Missiles on any worms you meet, but don't fire them without jumping. Homing Missiles that are fired at worms that crawl on the same platform as SOPHIA are never able to hit their target.
- Noted locations
- A: At this point, you could potentially drop down and reach section F. However, if you haven't collected the Crusher Beam from the boss of this area, it will do you no good. You will be trapped behind a wall that you can't destroy. In fact, if you had the Crusher Beam, you wouldn't need to climb up to point A at all, you could just destroy the wall opposite the entrance.
Section C
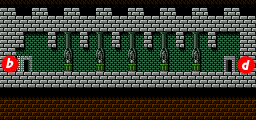
As you cross this small hallway, three skull-like enemies will appear from the right. Each one will drop a bomb as SOPHIA passes beneath them. The first one is difficult to avoid since it appears right as you arrive, but the other two can be destroyed if you attack to the right proactively before they appear on the screen.
Section D
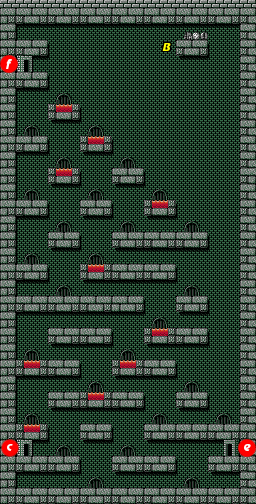
Like Section B, you must make it from the bottom of this room to the top. Unlike section B, your goal is on the left side. This room mainly contains two things: worms and lava pits. Keep SOPHIA out of the lava pits at all costs. Avoiding the worms is a little harder. They typically appear on higher platforms, and drop down on you. Homing Missiles are very effective at striking enemies on the other side of walls that are above you.
As you get higher up, you'll see a different type of orb enemy that resembles a ladybug, which patrols back and forth, occasionally "rolling" up or down to another height before continuing their patrol. These enemies are easy to destroy.
In addition to reaching section F above, you can also travel to section E, but that section leads to an interior at a dead-end.
- Noted locations
- B: There is a small cache of weapon ammunition for SOPHIA up here, but you won't be able to claim it until you have the Hover upgrade. Alternatively, the use of both Wall upgrades will allow you to collect it, but it will be much later in the game before you find those upgrades.
Section E
Section E is an empty hallway that leads to the first interior entrance in the area. The interior contains a long and winding maze containing teleporting enemies and floating eyeballs. At the very end, it's possible to find some good gun and health power-ups, in addition to a hidden Homing Missile cache, but the game does not always allow the power ups to appear if there are too many enemies present on the screen. You can safely ignore this interior.
Section F

No matter which way you go, it seems that all paths lead to section F. This is the largest room in the entire area. If this is your first visit through Area 2, then you will want to continue the trend of heading to the very top of the area. There, you will find another interior on the left side, and a passage to section H, which will lead you on your way to the area boss.
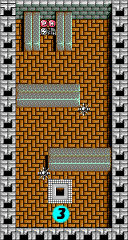
This section is quite dangerous, featuring a number of different enemies. But the real danger comes from the lava pits and the mines that are placed close to them. If you can't jump up and shoot the mines with SOPHIA's cannon from a lower level, you'll need to hop out of SOPHIA and blast them away. You need to be even more careful when travelling down from the top to the bottom, as you can't always see where the lava pits or mines are below you until it's too late.
Section F leads to a large number of other locations, including a few that won't help you much right now. Just above the entrance from section D is a passage to section G which contains interior. There's another interior found at the top of this section, containing a small room where you can obtain a number of weapons ammunition for SOPHIA, but no extra gun power for Jason.
- Noted locations
- C: If you have obtained the Crusher Beam from the boss of this area, then you will be able to break down the blocks here, and create a nice short-cut that leads back to section B, and on to the warp back to Template:~.
- D: However, you should not be in such a rush to return to the entrance since your next destination lies beyond these blocks. Break them down with the Crusher Beam, and you will find the entrance to section K, which contains the warp to Template:~.
- E: Far later in the game, you will want to come down here to explore the passage to section L. Beyond that hallway, you'll find a tall pit, but no amount of Hover will get you to the top. You'll need to come back here when you obtain the Wall 1 upgrade from Template:~. Then you'll be able to climb the wall and continue on to find the warp to Template:~.
Section G
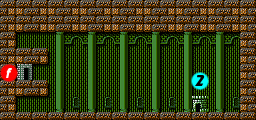
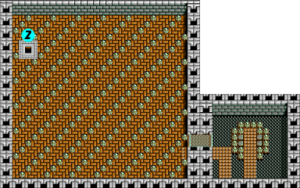
This section contains two ships which hover slowly above the ground, firing at SOPHIA as they go, and three mines on the ground. On the right side, you will find the entrance to the second interior. This is actually a great interior to investigate. Make your way from the upper left corner of the entrance, to the passage in the lower right corner. Inside, you'll find a room with a number of useful upgrades, including many gun power-ups (don't forget the shoot the blocks). In fact, if you shoot many of the blocks in the first room, you can find enough gun power to maximize your gun level in one visit.
Section H
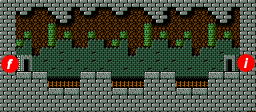
Three fast spinning orbs will track down your location and attempt to crash into you. Do your best to destroy them before they can touch you, and advance to section I.
Section I
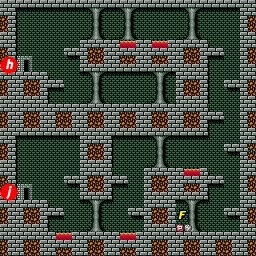
When you arrive, follow the top path up and around the outside of this room. Watch out for the flying enemies, and the ladybug-like orbs. Use weapons like Homing Missiles or Thunder Break to destroy enemies that are below you. Avoid the lava, and make your way to the entrance to section J.
- Noted locations
- F: Speaking of Thunder Break, you can stock up on this downward weapon here, as well as refuel half of SOPHIA's energy tank.
Section J
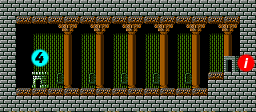
This empty hallway is all that greets you before you reach the interior where the area boss awaits.
Area 2 Boss: Crabullus
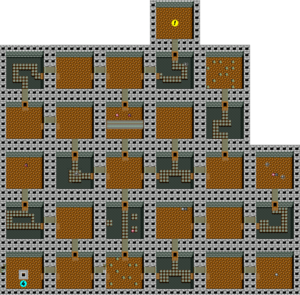
The fourth and final interior of Area 2 is a collection of rooms arranged in a grid, which you must explore in order to find the boss. You begin in the lower left corner. This guide will take you through the interior in the shortest path possible. However, if you enter with no gun power, extra notes are provided to help you find ways to max out your gun, which is highly recommended before you face the boss.
- From the entrance, head right. Be prepared to take out the two floating eyeballs that are waiting here.
- To improve your gun: Go up. Destroy the three teleporting enemies and go left. Destroy the teleporting enemy in this room, carefully walk on the path and avoid the spikes. Eyeballs may or may not appear as you traverse this room. Go up, and destroy the teleporting enemy guarding a flashing gun power-up. Then return down, right, and down.
- Go right and destroy the teleporting enemy. If you destroy all of the blocks in here, you'll find a health power-up, a flashing health power-up, and a gun power-up.
- Go up, and you can ignore the four-way cannon as long as you time your movement up the path between the sideways bullets.
- Continue up, and watch out for the two eyeballs waiting for you in the room. Then head left. Carefully remove the four-way cannon. It may drop a gun power-up when defeated.
- Go up, and watch out for the three teleporting enemies. Destroy them if you are able, or ignore them and continue to the left. Destroy the teleporting enemy in this room.
- Go up, and quickly move slightly to the left so that you don't get shot by the four-way cannon. Destroy it and the eyeball, and follow the path around to the right.
- In the next room, destroy the three eyeballs and continue right. Destroy the four eyeballs that await you in this room.
- To improve your gun: Go down, and collect the flashing gun and health power-ups, and then return to the room above. Your gun should be at maximum power now.
- Head to the right, carefully destroy the four-way cannon, and advance through the door at the top.

You will find the boss in this room. After it fully appears, it will roam left and right while flailing its long tentacles at you. You are safe from the tentacles as long as you remain on the bottom of the screen. Unfortunately, that won't give you a very good chance to hit the boss' only weak point, the mouth, unless you have a fully powered up gun which can pass right through the creature and strike its mouth. If you do, remain at the bottom of the screen, and fire upwards as quickly as you can. It will take a little while, but you should be able to destroy the boss without ever putting Jason at risk. The gun will even destroy the small bullets fired by the boss. If you don't have a fully powered gun, you're going to have to take more of a chance. Getting closer and pumping the mouth of the boss with grenades is a dangerous, but effective way to eliminate the boss quickly. You'll have to remain in step with the boss, correcting your position before facing up again and tossing more grenades until they are no long striking the boss. Either way, once you defeat the boss, you will obtain the Crusher Beam, allowing you to destroy the blocks that line the bottom of certain walls throughout the area.
Section K
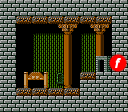
Now that you have the crusher beam, you can head to the area marked by the small yellow D on the map of section F, and destroy the wall. This will allow SOPHIA to pass through the passage, and find this small room, which contains the warp to Template:~.
Section L

You won't need to explore this long empty hallway until much later in the game. This leads to the bottom of the pit in section M, but without the wall 1 upgrade, you won't be able to climb it.
Section M
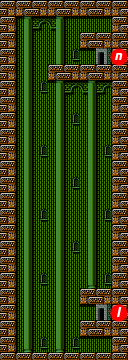
As stated above, you won't be able to make very much progress in here without the Wall 1 upgrade. Even a fully loaded Hover meter won't help you reach the top of this section. Once you have the Wall 1 upgrade, you'll be able to climb up the left wall, and reach the platform at the very top that leads to the passage to section N. However, if you get shot along the way, you will fall down to the bottom, so try to remove any threats. When you reach the ceiling, and SOPHIA starts to fall, remember to push to the right in order to land on the ledge.
Section N
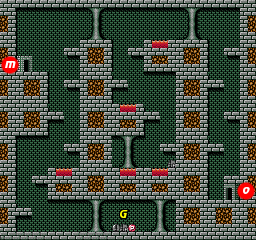
If you're concerned with time, don't hesitate and take the upper path to the far right side of the room. Then head down to reach the passage that leads to section O. However, if you're willing to explore, it might be worth your while to visit the lower path first. Whatever you do, avoid dropping down the middle section of the room as it offers one Homing Missile cache in exchange for a lot of trouble. Watch out for the red worm that can hop out of pits and chase you down as you approach the right.
- Noted locations
- G: If you drop down to the bottom of this room, you will find some weapons ammunition and a flashing power capsule. Grabbing these is a lot safer than trying to collect the Homing Missile capsule just above by the two lava pits.
Section O
If you made it this far, then you're ready to tackle Template:~. Drive SOPHIA through the warp to explore a new fiery area.