Blaster Master/Area 5
|
|
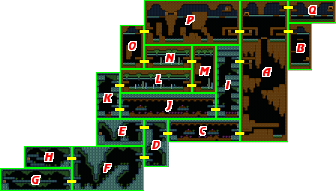
Section A[edit]
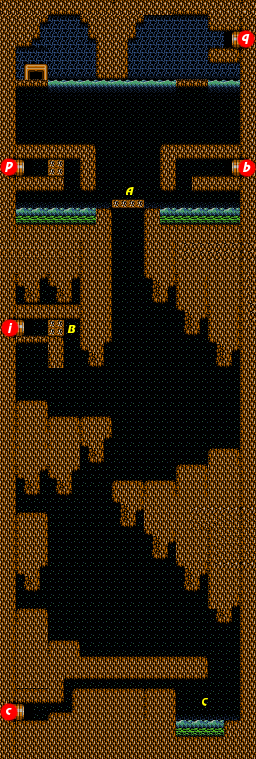
Welcome to the watery world of Area 5. After you arrive, you'll have to jump into the water where you'll have no choice but to sink like a stone. Not even your Hover engine will help you ascend. This section serves as the entrance to a number of locations throughout the area. But in order to explore most of them, you'll need to reach the bottom and swim through the lower portion of the stage to reach the area boss, one of the toughest in the game. Once you defeat the boss, you'll obtain the Dive Engine which allows SOPHIA to swim through the water like a fish.
This section is broken up into three part. You can stop yourself in the upper region before shooting out the blocks that allow you to access the middle region. Once you drop down to the middle region, you'll have no choice but to continue dropping all the way down to lowest portion. From there, you'll have to hop out of SOPHIA and swim the rest of the way in order to find the boss and the Dive Engine. Pay special attention to the three locations specified below.
- Noted locations
- A: Before you continue dropping to the bottom of this section, you will land on top of this small bridge. The blocks that make up the bridge can be shot and destroyed, but don't be in such a hurry. The boss of this area is quite difficult to defeat without a fully powered gun, and there happens to be an interior nearby that you can explore to increase your gun meter. Hop out of SOPHIA and swim over to section B to find that interior before destroying the bridge and dropping down.
- B: Once you drop below the bridge, it has a bad habit of rebuilding itself when you return. And you won't be able to stand on any land and fire SOPHIA's gun up at the blocks. Your only hope and returning to the top where you can advance to Area 6, or return to Area 4, is to pass through this tunnel to section I. However, you'll have no chance of doing that unless you obtain the Dive Engine first.
- C: This is the end of the line as far as SOPHIA goes. Once she sinks to the floor down here, no amount of jumping will get you anywhere. From this point on, you'll have to exit SOPHIA and swim along the tunnel to reach the passage to section C. Be very careful as there is an unfortunate bug that can get you stuck inside the wall when you swim through this tunnel. The main instigator of this bug tends to be taking damage while touching the edges of the tunnel. To avoid having this problem, stand still while shooting enemies, even if it means taking damage.
Section B[edit]
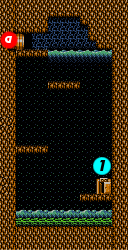
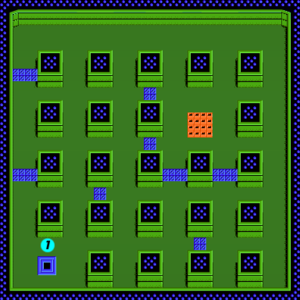
After swimming up to the tunnel that leads to this section, drop down, and swim past the snails that scuttle your way whenever Jason lines up with them. Enter the door to the interior at the bottom of the section. You begin in the lower left corner of the room. There are a cluster of blocks near the upper right corner. There are many pathways to reach the cluster, but a number of them are trapped with spikes that will damage Jason if he walks over them. There is, however, one very easy and safe way to cut across the interior: walk along the bottom. Jason can squeeze between the bottom wall and the squares, creating an enemy free path for him to take. You'll still need to worry about the few robots that approach you as you walk up the right side.
Once you reach the cluster of blocks, you may notice that they are guarded by four motion sensing robots. If you shoot out the blocks that they are locked in from the wrong direction, they will dash out and hit you. However, you can avoid that problem altogether by using grenades to take them out before you destroy the blocks. Once all four robots are destroyed, start shooting the blocks to collect all of the power up capsules they contain, including two gun capsules, one gray and one flashing for a total of five gun meters. Leave and return to this interior as much as necessary until you can exit with a fully powered gun. Then swim back up to the top of the section, return to section A, and hop back in SOPHIA to proceed.
Section C[edit]

You must now begin your swim to the boss without the safety of SOPHIA. Though less powerful, Jason is far more maneuverable in the water than SOPHIA, for the time being. The two threats that Jason must face in this section represent most of the threats that Jason will encounter throughout his time separated from SOPHIA. The small swimming enemies try to swim close to Jason and shoot at him. The best strategy is to shoot at them and remove them before they shoot at you. The larger snail-like enemies race toward Jason whenever he lines up with them. The snails are easier to avoid if you swim near the ceilings. Swim all the way to the left to reach section D.
Section D[edit]
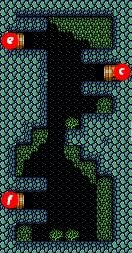
This section is a vertical drop that you must swim down. Small swimming enemies will try to intercept you along the way. There are two passages, one at the top, and one at the bottom. The one at the bottom is the one that continues on the path to the area boss. The one at the top leads to a dead-end with an interior that is generally not worth exploring. Swim down to the bottom of this short section and move on to section F.
Section E[edit]
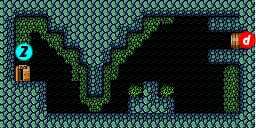
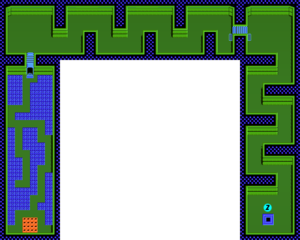
This small section, and the interior it contains, is generally more trouble than it's worth. You'll have to swim through a low tunnel that forces you to swim by a group of snails that will rush toward you as you do. Once you reach the interior, you'll find a long winding tunnel that ultimately leads to a cluster of blocks at the very end, none of which contain gun capsules. The place is riddled with motion-sensing lasers that patrol small hallways. Even if they do drop gun capsules (which isn't all of the time), you're more likely to lose gun power than to gain any. The portion leading up to the blocks is riddled with spikes. You're far better off avoiding this interior and the section altogether.
Section F[edit]
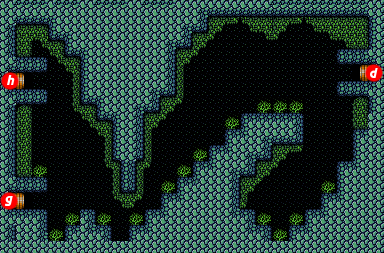
This is a rather large area that you will have to swim through. When you arrive, you are greeted by two swimming enemies. Take them out before advancing. Don't bother dropping down from the entrance, as that only leads to a dead-end. Instead, start off by swimming to the left. As you do, you may notice a large aquatic robot swimming back and forth. These are best left ignored; they won't veer from their path, and they take too many shots to destroy. Stay beneath them as you make your way to the left. After a short distance, a wall will force you to drop to the floor. As you do, you will trigger several snails to dart off in your direction. Do you best to avoid them, but continue to the bottom. As soon as you are able to, begin swimming up the other side of the wall. From this side, there are two passages for you to take. The lower passage to section G is very much like section E; it leads to a dead-end with an interior that is not worth investigating. Instead, you should swim up to the top to reach section H, which instead contains an entrance to a much more important interior.
Section G[edit]

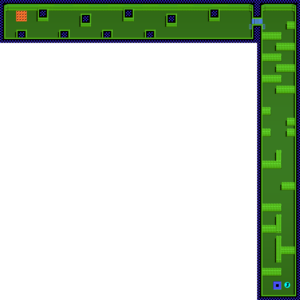
This section contains a new type of enemy. They appear to be gray boulders, but they reveal their true nature when Jason gets close. A hatch opens up, and explosives are propelled from the boulders. They are immobile except when they detach from the ceiling. This section is divided into two parts down the middle of the screen. If you swim along the top part, you'll reach a dead-end. If you swim along the bottom part, you'll find an entrance to another interior. This interior, like the one found in section E, is quite long and quite dangerous. They payoff at the end is much better, as the cluster of blocks contains a large amount of ammunition for SOPHIA's special weapons, and it even has a flashing gun capsule. But once again, you are more likely to lose gun power than gain it, and that's too heavy a cost before you take on this area's boss. If you feel compelled to explore this interior at all, it is best to do so after you have defeated the boss, and are on your way back to SOPHIA with the Dive Engine.
Section H[edit]
Only one small swimming enemy and a large fish-robot occupy this section. Swim to the left, and stay closer to the ground when you reach an outcropping to reach the entrance to the fourth interior.
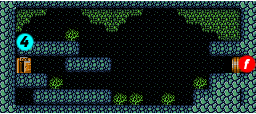
Area 5 Boss: Lobsgator[edit]
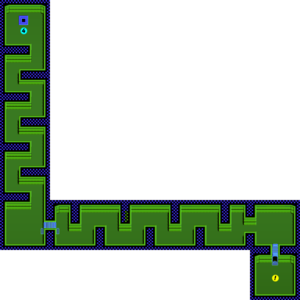
As soon as you enter this interior, you will be attacked by three small red robots. It is essential that you avoid taking damage and keep your guns at maximum power. Do whatever you need to do to put some distance between you and the robots, and destroy them as quickly as possible. Then start making your way down to the bottom of the first portion. Whenever you travel down a hallway, stick to the middle in order to avoid triggering any motion sensing robots that wait below. A few more small robots will attack, including two that wait just outside the passage found at the very bottom. When you're ready, walk through the passage, but be aware that there is a laser motion detector on the other side. When you arrive, a small robot will be approaching you, and the laser will be heading to the right. Walk straight up in order to get above the laser, then attack both enemies from the top. Take out the robot on the other side of the wall as well. More robots will attack as you make your way to the right. Eventually, you will encounter another laser near the end. Remove it safely, and make your way to the final room on the right. In addition to another robot, there will be two laser motion sensors near the middle of the room. Shoot them both before you proceed through the passage on the bottom. Hopefully, you made it here with full gun power. Step through the passage to encounter the boss.
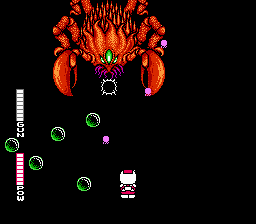
The boss, Lobsgator (ロブスガータ?), is surrounded by a tough exoskeleton. Like the boss from the second area, the only vulnerable point on him is the small set of eyes in the middle. Lobsgator walks back and forth along the top of the screen, and only has one form of attack: a spread of bubbles. These bubbles come out in three levels of intensity. At first, they start out light, two bubbles that come out at a regular pace to the left, and to the right. After Lobsgator takes some damage, it will speed up the pace and add a downward bubble in the middle, alternating from left to right, and from right to left. When Lobsgator is close to dying, the intensity of the bubbles will reach its maximum, releasing a huge spread at various angles that pauses briefly. These bubbles will stop all but the most powerful level of gun shots. That's why it's so important to reach this boss with full gun power. You could try to take the boss out with grenades, but unless your good at positioning yourself in just the right place, you're more likely to die before you kill Lobsgator. If you have maximum gun power, you can simply stand at the bottom of the screen, and shoot up at Lobsgator, protecting yourself from the bubbles while still damaging it, until it is defeated. Once you do, you'll earn the Dive engine, and be able to return to SOPHIA in order to swim through the water.
Section I[edit]
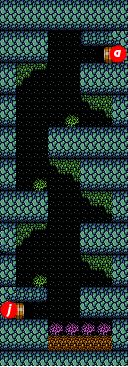
Once you obtain the Dive Engine, you'll need to swim back to SOPHIA in section A, and then drive it to noted location B on the map. When you blast through the wall, the passage takes you to section I. Once here, you must make your way down to the bottom to find the passage that connects with section J. Many small swimming enemies will attempt to engage you here, as well as a few snail-like enemies. Once you enter section J, you'll be on a non-stop one-way tour through the area until you finally reach section P.
Section J[edit]

You'll want to stay above the fray in order to keep the snails at the bottom tranquil. However, in doing so, you are likely to awaken the orbs which cling to the ceiling. Watch out for when they push off the ceiling to attack.
Section K[edit]
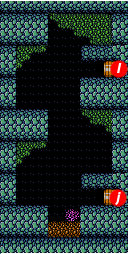
Another group of small swimming enemies try to ambush you here when you enter. Take out the three that await you, then prepare to fight off more as you move up.
Section L[edit]
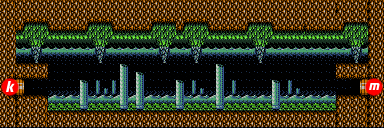
To make your way through this section, you must swim over the columns, and under the stalactites. As you do, small swimming enemies and large robot fish will try to hinder your escape. Be careful when firing your weapon while you try to swim downward; doing so is likely to make you release SOPHIA's currently selected special weapon.
Section M[edit]
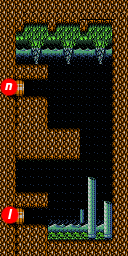
The columns at the bottom and the stalactites at the top shouldn't slow you down as you swim around the bluff and make your way to the next passage entrance at the top.
Section N[edit]
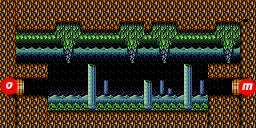
This section will be even emptier than section L below. Make your way to the left to reach section O.
Section O[edit]
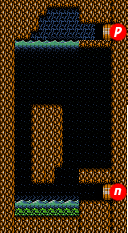
The island in the middle of this section gives you a choice between the left or right, but it's not much of a choice; small swimming enemies occupy both sides, and a snail will give chase once SOPHIA reaches the top. Watch out for more swimming enemies when you've above the island, and hop out of the water to reach the passage that leads to section P.
Section P[edit]
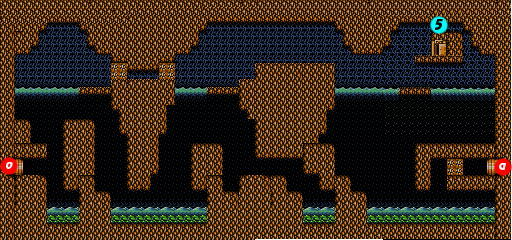
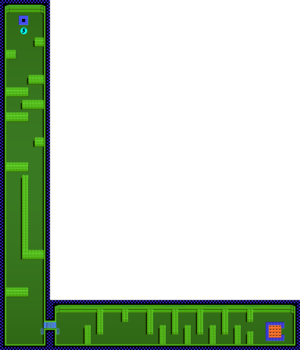
There are a couple of different ways for you to explore this larger section. You could take the high road by hopping out of the water and shooting your way through the destroyable blocks to reach the right side. Or you can swim under the rocky terrain instead. Either way, make your way to the right where there's one more interior for you to explore near the top if you like. This interior is extremely similar to the fourth interior where you fought the area boss, punctuated by a few more areas of openness. Before you reach the bottom of the first portion, a wall will divide the path. The right side leads to a flashing gun and a flashing power capsule. The left way leads further in, where you can find a cache of weapons for SOPHIA, as well as more gun power. When you're ready to continue on, head through the passage in the lower right corner of section P to return to section A. Then swim over to the opposite side of where you entered the area, and hop out of the water to reach section Q.
Section Q[edit]
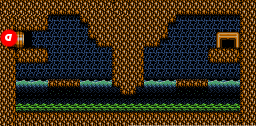
Once you enter, drop down to the shallow pool of water below, and make your way over to the right side. Shoot the boulder on the right platform, and then jump up to the warp that leads to Area 6.