
Putting together puzzle pieces from this world will cause a collectible to be lost forever.
See the Stars section for more information.
 3-1 The Pit
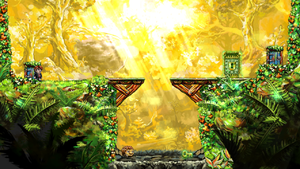
This is an introduction level to the new green glow feature. It contains no puzzle pieces.
Jump into the pit and get the green-glowing key from the monstar. Rewind time, jump over the pit and open the gate. Continue through the door to the next level.
 3-2 There and Back Again
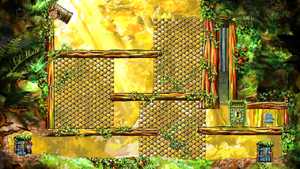
At this level you'll spot a green-glowing key at the top of the screen and a locked gate with a puzzle piece behind it on the right hand side. Climb to the top while dodging the monstars and grab the key. You'll notice that a big metal block has sealed off the path to the locked gate. As green-glowing objects are not affected by any time manipulation, rewinding time will not make Tim drop the key he's picked up. So rewind time until the path is open again. Go and open the gate and grab ![]() Puzzle Piece 3-2-1. You're done with this level so continue through the door.
Puzzle Piece 3-2-1. You're done with this level so continue through the door.
 3-3 Phase
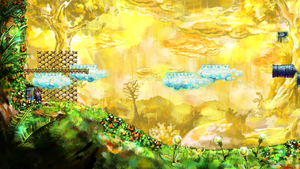
Begin the level by climbing up the trellis. There are two cannons firing two different streams of clouds; a regular one and a green-glowing one. By pausing (start holding ![]() and quickly press
and quickly press ![]() to set the speed of time to 0x) or rewinding time you can bring the green-glowing clouds (not affected by time manipulation) in phase right between the non-glowing clouds, so that they're evenly spaced, alternating between each other. Now there should be a small enough gap between each cloud for you to jump across to
to set the speed of time to 0x) or rewinding time you can bring the green-glowing clouds (not affected by time manipulation) in phase right between the non-glowing clouds, so that they're evenly spaced, alternating between each other. Now there should be a small enough gap between each cloud for you to jump across to ![]() Puzzle Piece 3-3-1.
Puzzle Piece 3-3-1.
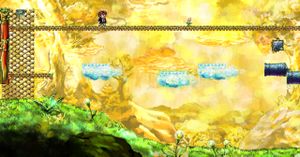
Jump down and continue right. You should reach more treillage to climb soon enough. Climb up onto the lower platform next to the clouds. The way to get the second puzzle piece is similar to the first, although there are fewer green-glowing clouds. So this time around you'll have to jump onto a regular cloud and pause time, wait for a green-glowing cloud to catch up, jump onto it, and jump onto the next regular one. Pause time again and wait for a green-glowing one, rinse and repeat until you get all the way to ![]() Puzzle Piece 3-3-2.
Puzzle Piece 3-3-2.
 3-4 The Ground Beneath Her Feet
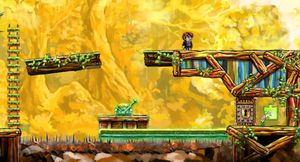
Starting this level you'll watch a monstar fall to his death. Just to the left of the door through which you entered is a key, but it's out of reach. Move up the ladder and jump down to the green-glowing lever. Operating it will make and equally glowing platform move. Pull the lever and let the platform move to the left. Rewind time to the beginning of entering the level and let time run again. The monstar who fell to his demise before will land on the platform this time. Let him go grab the key from the small crevice and steal it from him when he gets out again. Flip the lever to make the gate reachable again, go open it and grab your ![]() Puzzle Piece 3-4-1.
Puzzle Piece 3-4-1.
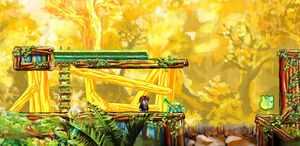
Moving on, you'll find a ladder blocked off by a metal platform. Go flip the lever next to the fire pit. The platform will move and open the path up the ladder. Climb on up only to find your path to the piece being blocked instead. Lucky for us, it's a green-glowing platform. Go to the spot on the platform directly above the puzzle piece and wait there for a wee bit. Now, go back down the ladder and flip the lever again. Start rewinding time until you are back at the point directly above the puzzle piece. Stop rewinding and fall down and collect ![]() Puzzle Piece 3-4-2. Rewind back to the lever and flip it yet again, and continue over the platform toward the exit.
Puzzle Piece 3-4-2. Rewind back to the lever and flip it yet again, and continue over the platform toward the exit.
 3-5 Tight Channels
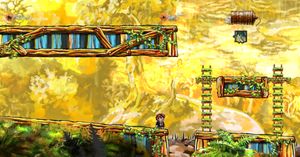
When you enter this level there won't be much to do other than to move right, so do just that. You'll soon encounter a bunny-like creature; a mimic. It will attack when you're getting close to it, so be ready to jump on it. Continue your way right until you reach a ladder, disposing of any more mimics you find popping up from the ground. Climb up the ladder. You'll not be able to reach the puzzle piece above you; you'll have to find something to give you a boost. See a cannon firing fireballs? Jump down the left side of the platform you're on and follow the path of the the projectiles. See the monstars being fired straight into the path of the fireballs? You can use one of them to reach the puzzle piece. Rewind time carefully and guide him along between the fireballs. When he falls to the platform under the piece, be quick to stop rewinding time and use him to reach ![]() Puzzle Piece 3-5-2. Continue on right toward the next piece of the level.
Puzzle Piece 3-5-2. Continue on right toward the next piece of the level.
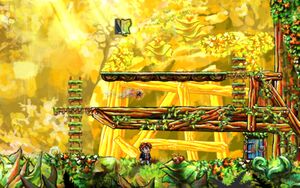
You'll soon get attacked by a whole nest of mimics. Jump over the claw and hopefully it'll snatch most of them. Kill of any stragglers and move on. A new nest will pop up, dispose of them if you want to or move on. Drop down in front of the cannon and continue on, jumping over any fireball that might hit you. This is the same stream of fireballs which block off access to the puzzle piece at the end of the level. When you get to the next fireball cannon, use the rewind time feature and try to get the fireballs from the two cannons to hit each other mid-air, destroying themselves. Go right to get to the ladder leading up to the second puzzle piece. Every other fireball will be destroyed on its way here, giving you just enough of a gap between the projectiles to be able to sprint between ladders and climb all the way to ![]() Puzzle Piece 3-5-1 up top. Now jump down and move through the door below.
Puzzle Piece 3-5-1 up top. Now jump down and move through the door below.
 3-6 Irreversible
As the name of this level implies, you might end up deadlocking your road to some of the pieces on this level. If you find yourself in such a situation, simply exit the level through any of its doors and go back again, or exit the world via the pause menu and enter the level again.
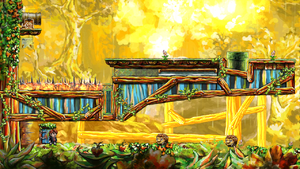
The very first puzzle piece of the level—visible as soon as you enter—is actually really simple to get, albeit perhaps requires a few tries anyway. The trick is simply to not rewind time until the horizontally moving platform has moved past the vertically moving, green-glowing barrier. The simplest way to do this is probably to wait it out on the ground level. Jump over or kill the two monstars and dispose of the mimic attacking you here. If any one of them kill you, rewinding time might break the puzzle, and you'll have to reset the level. When the platform's gone past the green-glowing barrier, climb up the ladder and kill the mimics and monstars in your way, jump down onto the platform and get ![]() Puzzle Piece 3-6-2.
Puzzle Piece 3-6-2.
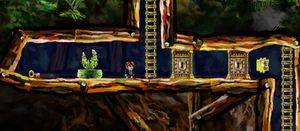
Further into the level you will find a ladder leading down into a cavern underground. The second puzzle piece is found here. It will be locked behind two gates this time, but there is only one key. Jump over the claw and grab the key. Jump on back to the gates and open the first, green-glowing one. Rewind time to the point the key is whole again (the glowing gate will stay open) and use it on the second gate. Now, you've opened two gates with one key and you can grab ![]() Puzzle Piece 3-6-1 as your reward.
Puzzle Piece 3-6-1 as your reward.
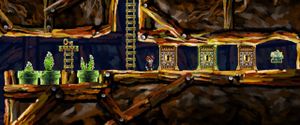
Continue down the ladder found next to the second piece. To your far right you'll catch a glimpse of the third and final piece of this level. The final puzzle piece is a tricky one; it requires you to open three gates with only two keys. You will probably spot a key almost as soon as you spot the piece, but resist your temptation to pick it up. Instead, jump over the three claws and hop down the shaft to the left. Here you'll find a green-glowing key, There's no way to climb back up, so rewind time to get back up again. Use the glowing key to open the first gate. Go get the other key you skipped before and open the green-glowing gate with it. It'll break, but don't worry. Rewind time and it'll be restored, and the second gate will remain open. Use the restored key to open the last gate and reap the spoils of ![]() Puzzle Piece 3-6-3.
Puzzle Piece 3-6-3.
Climb up the ladders again. When up above ground again, move to the right exterminating all the mimics attacking you. After a bit you will find a puzzle canvas in which to connect the puzzle pieces you've collected into a painting. Remember that if you want to collect that secret, hidden collectible, you may not connect any pieces just yet. If you do, the secret will be irreversibly lost forever. So continue onward through the exit door.
 3-7 Lair
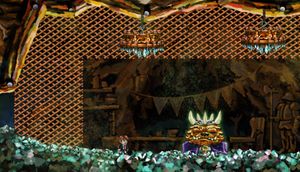
As soon as you enter the level you will see a monstar with a key fall down a pit on some spikes. Follow him down the pit and land on the key. Rewind time and you'll bring the key back up with you. Jump over the pit and open the gate. Move along and you'll find the very first boss of the game – sleeping. Wake him up by getting close to him or climbing up to the ceiling and dropping down a chandelier. Now when he's awake, rewind time (if you dropped a chandelier) and try to drop the chandelier on his head. You need to hit him five times for him to be out cold and drop the key around his neck. You only have two chandeliers to spare, so rewind time to get them back when you've scored a hit or if you missed him.
When he's down for the count, grab the key from him and make your way through the gate on the right. There are no puzzle pieces on this level, so continue through the exit door.
 3-8 A Tingling
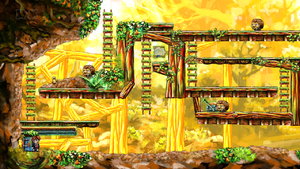
Starting this level, you will probably notice the first puzzle piece right away. This piece can be a bit tricky to get to as it requires both planning ahead and being fast on the buttons. Begin by climbing up the only ladder leading up the structure. It might be beneficial to go down and get rid of the monstar roaming around the lever already now, but that isn't a must for getting the piece (don't flip the lever, though.) Whether you leave him be or not continue up to the top of the structure and move along left, disposing of all the monstars in your way. Grab the key if you have the opportunity; It's needed for accessing the next piece.
When you're at the platform directly above the green-glowing platform, walk up to the edge of it and wait for a bit. Backtrack the same way you came, walking all the way to the lever. Be ready on the rewind and flip the lever, rewind quickly to the point of being on the edge of the platform. Quickly jump onto the moving platform and grab hold of the ladder you'll pass by, climb up and dislodge onto ![]() Puzzle Piece 3-8-1.
Puzzle Piece 3-8-1.
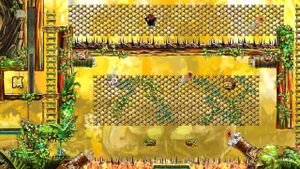
Since the second puzzle piece introduce a new mechanic of the green glow, it might be a bit hard to figure out, but this part will guide you through.
As soon as you enter the level, a barrier will begin to descend in front of the second puzzle piece. Being able to grab the key to the gate separating you from the second part of the level (where the piece is located) before the barrier has fallen all the way down is impossible. So, what you'll have to do is: If you haven't yet taken the key from the monstar, do so now and continue to open the gate. After unlocking the gate, ignore the piece for a bit and move on over the trellis by the top of the ladder. Be careful of the fireballs.
When reaching the other side, drop down and enter the area spewing with enemies and fireballs. Make your way to the other side, carefully avoiding any danger. There, you will find a hard-to-spot lever in the foliage. Flip it and a platform will rise from the fire. Rewind time a bit and get down on it. The bubbling green glow of the platform will transfer over to Tim. Now, if you rewind time, Tim will be unaffected by any time manipulation. Use this to your advantage and rewind time all the way back to when the barrier blocking the puzzle piece was at its highest peak; the start of the level. Start time again and make your way back to the place of ![]() Puzzle Piece 3-8-2. If you were quick enough you should be able to run in and grab it before the barrier drops all the way down again. Having grabbed it, move along to the right and reach the end of the level.
Puzzle Piece 3-8-2. If you were quick enough you should be able to run in and grab it before the barrier drops all the way down again. Having grabbed it, move along to the right and reach the end of the level.
