Braid/World 5: Time and Decision

 5-1 The Pit[edit]

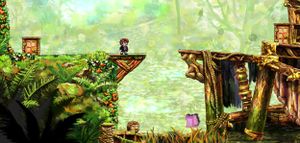
A new world, a new game mechanic. This time The Pit will give us a puzzle piece as a reward. Jump down the pit and grab ![]() Puzzle Piece 5-1-1, then rewind time to get back up again. Unfortunately, the puzzle piece is not a green-glowing one, so you will lose it when you rewind time. However, notice how a shadow image of Tim now jump down and grabs the piece for you. Yes, purple-glowing objects—like this puzzle piece—can be interacted with by Tim's shadow, who appear whenever you rewind time in this world. The shadow will mimic the corporal Tim's last movements and actions from before rewinding time. There's nothing else to do at this level, so continue out the door.
Puzzle Piece 5-1-1, then rewind time to get back up again. Unfortunately, the puzzle piece is not a green-glowing one, so you will lose it when you rewind time. However, notice how a shadow image of Tim now jump down and grabs the piece for you. Yes, purple-glowing objects—like this puzzle piece—can be interacted with by Tim's shadow, who appear whenever you rewind time in this world. The shadow will mimic the corporal Tim's last movements and actions from before rewinding time. There's nothing else to do at this level, so continue out the door.
 5-2 So Distant[edit]

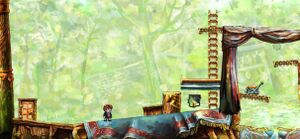
The first puzzle piece you will see as soon as you enter the level, but it's sealed off by a barrier. Fortunately, there's a lever to operate it nearby. Climb up to it and flip it. The barrier will rise but as soon as it reaches its apex, it falls down again. You need to use Tim's shadow to help you. Start by going over to the barrier and wait beside it for a bit. Then move over to the lever and operate it; the barrier will rise and fall. Now, rewind time to the point where you were waiting beside the barrier. When you stop rewinding a shadow clone of Tim will move on over to the lever—just like Tim did before rewinding time—and flip it. Run left and you should be able to just squeeze through under the barrier before it falls down again. Take ![]() Puzzle Piece 5-2-1 and move on.
Puzzle Piece 5-2-1 and move on.

The next puzzle piece will also be locked behind a barrier, and this barrier is too operated by a nearby lever. A monstar patrol the area, and you'll need him to reach the platforms above. Jump on him and bounce up the section with the lever on it. Flip it and the barrier will rise, and this one doesn't fall down again when reaching the top. But now the monstar is gone, and you need him to get Tim up to the platform with the barrier. Rewind time to a point where the one and only monstar is alive again and let time flow. A shadow clone will bounce off the monstar's shadow and flip the lever. Now use the physical Tim and bounce of the monstar up to the now aloft barrier. Climb the ladder, grab ![]() Puzzle Piece 5-2-2, and exit through the door.
Puzzle Piece 5-2-2, and exit through the door.
 5-3[edit]

Once again there are two puzzle pieces on the level. The first one should be right above Tim when you enter the level, but it's locked behind a gate. The purple-glowing key to open it is visible on the other side of the nearby fire pit. Unfortunately, the pit is too wide to jump over, so you will have to climb up and jump down on the other side of it. But now you can't get up again. Going right will trigger a mimic to wake up and block your path, so that's a no-go. What you want to do is to grab the key and jump as far over the fire pit as you can. You won't make it over, but rewind time to about the time where Tim was still up on the platform by the locked gate. Climb down and walk up to the very edge of the fire pit's left side. Tim's shadow should run along and fetch the key and then try to jump past the fire pit. It won't make it either, but it should make it just far enough to be able to pass on the key to the real Tim on the other side. With key in hand, climb up to the gate and get ![]() Puzzle Piece 5-3-1.
Puzzle Piece 5-3-1.

If you tried your luck with going right after you picked up the key before, you should know there is a mimic which will block your path to the next puzzle piece. It won't attack like other mimics, but simply guard the path underneath the second piece from intruders. Tim is too slow to outrun the mimic under normal conditions, so he'll have to lure the mimic away. Jump down to any side of the path under the piece and lure the Mimic to follow you right up to the opening of the path. When the mimic won't move any further, rewind time and wait for Tim's shadow to start luring the mimic again. Jump down the other side and sprint for the ladder and ascend it. Grab ![]() Puzzle Piece 5-3-2 and rewind time until you're on the top of the structure you're inside right now. Jump the floating platforms on the right to reach the exit door.
Puzzle Piece 5-3-2 and rewind time until you're on the top of the structure you're inside right now. Jump the floating platforms on the right to reach the exit door.
 5-4 Crossing the Gap[edit]

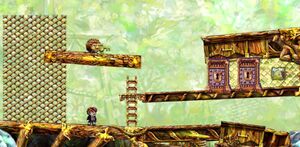
On this level you'll find three puzzle pieces, and two of them should be visible as soon as you enter the level. The one closest to Tim is the easiest to get, so let's begin with that one. Get moving and climb up the mishmash of ladders and make your way to the cannon just above the door you entered through. Its label tells you it shoots monstars, but the current monstar has already been expelled from it; it's the one wandering below. Jump down on it and kill it. You won't be able to climb back up before a new one is fired off, so rewind time to get back up. The monstar down below will start to live again, but Tim's doppelganger will jump down and kill it. Quickly jump on the new one coming out of the cannon to bounce up to the above platform and reach ![]() Puzzle Piece 5-4-1.
Puzzle Piece 5-4-1.
The second puzzle piece you can probably already see in the upper right corner of the screen. The process of getting it is similar to the last piece's. Jump over to the lever and face the same opening you jumped down earlier, when you killed the monstar. Wait until the monstar is in a good position beneath the opening and jump down it, landing on the monstar to kill it. Rewind time to get back to the lever and activate it. Your shadow friend will run along and dispose of the monstar while the platform will move from the pulled lever. A new monstar will pop out when the old one dies, and hopefully he'll be able to cross the entire platform bridge now. Remember, he's purple-glowing, so he can walk on the shadow bridge too. Wait until he reaches the spot below the puzzle piece, then jump on him to bounce up to the ladder taking you to ![]() Puzzle Piece 5-4-3.
Puzzle Piece 5-4-3.

The platform operated by the lever should already be in its correct position to guide Tim to the next piece now. It' should be on the left side. Since you killed the monstar getting the second piece, a new one will spawn. With the platform on the left side, he will take a different path this time. He will walk the bed of cushions at the bottom part of the level and make his way toward the exit door under the third puzzle piece. You should do the same, but take the upper path instead. When the monstar gets to the area with the exit door, you may try jumping on him, but the boost Tim'll get just won't be enough. Rewind time to get back up to the upper path again, but this time jump down before the monstar gets all the way over here. Position Tim underneath the small shelf and wait for the monstar's arrival. Make him land on Tim and the monstar will get a small boost. Now you can rewind time to get back up on the upper ledge, your shadow figure will mimic the actions you just did. Jump down and try to land on the monstar when he reaches the apex of his bounce, then you'll get just enough of a bounce yourself to be able to reach the last piece of the level, ![]() Puzzle Piece 5-4-2. Now jump down and exit through the door.
Puzzle Piece 5-4-2. Now jump down and exit through the door.
 5-5 Window of Opportunity[edit]

Starting the level you should see the first puzzle piece straight away. Unfortunately, it's blocked off by a platform above it. Next to the piece is the lever used to control the platform blocking the path to the puzzle piece. Continue the only way possible until you get to a monstar walking around with a key. Grab his key and jump down to the locked gate not far from away. If you open it, but not the purple-glowing gate just around the corner, you'll be able to open the path to the puzzle piece, but not get back to it because you'd be locked in here behind the purple-glowing gate. If you open the purple-glowing one, you can't get to the lever; Both need to be open. If you open the purple-glowing gate first however, the jump through the other gate over to the lever will be too wide. You'll need to open the non-glowing gate, jump over to the lever, and then open up the glowing gate. That's possible, thanks to the shadow doppelganger. Jump down from beside the non-glowing gate and run over and open the glowing one. Rewind time until being just beside the other gate again. Quickly open it up and jump on over to the lever. The shadow should rush along and open up the glowing gate, so now Tim only needs to back-track to the start of the level and grab ![]() Puzzle Piece 5-5-1.
Puzzle Piece 5-5-1.

If the previous puzzle piece wasn't difficult enough to figure out how to get your hands on, this one might be a suitable challenge. This puzzle require you to time your actions well. Continue over to the contraption on the far right of the level, move over to the uppermost lever and pull it. Try to get a feel for about how long time it takes for the below platform to reach its top position. Flip the lever and let it go all the way down again. With it down, move down and place Tim under the hovering lever. Wait for about as long as you think it took for the platform to move up and press ![]() . Now quickly reverse time back to get back the non-hovering lever. When the shadow figure reaches the larger platform below, flip the switch and jump onto the smaller platform to the real Tim's right. The shadow figure should rise up to the hovering lever, and unless his timed life runs out too quick, he'll flip it for you, rising Tim up to
. Now quickly reverse time back to get back the non-hovering lever. When the shadow figure reaches the larger platform below, flip the switch and jump onto the smaller platform to the real Tim's right. The shadow figure should rise up to the hovering lever, and unless his timed life runs out too quick, he'll flip it for you, rising Tim up to ![]() Puzzle Piece 5-5-2. This level if now finished, continue through the door at the bottom.
Puzzle Piece 5-5-2. This level if now finished, continue through the door at the bottom.
 5-6 Lair[edit]
It's another Lair level! That means another boss needs to be slain. The layout of the level and the method of killing the boss is the same as in ![]() 3-7 Lair, but this time the boss is not immune to time manipulation. You will have to use your shadow doppelganger to help with the disposal of this monster.
Begin with waking up the boss. Just moving close to him will do it. Now climb up and drop a chandelier on him. You need to save these chandeliers to drop all five life points of the boss, so rewind time and let a shadow copy drop a shadow chandelier on the boss instead. Repeat until all his life is gone and he'll drop the key for the exit. However, you might have noticed a lever behind a locked gate at the very beginning of the level. There's a puzzle piece on this level and the lever is the key to getting it.
3-7 Lair, but this time the boss is not immune to time manipulation. You will have to use your shadow doppelganger to help with the disposal of this monster.
Begin with waking up the boss. Just moving close to him will do it. Now climb up and drop a chandelier on him. You need to save these chandeliers to drop all five life points of the boss, so rewind time and let a shadow copy drop a shadow chandelier on the boss instead. Repeat until all his life is gone and he'll drop the key for the exit. However, you might have noticed a lever behind a locked gate at the very beginning of the level. There's a puzzle piece on this level and the lever is the key to getting it.

At the end of the lever—right next to the exit door—there's a barrier blocking the only puzzle piece on this level. The lever on the other side of the level lifts this barrier, but it will not stay up once it reaches its top. There are two gates to open as well. One blocks the path to the lever, and one to the puzzle piece and exit. Grab the key from the defeated boss—or from a Monstar if one has picked it up—and position Tim on the ground, under the left chandelier or thereabout. Rush over to the gate blocking the lever and open it. Continue to the lever and flip it. Now rewind time to get back under the chandelier. A doppelganger will sprint away and pull the lever, so quickly make your way in the other direction, through the gate, and over to the puzzle piece. When the barrier opens, move in and grab ![]() Puzzle Piece 5-6-1 and make it through the exit door.
Puzzle Piece 5-6-1 and make it through the exit door.
 5-7 Fragile Companion[edit]

There's only the one puzzle piece left in this world, and you will spot it as soon as you enter this level. The puzzle seems simple enough; You need to open two gates with only one key. You've done this before. The problem this time is that the key is green-glowing—it's unaffected by rewinding time—so if you break it, it's broken. If you exit through the door you came from and go back through it again, the key will reset itself though, so no worries.
The solution is not too complicated. Begin by grabbing the key from the monstar. Continue by running toward the gates and jumping down toward them. Mid-air—before Tim hits any of the gates—rewind time to before the jump. The shadow Tim will run, jump off and fall asleep mid-air, but the momentum of the jump will hurl him into the gate, which will unlock. You can now use the real key you still have on the second gate and collect ![]() Puzzle Piece 5-7-1.
Puzzle Piece 5-7-1.
Continuing to the levels right reveal the castle of the fifth world. A greeter will say a few words to Tim and then you'll be back at Tim's house; World 5 being completed.
