Call of Duty 2/The Battle Of El Alamein
The Diversionary Raid[edit]
- El Alamein
- 29 October 1942
- Difficulty: 5 out of 10
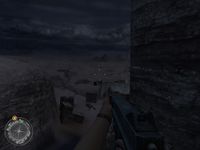
Your squad starts in a small cave-like place in El Alamein, Egypt. Jump down to behind the crates, and take a moment to examine your new weapons. You will have started with a Thompson submachine gun (should be familiar to you if you played any WWII games before) and a Lee-Enfield bolt action rifle. Also, from now on the Nazis will be wearing a different uniform, hot as Egypt is. Left of your position is a MG-42 nest (yes, those are still here); take down the gunners. Now enter the trench. Some enemies will be in here, and your Thompson will make short work of them. When you get to a blocked section, turn back and go up to where the flak gun is. Keep going, and you will find yourself in another trench. Get inside the bunker on your left, and move fast to kill everyone in here. When you get back out, your mates will be fighting some Germans above them. Try your Lee-Enfield here, and get used to its sluggish reload (manual reload for this rifle can only be done when there are five or less rounds left in the rifle).
Take out the unsuspecting machine gunners on your left, and commandeer the MG-42. To your right are some Germans hiding in a trench, shooting at some of your comrades. Mow them down, but don't do it for longer than seven or eight seconds; the other Jerries will snipe you or simply machine-gun you to death. Come back down and continue along the trench until you see a MG-42 gunner inside a trench on your right. Shoot him, and keep going. Along the way, the Germans will keep throwing grenades at you, and it's better to step back out of range than to try to outrun the explosion. You will get to a spot where there's a slope on your left and a bunker to your right. If you wish, go up the slope and kill everyone inside the trench you get into, and also the two guys at the machine gun nest. Don't get out of the trench; you will step onto a minefield and die. Instead, go back to that slope. Now enter the bunker. If you spent too much time getting here, the Germans will be down here. If you didn't, they will be still on the upper floor. In this case, beware of any grenades they throw down at you, and climb up the ladder. Take out the machine gun position (if you didn't go up that slope), and a guy behind you if you're playing on Hardened or Veteran. Get back down to the entrance.
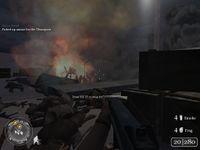
You'll notice that all the crates that were blocking your way were blown up. Just follow along the trench toward the star on your compass, watching out for waiting Germans. You'll eventually reach Captain Price. Now, your compass will suddenly be filled with a whopping nine objectives. These represent fuel barrels and ammo depots that you must destroy, and the order is irrelevant. The easiest way here is to take out the annoying MG-42 gunner, go past him, and walk around the building. Take the fuel barrels out, and plant a charge on the truck inside the building. As you come back out, enemies will appear from behind the building. After dispatching these guys, the rest is routine. Focus on the ammo depots--your buddies will take out the barrels on their own, but they don't have any charges.
After the chaos is over, go to the sealed bunker. Captain Price and Private MacGregor (whom you'll see all throughout the campaign) will have a brief verbal match about the importance of a document, and someone will blow the door. Throw a grenade in, and after it blows, move inside. There aren't many enemies in here--just get to the end of the bunker, kill everyone in the room, grab the secret document, and get back out. Your job here is over, but the night is not--a nearby town is under attack!
Holding the Line[edit]
- El Alamein
- 29 October 1942
- Difficulty: 3 out of 10
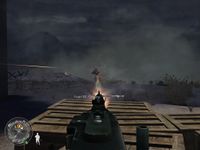
Sit tight during the Bren ride into the attacked town, and don't waste ammo on anything. After the car stops, jump out (if you're too sluggish, enemy halftracks will mow you down) and go into the nearby trench. Man the MG-42; you know what to do with it. There are quite a few enemies charging for your position, so don't get off the gun until your objective changes to defending the other side of the town. Go in the western direction, and get on the furthest Flak 88 Gun. This weapon has a huge blast radius, so aim it among a large group of enemies and it'll take most of them out. Also, look for a halftrack or two to destroy. After a short while, your objective changes again. You can just stay on this gun and blast the enemies coming down from the hill if you wish, but you should take the time to get on the other Flak 88 so that you'll have better visibility. Now, the Germans are attacking the north side of town! It is pretty repetitive, but you have to get to the north side and man the MG-42 set up over there. Mow down the advancing enemy until (finally) you receive a new order--direct artillery fire on enemy tanks.
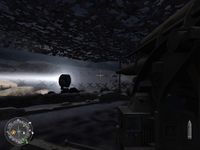
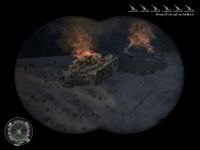
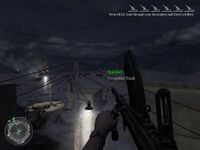
Go to the roof of the tallest building in town. Now, this next part is a bit confusing. What you have to do is press the binocular button B, to see enemy tanks (fellow soldiers will also be calling their positions out). If they're moving, put the binocular's crosshair a bit front of them, and press F; if not, just put the crosshair on the tank(s) and press F. A red flare will drop, marking the position the artillery will shell. After 10 or so seconds, the tank will be destroyed by the shelling (unless it moves out of range quickly enough, in which case you'll have to do it again). Do this for all the tanks (some of them are close together, so you can get two with one shot). Germans can shoot you from below, and sometimes they climb up to the roof, so watch out. Also watch out for a gap between the sandbags in the direction of the tanks; if you fall out, you die. You can also use artillery on the infantry invading the town, but make sure to keep it away from your own troops. As a note, sometimes when you direct a shot on a tank past a power line, the game recognizes the power lines as the marking point and drops a flare there. Destroy all the tanks, and the mission will end with friendly tanks coming to your rescue. The long night is over.
Operation Supercharge[edit]
- El Alamein
- 3 November 1942
- Difficulty: 4 out of 10
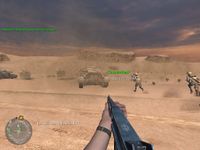
This mission features one of the largest maps in the entire game, and therefore will take a while to complete even though it is comparatively easy. That said, the mission is very linear--not many other ways to complete it than what is outlined here.
Follow the tank directly in front of you, and as you advance use it as cover. Shoot down all the enemies in the trench, and Captain Price will order you to enter the tunnel. Lead the way, clear the tunnel, and follow the tanks again. From here, just follow the trenches, and when you come near any Flak guns to unman, first throw a grenade in before you approach to conserve ammo. Don't give up your Scoped Lee-Enfield, because it'll come in handy later.
You will still have some Flak guns left when you come to an opening and your mission objective goes gray. This doesn't mean you've missed some--just that something else has taken priority, and the objective will resume after the current one ends. Wait for the artillery barrage to cease and follow the tank that comes in front of you. This part requires careful balance. If you're too far behind the tank, MG-42s will be able to kill you, and if you're too close, you'll die with the tank when one of those blasted Flak 88s shoot it.
Survived the explosion? Great! Now for the tank that comes from behind you. It will start going north (on your compass), and you must follow it, taking cover by the right side of the tank. The smoke grenade in the way is normal (designed to keep you from seeing Jerries on the other side), so just go through it and shoot everyone. Once again you must kill Flak gun operators, which means another linear trench awaits you.
You'll know the mission is almost over when you see a house in the distance. Until the Captain tells you to make a run for it, use the sniper rifle to pick off guys on the roof. Then, slowly make your way to it, watching for an approaching halftrack containing enemies. When you do get to it, just watch for Germans hiding in stairs and clear out the whole place. The radio you must use to contact HQ is in a small room, top floor. Let's hope you make it to Tobruk!
The End of the Beginning[edit]
- El Daba
- 6 November 1942
- Difficulty: 7 out of 10
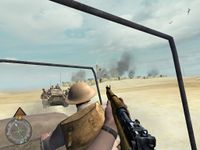
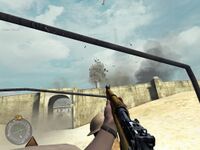
Well, looks like you've survived Tobruk and made it to El Daba. Just watch the RAF bomb the port town until your troop carrier reaches it. Get out of the vehicle once you're inside the town walls, and immediately take cover behind the sandbags. Hear the continual ripping sound of an MG-42? You (as always) have to take it out, but in a more unusual way.
The thing is, if you attempt to take it out face-to-face (a working tactic in other missions) you'll only get shredded. So you must hit it from the back. Step out from cover and quickly go right. Some of your troops will be fighting Germans at the end of this alley. Help them out, and go behind the crates the enemy was taking cover behind. From here you can use your rifle to kill all the gunners and other enemies. Proceed into a building on the right of the MG nest.
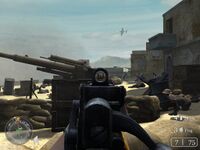
Once you emerge outside, a German will be waiting for you with a machine gun on the ground. Rather than shooting him, throw a grenade and get back inside. The grenade will kill the gunner as well as two others hiding. Now go on until you come out of the narrow alley and airplanes fly overhead. The four Flak Guns you see here are pounding the British fleet into scraps of metal, and you need to take them out. Pick up a Bren LMG (big, bulky support rifles) or use your Lee-Enfield to take out the gunners from afar, and give them a constant rain of grenades. There are plenty of fallen enemies and allies, so don't worry about running out.
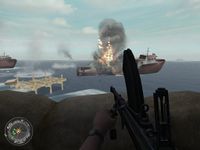
Your objective changes to radioing HQ to attack the Nazi ships. The Flak Guns were the easy part; this is a bit harder. Of the two entrances to the area with the house the radio is in, take the right one. After killing whoever comes out to fight (including a soldier carrying an MG42), use your Bren or Enfield to shoot everyone you see in the house's windows, roof, or balcony.
Now you're free to go in the house and clear it out. Just watch for enemies lurking behind stairs and you'll be fine. You must kill everyone on every floor of the building. There's one more than it looks like, because this includes the roof. Now, go back and use the radio in a room facing the way you came from. The Nazi ships will start sinking after an Allied barrage.
You're only about halfway finished, though. Replenish any ammo you need and follow the star on your mission compass, and stop when you see where all your troops are being pinned down by unrelenting MG42 fire (curse the Germans' sweet machinegun). You can't advance any further, so go left and up the stairs to another building.
Dispatch the Germans here, then go up to the windows. Quickly take care of the MG-42 gunners below (who are oblivious to anyone having their sights on them), but don't go down just yet. In this area there are five riflemen hiding. One is in the building on your left, three are in the building across the open area, and the last one is on the roof of that building. Be careful not to get shot (take cover after each shot), as about two shots from them will kill you in Veteran difficulty.
Now run down to the building opposite from you-the Nazi Headquarters. Like the other house you had to infiltrate, watch the staircases. Also, as you go up the stairs, turn around and shoot the German aiming at you. Complete your errand here, then go back outside. Before going back, have a little fun with the MG-42. Grab one and shoot at anything you see (except allies, of course), and you'll notice all the boxes are destructible. There are also some Nazis hiding out that you can kill.
Take the side alley on your left and follow it (a group of enemies will be in front of you, but others take care of them). You can get back to the pier two different ways--going straight or up the stairs and out the window--but it doesn't make any difference. Enjoy the Cognac!
