Story[edit]
- For the full story (with spoilers), see the story page.
- See the characters page for more information.
The game takes place in 1830, ten years after the Vampire Hunter Morris Baldwin defeated Dracula. A cult, lead by Camilla, is working to revive Dracula. Morris and his two apprentices, Nathan Graves and Hugh Baldwin storm the castle in an attempt to stop the resurrection ritual.
Gameplay[edit]
- See the cards and DSS pages for more on the magic system, weapons for combat information, and relics for special abilities.
Circle of the Moon has similar gameplay as other modern 2D Castlvanias (such as Aria of Sorrow, Symphony of the Night, and Portrait of Ruin). Your goal is to explore Dracula's castle, navigating across platforms and hazards, while defeating bosses and other monsters. Along the way you will find items that will make you more powerful and enable you to access new areas. What makes CotM different than other modern Castlevanias is that it has a heavy focus on platforming in addition to exploration, as well as a slightly higher degree of difficulty. Like Harmony of Dissonance and the older Castlevania games, your primary weapon is a whip, and you cannot get new weapons (unlike HoD, you can't even upgrade it).
The unique gameplay element in CotM is the DSS system, in which you access special effects, weapon modifications, and magic spells by pairing two cards together. These cards are found by defeating certain enemies that drop cards when defeated. Once you have the card it is never lost or used up, allowing you to use different combinations as necessary. Effects include adding an elemental attack to your whip, boosting strength, summoning monsters and familiar, and transforming into a skeleton.
In addition to magic, the traditional Castlevania sub-weapons return. Uses these weapons consumes hearts, which can be replenished by finding more in candles or from defeating enemies. Other one-time use items that restore health, magic, hearts, and restore your status are also available. However, unlike many other Castlevanias, there is no store to purchase them from. Items are dropped randomly from enemies, so stockpiling supplies is difficult and time consuming.
Combat[edit]
You have several different means of attacking, but your primary one will be the whip.
- Whip
- Strike: Swing forward a short distance with a lot of power.
- Spin: Spin the whip in a circle around you, doing approximately 1/10 the damage of a strike. You can't move when spinning, but this is useful for clearing out the numerous annoying flying enemies and projectiles.
- Kick-slide: Press the jump button while kneeling to slide a short distance. Not only necessary for getting through gaps, but also damages enemies by as much as a whip strike. Very useful for clearing hallways filled with weaker enemies, though you should be aware that you will take damage if you don't kill an enemy that you slide into.
- DSS: Use a variety of different spells, many of which are offensive in nature. (see more)
- Sub-weapons: Use one of several projectile weapons at the cost of your heart supply. (see more)
Stats & leveling[edit]
- See the stats page for more.

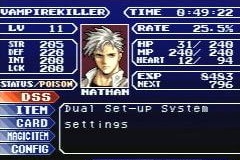
You have the standard RPG stats, which go up as your level increases. Leveling up is the standard fare as well — defeat enemies to get experience points. When enough are defeated, you level up. That simple. The amount of points each stat goes up is constant (10 for each state, except Hearts, on normal mode). Using a save point automatically restores HP and MP.
- HP: Hit points — taking damage reduces this number and when it hits zero, game over. Can be restored with potions and meat, as well as certain card combinations.
- MP: Magic points — using DSS effects consume magic; some effects deplete magic over time, others only when you attack or cast the spell. MP is automatically regenerated, even while DSS is activated. Can be restored more quickly using mind restores.
- Hearts: Ammo for your sub-weapons. Can be restored by finding hearts in candles and from enemies, as well as using heart items.
- Str: Your strength — the higher it is, the more damage you do (including your seemingly-magic DSS combinations). Modified by numerous DSS combinations and several pieces of equipment.
- Def: Your defense, and the counter to strength — the higher it is, the less damage you take from enemies. Affected by all equipment and some DSS combinations. Being frozen or petrified significantly lowers your defense.
- Int: Intelligence, which determines the speed of MP recovery — for every 100 intelligence points, MP recovers by 1MP/second. (Note that this rate is always rounded down, so an Intelligence of 799 will recover 7 MP/second.) Affected by a few DSS combinations and several pieces of equipment, especially robes. Does not affect damage of any DSS.
- Lck: Luck, which determines the chances of an enemy dropping an item. The higher your luck, the more likely an enemy is to drop a rare item (including cards) instead of a normal item. Affected by few DSS combinations and equipment. See the enemy data page for the drop rates.
Note: Some later Metroidvania games have Int value affecting magical attacks. In this game however, it is not true.
Other stats that indirectly affect you:
- LV: Level, when it goes up, your main stats are boosted.
- EXP: Total experience points, when it reaches a certain amount, you level up.
- Next: The amount of EXP needed to level up. The amount of experience needed to progress increases for every level.
- Leveling in the first release of Japanese version is easier. Later English versions required 20% more EXP.
- Status: Any aliments you are currently affected by.
- Mode: Set at the start, this determines your base stats, level up bonuses, and if you can use cards.
- Time: Total game play time (stops when you pause the game or are viewing a cut-scene). The Pluto/Cockatrice and Pluto/Thunderbird card combinations use this value to affect your strength or defense.
- Rate: The percentage of the map explored. The Venus/Golem and Venus/Thunderbird card combinations use this value to affect your strength or defense.
Status[edit]
Like Schrödinger's cat, Nathan can exist in states other than alive and dead. Specifically:

- Poisoned: You lose a certain amount of HP every second or so. The effect is only temporary, though you will lose a significant amount of HP in the time it takes for you to recover. Antidotes
 can cure poison instantly. The Jupiter and Mandragora card combination restores approximately as much HP as poison takes, so using it can negate the effects of poison (though this will drain your MP considerably). Neptune and Manticore make you immune to poison.

- Cursed: You are unable to use your whip, sub-weapons, or offensive DSS. Like poison, the effects of curse wear off after a set amount of time, or can be cured with a Cure Curse
 . While you cannot use your weapons, you can still use your sliding kick attack and some familiars can still attack. If a sliding kick attack doesn't kill them, you will take damage, but probably less that you would standing around waiting for the curse to wear off. Neptune and Black Dog make you immune to curses.

- Petrified: While not as common as the other two in the game, petrification is a big threat in the towers as Medusa Heads always petrify on contact. When petrified you cannot move and your defense drops considerably. To break free, simply moving your fingers around the
 in a circular motion as quickly as possible. While there is no curative item, the Jupiter/Cockatrice and Neptune/Cockatrice card combinations make you immune to petrification.

- Frozen: Exactly the same as petrified, except that it's caused by ice enemies instead of stone ones. Card combos that prevent petrification do not stop you from being frozen, however Neptune/Serpent will.

- Slow No dashing, no double jumping, you walk at half speed, and you can only jump half as high (you can still wall-kick and slide-kick normally). A rare condition caused by the Arachne enemy and the Jupiter/Cockatrice card combination. It cannot be healed and no cards give immunity, but it wears off after a short time and is little more than a nuisance.
Elements[edit]
All enemies are associated with a specific element. Attacking with a weapon or spell of the opposite element does extra damage while attacking with the same element does reduced damage. Your whip (unless enhanced by a DSS combination), sub-weapons, kicks, and equipment are all non-elemental so they have the same effect on all enemies.
There are ten elements, each with an opposite and an associated card.
- Fire: Associated with the Salamander card, opposite is Water/Ice. Most of the undead enemies are fire based — bombers, zombies, spirits.
- Ice: Associated with the Serpent card, opposite is Fire. Ice enemies are almost exclusively in the Underground Waterway.
- Plant: Associated with the Mandragora card. Plant enemies are all over the place, but heavily concentrated in the Underground Gallery and Underground Warehouse.
- Earth: Associated with the Golem card. Earth enemies are found everywhere and include most non-flying animals such as spiders, Mud-Men, and Minotaurs.
- Stone: Associated with the Cockatrice card. All enemies that can petrify are stone based, as are the skull pillars, mummies, and golems.
- Poison: Associated with the Manticore card. All enemies that poison you are of the poison element, which includes most snakes and insects.
- Wind: Associated with the Griffin card. Almost all flying enemies are wind based.
- Lighting/Thunder: Associated with the Thunderbird card. A variety of enemies are thunder based; the obvious identification is that they use electrical attacks.
- Holy: Associated with the Unicorn card, opposite is Dark. There are only five Holy type enemies in the game, but are generally the most powerful ones in the area.
- Dark: Associated with the Black Dog card, opposite is Holy. Most bosses, dark-magic using humans, humanoids, demons, and skeletons are Dark elementals.
Saving[edit]

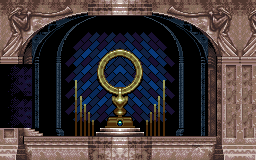
As is normal in Castlevania, the game can be saved only in save rooms. This time around the save points look like weird towers with a ball of red energy in them and are marked in red on the map. Save points also restore MP and HP completely, even if you don't save the game. If you confirm you want to save it overwrites your existing game file. To create multiple restore points, you have to save, reset the game, and then copy the file on the system menu.
Warp[edit]

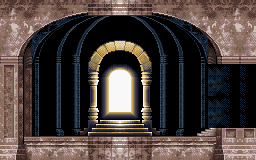
There are five warp points that will take you around the castle. Warp points (except the first) are only usable once you've entered the room from a doorway. The first warp room is sealed off, but by going through the second warp room, you can unblock the passage to it. Warp rooms are marked in yellow on the map.
Warp room locations
- Abyss Stairway: The closest room to the Ceremonial Room. It is sealed off until you use another warp room to get to it.
- Audience Room: Located on the eastern side of the area, you have to pass over the Outer Wall to get to it originally. It is the closest warp room to a save room.
- Eternal Corridor — On the eastern side, directly under the Chapel Tower.
- Chapel Tower — Far northwest end of the Chapel Tower, it requires the Heavy Ring
 to access. It is mainly to use for easy access to the Battle Arena.
 - Observation Tower — Western side, pass through the devil's room to get to it.
Modes[edit]
- See stats for more on character growth and individual mode pages for more.
In what has become a tradition with modern Castlevania games, after you beat the normal game you can play through a variation of the game. Normally, this means playing as a different character that was related to the story (in Symphony of the Night you could play as Richter Belmont after beating the game as Alucard, in Harmony of Dissonance you could play as Maxim after beating the game as Juste, and so on). Circle of the Moon modifies that idea a bit — instead of playing as a different character, you continue to play as Nathan, but with different stats. The story, gameplay, and order of events are exactly the same, however the changes in your stats and abilities forces you to change your fighting style.
In order for a mode to be unlocked, you have to beat the previous one. So, beating VampireKiller mode unlocks Magician, beating Magician unlocks Fighter, and so on. To play a mode after unlocking it, simply enter the password as your name (if you want you can change your name later from the system menu).
| Mode | Base Stats | Cards | Description | Password |
|---|---|---|---|---|
| VampireKiller |
|
Find | The normal game and you have very balanced stats. It is important that you master the gameplay, especially the DSS system, here before trying the other modes. | none |
| Magician |
|
Start with all | Either borderline impossible or merely somewhat difficult, depending on how well you are at using the DSS. Spend time stockpiling items, as the Jupiter/Mandragora card combo cannot help you in the heat of battle. Neptune's combinations will keep you alive during many boss fights. | FIREBALL |
| Fighter |
|
None | By far the easiest mode. You can't use DSS, but you don't need it. Just smash your way through your foes without looking back. Even the Battle Arena is (relatively) easy. | GRADIUS |
| Shooter |
|
Find | This mode tends to cross the thin line between "challenging" and "annoying" at times. You have weak stats all around, except for your hearts. You'll have to rely on sub-weapons to get through, so get the axe or boomerang as soon as possible. Fortunately you get a new sub-weapon, the magic dagger, and all sub-weapons' heart cost is halved. | CROSSBOW |
| Thief |
|
Find | The hardest mode, though surprisingly less annoying than Shooter. You have weak stats in every area except luck. What this means is that enemies drop items constantly. Stock pile items, especially healing ones, as they will be what keeps you alive during fights. You also have normal intelligence so you'll be able to get decent use out of DSS combinations, especially the summons. | DAGGER |