Jump to navigation
Jump to search
Images for StarCraft.
Media in category "StarCraft images"
The following 189 files are in this category, out of 189 total.
-
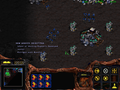
 SC Agent of the Swarm Early Defense.png 640 × 480; 203 KB
-
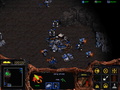
 SC Agent of the Swarm Landing Point.png 640 × 480; 230 KB
-
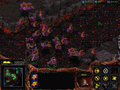
 SC Agent of the Swarm Middle Island.png 640 × 480; 213 KB
-
 SC Agent of the Swarm Mineral Patch.png 640 × 480; 173 KB
-
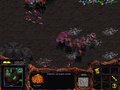
 SC Agent of the Swarm Raynor's Command Center.png 640 × 480; 195 KB
-
 SC Agent of the Swarm Spying on Enemy.png 640 × 480; 193 KB
-
 SC Agent of the Swarm Staging Area.png 640 × 480; 231 KB
-
 SC Agent of the Swarm Victory.png 640 × 480; 198 KB
-
 SC Amerigo Ambush Corridor.png 640 × 480; 134 KB
-
 SC Amerigo Beacon 1.png 640 × 480; 133 KB
-
 SC Amerigo End.png 640 × 480; 161 KB
-
 SC Amerigo Killed Marines.png 640 × 480; 151 KB
-
 SC Amerigo Teleport.png 640 × 480; 128 KB
-
 SC Amerigo Trap and Beacon Room.png 640 × 480; 158 KB
-
 SC Amerigo Trap.png 640 × 480; 138 KB
-
 SC Among the Ruins Base.png 640 × 480; 236 KB
-
 SC Among the Ruins End.png 640 × 480; 344 KB
-
 SC Among the Ruins Ramp.png 640 × 480; 344 KB
-
 SC Backwater Station base.png 640 × 480; 340 KB
-
 SC Backwater Station Creep.png 640 × 480; 281 KB
-
 SC Backwater Station Infested CC.png 640 × 480; 317 KB
-
 SC Big Push Base Defense.png 640 × 480; 204 KB
-
 SC Big Push Leapfrog Part I.png 640 × 480; 189 KB
-
 SC Big Push Leapfrog Part II.png 640 × 480; 183 KB
-
 SC Big Push Leapfrog Part III.png 640 × 480; 174 KB
-
 SC Big Push Science Vessel Spotting.png 640 × 480; 255 KB
-
 SC Choosing Sides Beacon Guardians.png 640 × 480; 229 KB
-
 SC Choosing Sides Beacon.png 640 × 480; 197 KB
-
 SC Choosing Sides Defenses.png 640 × 480; 211 KB
-
 SC Choosing Sides Fleet.png 640 × 480; 199 KB
-
 SC Choosing Sides Guardians.png 640 × 480; 179 KB
-
 SC Choosing Sides Infested Command Center.png 640 × 480; 206 KB
-
 SC Choosing Sides Scourge.png 640 × 480; 182 KB
-
 SC Choosing Sides Scout Defense.png 640 × 480; 173 KB
-
 SC Choosing Sides Terran Island.png 640 × 480; 193 KB
-
 SC Choosing Sides Zerg Base.png 640 × 480; 213 KB
-
 SC Culling Attacking Western Enemy.png 640 × 480; 220 KB
-
 SC Culling Beginning.png 640 × 480; 182 KB
-
 SC Culling Center Right Outpost.png 640 × 480; 183 KB
-
 SC Culling East Defense.png 640 × 480; 168 KB
-
 SC Culling Expansion.png 640 × 480; 205 KB
-
 SC Culling Guardian attack.png 640 × 480; 192 KB
-
 SC Culling Main base.png 640 × 480; 206 KB
-
 SC Culling Plague.png 640 × 480; 204 KB
-
 SC Culling Plateau.png 640 × 480; 220 KB
-
 SC Dark Templar Attacking Reavers.png 640 × 480; 242 KB
-
 SC Dark Templar Dragoons.png 640 × 480; 213 KB
-
 SC Dark Templar Expansion Base.png 640 × 480; 203 KB
-
 SC Dark Templar Mutalisks attacking base.png 640 × 480; 223 KB
-
 SC Egression Alternate Strategy.png 640 × 480; 282 KB
-
 SC Egression Base.png 640 × 480; 297 KB
-
 SC Egression End Beacon.png 640 × 480; 220 KB
-
 SC Egression Enemy Base.png 640 × 480; 222 KB
-
 SC Egression Ramp.png 640 × 480; 272 KB
-
 SC Eye for an Eye 2nd Resource Node.png 640 × 480; 198 KB
-
 SC Eye for an Eye Attack on Second Base.png 640 × 480; 233 KB
-
 SC Eye for an Eye Attacking First Base.png 640 × 480; 215 KB
-
 SC Eye for an Eye Nydus Canals.png 640 × 480; 178 KB
-
 SC Eye for an Eye Staging.png 640 × 480; 250 KB
-
 SC Eye for an Eye Top Resources.png 640 × 480; 212 KB
-
 SC Eye of the Storm Arbiter Tanks.png 640 × 480; 342 KB
-
 SC Eye of the Storm Corner Hive.png 640 × 480; 320 KB
-
 SC Eye of the Storm Overmind.png 640 × 480; 234 KB
-
 SC Eye of the Storm Protoss Expansion.png 640 × 480; 263 KB
-
 SC Eye of the Storm Protoss Push.png 640 × 480; 298 KB
-
 SC Eye of the Storm Pushing 1.png 640 × 480; 185 KB
-
 SC Eye of the Storm Pushing 2.png 640 × 480; 270 KB
-
 SC Eye of the Storm Terran Base.png 640 × 480; 230 KB
-
 SC First Strike.jpg 640 × 480; 67 KB
-
 SC Full Circle Archons.png 640 × 480; 194 KB
-
 SC Full Circle Defending Mineral Field.png 640 × 480; 201 KB
-
 SC Full Circle East Mineral Field.png 640 × 480; 174 KB
-
 SC Full Circle Eastern Enemy Base.png 640 × 480; 204 KB
-
 SC Full Circle Gas Base.png 640 × 480; 215 KB
-
 SC Full Circle Gas Deposit.png 640 × 480; 189 KB
-
 SC Full Circle Protoss Base.png 640 × 480; 192 KB
-
 SC Full Circle Static Defense.png 640 × 480; 158 KB
-
 SC Full Circle West Mineral Field.png 640 × 480; 176 KB
-
 SC Full Circle Western Enemy Base.png 640 × 480; 206 KB
-
 SC Hammer Falls Attack Red Base.png 640 × 480; 240 KB
-
 SC Hammer Falls Building Out.png 640 × 480; 199 KB
-
 SC Hammer Falls Fleet.png 640 × 480; 214 KB
-
 SC Hammer Falls Heavy Defense.png 640 × 480; 244 KB
-
 SC Hammer Falls Landing.png 640 × 480; 260 KB
-
 SC Hammer Falls Lockdown.png 640 × 480; 254 KB
-
 SC Hammer Falls Northeast Entrance.png 640 × 480; 261 KB
-
 SC Hammer Falls Outpost.png 640 × 480; 251 KB
-
 SC Hammer Falls Raynor.png 640 × 480; 204 KB
-
 SC Hammer Falls Southwest Entrance.png 640 × 480; 244 KB
-
 SC Higher Ground Attacking.png 640 × 480; 160 KB
-
 SC Higher Ground Expansion.png 640 × 480; 183 KB
-
 SC Higher Ground Zerglings.png 640 × 480; 147 KB
-
 SC Homeland Center.png 640 × 480; 189 KB
-
 SC Homeland Enemy Base.png 640 × 480; 190 KB
-
 SC Homeland Expansion Under Attack.png 640 × 480; 194 KB
-
 SC Homeland Expansion.png 640 × 480; 202 KB
-
 SC Homeland Nexus.png 640 × 480; 185 KB
-
 SC Homeland Opening.png 640 × 480; 194 KB
-
 SC Homeland Photon Cannons.png 640 × 480; 168 KB
-
 SC Homeland Start.png 640 × 480; 553 KB
-
 SC Homeland The Push.png 640 × 480; 210 KB
-
 SC Hunt for Tassadar Psi Storm.png 640 × 480; 133 KB
-
 SC Into the Darkness Closed-door technique.png 640 × 480; 129 KB
-
 SC Into the Darkness Door Beacon.png 640 × 480; 136 KB
-
 SC Into the Darkness Gauntlet.png 640 × 480; 155 KB
-
 SC Into the Darkness Ghost targeting Terran.png 640 × 480; 112 KB
-
 SC Into the Darkness Hideout.png 640 × 480; 116 KB
-
 SC Into the Darkness Hydralisk trap.png 640 × 480; 135 KB
-
 SC Into the Darkness Second Reinforcements.png 640 × 480; 121 KB
-
 SC Into the Darkness Teleportation Field.png 640 × 480; 135 KB
-
 SC Into the Darkness Terran on Platform.png 640 × 480; 132 KB
-
 SC Into the Darkness Terran Reinforcements.png 640 × 480; 108 KB
-
 SC Into the Darkness Trap.png 640 × 480; 129 KB
-
 SC Into the Darkness Wall in Effect.png 640 × 480; 133 KB
-
 SC Into the Darkness Wall Turrets.png 640 × 480; 118 KB
-
 SC Into the Darkness Wall.png 640 × 480; 122 KB
-
 SC Into the Darkness Zeratul.png 640 × 480; 103 KB
-
 SC Into the Darkness Zergling Trap.png 640 × 480; 139 KB
-
 SC Invasion of Aiur Arbiter.png 640 × 480; 211 KB
-
 SC Invasion of Aiur Beacon.png 640 × 480; 177 KB
-
 SC Invasion of Aiur Carrier.png 640 × 480; 217 KB
-
 SC Invasion of Aiur Crystal.png 640 × 480; 212 KB
-
 SC Invasion of Aiur Expansion.png 640 × 480; 179 KB
-
 SC Invasion of Aiur Harassment.png 640 × 480; 195 KB
-
 SC Invasion of Aiur Stasis Field.png 640 × 480; 189 KB
-
 SC Map Terran1.png 128 × 128; 8 KB
-
 SC Map Terran3.png 96 × 96; 6 KB
-
 SC New Dominion Attacking Barracks.png 640 × 480; 216 KB
-
 SC New Dominion Attacking Command Center.png 640 × 480; 220 KB
-
 SC New Dominion Attacking Starport.png 640 × 480; 202 KB
-
 SC New Dominion Attacking Turret.png 640 × 480; 232 KB
-
 SC New Dominion Chrysalis.png 640 × 480; 152 KB
-
 SC New Dominion Expansion Base.png 640 × 480; 211 KB
-
 SC New Dominion First Strike.png 640 × 480; 199 KB
-
 SC New Dominion Initial Attack Force.png 640 × 480; 209 KB
-
 SC New Dominion Victory.png 640 × 480; 218 KB
-
 SC New Gettysburg Zerg Def.jpg 640 × 480; 488 KB
-
 SC Norad II end2.png 640 × 480; 310 KB
-
 SC Norad II landing zone.png 640 × 480; 179 KB
-
 SC Norad II Norad II.png 640 × 480; 286 KB
-
 SC Norad II Spore Colonies attacked.png 640 × 480; 296 KB
-
 SC Revolution attack on base.png 640 × 480; 294 KB
-
 SC Revolution attack part 2.png 640 × 480; 305 KB
-
 SC Revolution Destroying Turret.png 640 × 480; 241 KB
-
 SC Revolution Kerrigan Cloaked.png 640 × 480; 271 KB
-
 SC Revolution Wraith.png 640 × 480; 264 KB
-
 SC Revolution Wraiths Cloaked.png 640 × 480; 286 KB
-
 SC Shadow Hunters Build Area.png 640 × 480; 299 KB
-
 SC Shadow Hunters Cerebrate 1.png 640 × 480; 314 KB
-
 SC Shadow Hunters Cerebrate 2.png 640 × 480; 228 KB
-
 SC Shadow Hunters Corridor.png 640 × 480; 343 KB
-
 SC Shadow Hunters Mineral Base.png 640 × 480; 302 KB
-
 SC Shadow Hunters Observing.png 640 × 480; 262 KB
-
 SC Shadow Hunters Plague.png 640 × 480; 332 KB
-
 SC Shadow Hunters Strike Force.png 640 × 480; 337 KB
-
 SC Shadow Hunters Temple Fight.png 640 × 480; 356 KB
-
 SC Terran 4.png 128 × 128; 4 KB
-
 SC Terran Academy.jpg 96 × 98; 11 KB
-
 SC The Big Push Attack Base 2.png 640 × 480; 284 KB
-
 SC The Big Push Cleanup Base 1.png 640 × 480; 203 KB
-
 SC The Big Push Cleanup Base 2.png 640 × 480; 290 KB
-
 SC The Big Push Wipe Out Base 2.png 640 × 480; 250 KB
-
 SC Trial of Tassadar Base.png 640 × 480; 173 KB
-
 SC Trial of Tassadar Cannon Push.png 640 × 480; 184 KB
-
 SC Trial of Tassadar Canyon.png 640 × 480; 157 KB
-
 SC Trial of Tassadar First Expo.png 640 × 480; 572 KB
-
 SC Trial of Tassadar Second Expo.png 640 × 480; 184 KB
-
 SC Trial of Tassadar Stasis Cell.png 640 × 480; 206 KB
-
 SC Trial of Tassadar Stasis.png 640 × 480; 217 KB
-
 SCTrump Card Attacking Enemy Base.png 640 × 480; 188 KB
-
 SCTrump Card Attacking the Battlecruiser.png 640 × 480; 237 KB
-
 SCTrump Card Dropship Rush End.png 640 × 480; 160 KB
-
 SCTrump Card Dropship Rush Start.png 640 × 480; 177 KB
-
 StarCraft Protoss Dragoon.jpg 640 × 480; 130 KB
-
 StarCraft Protoss Probe.jpg 640 × 480; 139 KB
-
 StarCraft Protoss Zealot.jpg 640 × 480; 130 KB
-
 StarCraft Psionic Storm screenshot.jpg 853 × 500; 122 KB
-
 Starcraft Terran Armory.jpg 106 × 95; 11 KB
-
 Starcraft Terran Barracks.jpg 126 × 113; 13 KB
-
 Starcraft Terran Bunker.jpg 99 × 64; 9 KB
-
 Starcraft Terran Command Center.jpg 136 × 110; 14 KB
-
 Starcraft Terran Depot.jpg 103 × 80; 10 KB
-
 Starcraft Terran Eng Bay.jpg 146 × 102; 12 KB
-
 Starcraft Terran Factory.jpg 116 × 112; 13 KB
-
 Starcraft Terran Refinery.jpg 128 × 96; 13 KB
-
 Starcraft Terran sci facility.jpg 112 × 96; 11 KB
-
 Starcraft Terran Starport.jpg 110 × 109; 12 KB
-
 StarCraft.jpg 650 × 650; 85 KB
-
 StarcraftPsiStormMineralLine01.png 318 × 239; 138 KB


