Chester Field/Stage 3
Stage[edit]

Stage 3 introduces new humanoid enemies to both the outdoors and the labyrinths. These new enemies have the ability to jump. The ones inside labyrinths will jump backward, but the ones you encounter outdoors will jump forward, making them far more difficult to combat.
You will begin, as always, in the woods to the left of town. A short distance in, you will reach the door (A) of the Inn. Sleep overnight if you would like to obtain a password. Just beyond that, the next door (B) leads to a medicine shop. When you arrive at the door, just before the bridge, a Ghost may appear and attack you. At this level, it will take two shots to destroy a Ghost. If you do not get both shots in before it disappears and reappears somewhere else, you will be unable to defeat it. For now, it is best to move on.
Beyond the bridge, you will reach two doors. The first door (C) contains the chief of the village, who informs you a Lizardman will call upon a dragon known as Shell Ryuu. The next door over (D) contains a man who will tell you of the Shell Ryuu's only weak point. He refers to the Shell Ryuu's "core", but this can be interpreted as his insides.
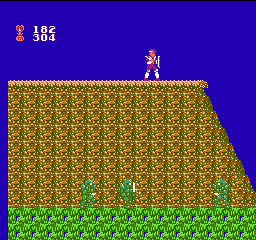
Beyond these two residences is a short strip of land inhabited by red Goblins and Amols. It would be a wise idea to wander back and forth (turn around at the jump when the Ghosts begin to appear) and slay a bunch of these Goblins and Amols to increase your Class level to K, and to earn money. You will need at least 380 metal to buy all of the equipment you need. This is a good section to earn that money in.

After you've spent some time here, begin jumping across the platforms and over the water. Advance continuously to keep the Ghosts at your back. When you reach the opposite side, you will encounter a new enemy: warriors in green suits of armor called Normal Armors. These enemies will leap forward in an effort to avoid your sword strike. This means that not only are they capable of dodging your attacks, they will most likely leap into you in response. In all honesty, if you do not need metal, there is little reason to fight them. They will more likely cost you health, than help you gain it, and there are easier sources of experience points. To avoid them, stay on top of the high platforms that cross of the ground below, or simply jump over them. Continue on to the right.
When you finally reach a new door (E), you will find a weapon shop where you can buy the Iron Sword for 200 metal. This is the first sword which is stronger than the Mace. The store keep also tells you that you can find a Necklace with light (your Lamp). The shop next door (F) will be selling the Large Shield for 180 metal. She will let you know that the old man next door knows something about the ghost ship.
After you finish shopping, head inside the last door (G) before you see a ship off in the background. The old man inside will say that the only way to reach an island via the ghost ship. He will ask you if you are prepared. If you say "Yes", he will send you on a one-way trip to the ship. You will arrive directly in front of a door (3), which is the entrance to the labyrinth. There is little reason to explore the right side of the ship. Head into the labyrinth immediately.
Labyrinth[edit]

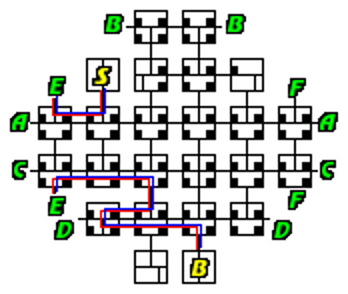
The third labyrinth is fairly large, but a majority of it can be entirely ignored. Virtually every row, as well as the two outside columns, loop around on themselves. Since your goal is to get to the bottom of the labyrinth where the boss is waiting, you can simply take advantage of the looping property of the outside columns and access the bottom very quickly.
From the start, climb down the ladder to the upper level of the room below. Access the room to the left, and climb up the ladder. This will loop you around to the bottom of the left side of the map (ironically one room below the room you just came from). When you arrive, you will encounter another new enemy, the Metal Armors. Unlike the Normal Armors who bounce forward when attacked, the Metal Armors jump back, which makes them substantially easier to fight. All you need to do is stand in the center of the room and let them approach you. When they get close enough to hit, stab them. They may jump back, but they will continue their approach. You should be able to remove them in four hits. Just be patient and do not rush them; let them come to you. And do not attack them when they have their back turned to you.
From this room, head right two rooms until you find a ladder which leads to the room below. Defeat the Little Dragons and Metal Armors in your way, and then climb down. In the next room, you will meet the monsters known as EW2s. They are a bit like Ghosts in that they appear, fire a projectile, and disappear. You must entirely defeat them in one appearance, or they will regenerate their health. Don't spend a lot of time dealing with them. Instead, head through the door to the left.

In the next room, there will be one Metal Armor on either level, and two EW2s floating around the room. Do your best to deal with them while climbing down the ladder, and returning through the lower right door. Pass through the four EW2 room again and continue to the right. Fight the two Metal Armors on the lower level, and then climb down the ladder to fight the boss.
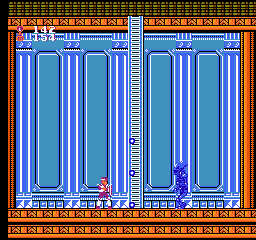
The boss of this labyrinth is a blue Skulltas. If you are Class K with the Iron Sword, you should be able to stand still, let the Skulltas approach you, and stab upward at its head to defeat it in relatively no time at all. As a reward, you acquire the Magic Necklace which will enable you to use the spellbooks which can be purchased from the fourth stage and beyond.
To escape the labyrinth, you should retrace your steps exactly the way you came. Climb up the ladder, return two rooms to the left, climb up the ladder between levels, return to the room to the right, and climb up to the room above. The head left two rooms, climb down the ladder, and return one room to the right to climb up the ladder and find the entrance.
Proceed to Stage 4[edit]

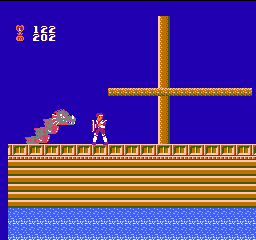
When you escape from the labyrinth, you will be back on the ship. Your only choice is to venture right. You will encounter a couple of Goblins before the scrolling stops completely, and a single Lizardman will appear on the screen. The Lizardman will be no challenge to beat, but defeating him will summon the Shell Ryuu, or Water Lizard boss. The Water Lizard head rises above the floor of the ship, first vertically, then at an angle. Then it will repeat this pattern on the opposite side of the boat.
Whenever the Water Lizard raises its head, it opens its mouth to shoot two projectiles at you. It is only at this moment when the mouth is open that the Water Lizard is vulnerable to attack. For this reason, your only opportunity to attack it is when it rises diagonally, since it is generally too high when it is vertical. (Even on the right side, it is difficult to jump up to the mast and attack it and get back down in time to continue.) It is important to stand just far enough away from the lizard to strike it with your sword without getting hit by its head.
Once you strike it in the open mouth enough times, it will be defeated. This will allow you to continue on to the right, where you will encounter two more Amols, and one Normal Armor right by the final door (H) which contains the old gentleman who will warp you on to the next stage of the game (or possibly back to the start if you so desire.)