Area 1-1[edit]
Enemies introduced[edit]
Progression[edit]
![]() ×2,
×2,
![]() ×2,
×2,
![]() ×2,
×2,
![]() ×2,
×2,
![]() ×3,
×3,
![]() ×3,
×3,
![]() ×3,
×3,
![]() ×2,
×2,
![]() ×3,
×3,
![]() ×8,
×8,
![]() ×1,
×1,
![]() ×4,
×4,
![]() ×4,
×4,
![]() ×1,
×1,
![]() ×4,
×4,
![]() ×1,
×1,
![]() ×4,
×4,
![]() ×4,
×4,
![]() ×4
×4
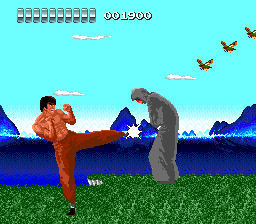
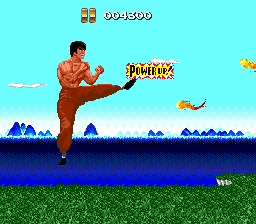
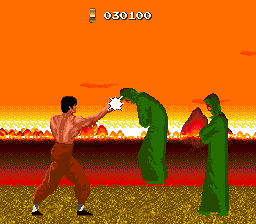
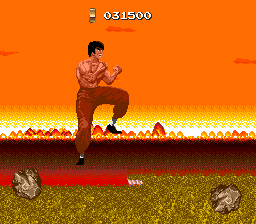
The first area will be rather predictable, with few surprises thrown at you. Most enemies and objects will be easy to anticipate. The stage will alternate between packs of gray monks and some other type of enemy, usually insects or rocks. Immediately after you start the game, two small rocks will fly in on a high arc. You can either duck them, or move all the way to the back and punch them with your fist. Gray monks will walk right up to you, so you can easily stand back and kick them away when they are within range. Insects fly rather high so ignore them and duck under them, or jump up and kick them. If they are low enough to the ground, you can sometimes punch them out of the air. When you see the first set of fireballs, you ignore the high ones and attack the low one with a punch if you like. However, the second set of four fireballs are more important; the second fireball contains a power-up that will provide you with three extra bars of health. If your health meter is silver and you fill it up beyond that, it will turn gold. After the second set of fireballs go by, a large boulder will bounce along the ground which you must leap over. This is followed by four small rocks which are difficult to attack. Following those four rocks is the first power-up book. Jump up and kick it to add five more bars to your health meter. Then finish off the last two packs of monks, with another set of rocks in between, to reach the boss.
Boss: Chen Dajia[edit]
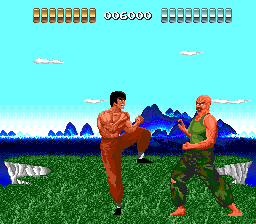
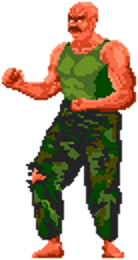
The first boss appears to be some kind of army member. He approaches you from the right side of the screen. He is fairly aggressive, but his defense is rather poor. The best way to handle him is to stand on the left side of the screen, continuously holding ![]() . When he gets close enough, push
. When he gets close enough, push ![]() to perform a kick. Performing a kick against the left side of the screen, has an interesting effect: it pushed you forward a little to the right, making it a bit easier to get inside your enemy's defenses. If you time your kick correctly, you should hit the boss and push him back a small amount. He will then continue to advance on you and you can repeat the process until his falls. If he does block one of your kicks, continue to kick until one gets through. If you don't, he is likely to hit you. If you want to be more aggressive, you can attempt to push him from the left side to the right side by alternating between punches and kicks as you cross the screen. Once he is against the right side, cross back over to the left and let him chase after you until he is close enough to attack again.
to perform a kick. Performing a kick against the left side of the screen, has an interesting effect: it pushed you forward a little to the right, making it a bit easier to get inside your enemy's defenses. If you time your kick correctly, you should hit the boss and push him back a small amount. He will then continue to advance on you and you can repeat the process until his falls. If he does block one of your kicks, continue to kick until one gets through. If you don't, he is likely to hit you. If you want to be more aggressive, you can attempt to push him from the left side to the right side by alternating between punches and kicks as you cross the screen. Once he is against the right side, cross back over to the left and let him chase after you until he is close enough to attack again.
Area 1-2[edit]
Enemies introduced[edit]
Progression[edit]
![]() ×4,
×4,
![]() ×4,
×4,
![]() ×2,
×2,
![]() ×4,
×4,
![]() ×13,
×13,
![]() ×2,
×2,
![]() ×2,
×2,
![]() ×2,
×2,
![]() ×2,
×2,
![]() ×4,
×4,
![]() ×2,
×2,
![]() ×3,
×3,
![]() ×3,
×3,
![]() ×2,
×2,
![]() ×2,
×2,
![]() ×13,
×13,
![]() ×3,
×3,
![]() ×2,
×2,
![]() ×5,
×5,
![]() ×4
×4
Things get a little trickier in this area. You'll have to prepare to jump over more than just one boulder before the next enemy shows up, but you will never have to leap over more than one boulder at a time. When you begin, the first of the rocks will appear while you are still fighting the last of the gray monks. Then leap over two boulders. After the next four gray monks, a stream of 13 insects will fly on to the screen. You can actually stand to the left and punch them all out, although doing do will likely break up the group. After two more gray monks and two more boulders, the first green monks will arrive. Stay to the left and wait for them to rise back up and attack you before you try to remove them from the screen. Two high fireballs appear back to back, making it difficult to attack both, but since neither contain a power-up, it's best to ignore them. After four gray monks, the sticks appear. Kick them out of the sky if they get too close to you. The rest of the stage will simply be variations on these sets of enemies. Do note that the second set of thirteen insects is important: it is the only power-up opportunity presented to you in the entire stage. One of the insects towards the end of the set will provide you with three extra health bars when you hit it.
Boss: Guo Liangyuan[edit]
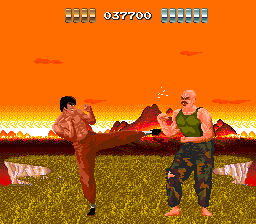
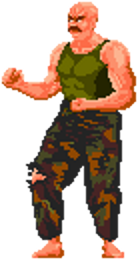
The second boss looks identical to the first boss, with a slightly darker outfit. He's not quite as dumb as the first boss, and appears a little more hesitant to approach you. But you can use this hesitance against him. Use the same strategy of holding ![]() to stay against the left side of the screen. As the boss approaches you, he will perform a punch well before he can actually hit you. As the punch begins to end, press
to stay against the left side of the screen. As the boss approaches you, he will perform a punch well before he can actually hit you. As the punch begins to end, press ![]() to kick him in the chest and push him back. He will most likely repeat this process over and over again until he is defeated. If he gets too close to you and puts you inside his attack range, kick to push him away, or consider punching him at close range.
to kick him in the chest and push him back. He will most likely repeat this process over and over again until he is defeated. If he gets too close to you and puts you inside his attack range, kick to push him away, or consider punching him at close range.
Area 1-3[edit]
Enemies introduced[edit]
Progression[edit]
![]() ×3,
×3,
![]() ×3,
×3,
![]() ×4,
×4,
![]() ×1,
×1,
![]() ×3,
×3,
![]() ×2,
×2,
![]() ×1,
×1,
![]() ×3,
×3,
![]() ×2,
×2,
![]() ×2,
×2,
![]() ×4,
×4,
![]() ×4,
×4,
![]() ×2,
×2,
![]() ×1,
×1,
![]() ×2,
×2,
![]() ×2,
×2,
![]() ×3,
×3,
![]() ×4,
×4,
![]() ×1,
×1,
![]() ×3
×3
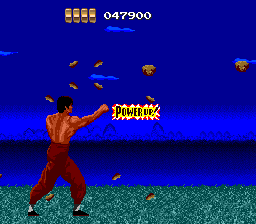
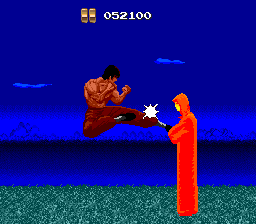
This stage starts off with three sets of small rocks at three different heights. The first set is rather high, and should be ducked. The second set is only a little lower, but can be hit with punches. In fact, the first rock of the set will provide you with health. The third set is incredibly low to the ground and will only hit you if you are not standing all the way to the left. To make up for the lack of power-ups in the previous stage, a book will come flying across the screen just as the first monk makes its appearance. After two sticks, the first cobra of the game will appear. Watch it and wait for it to strike, and prepare to jump over it as it races across the floor. Then jump over the following three boulders. After a set of four insects, spaced apart, and four low flying rocks, two more cobras will appear, one near the bottom, and the other higher up and closer to the cliff. Carefully jump over both, and prepare for your first encounter with a red monk. Remember that you must quickly strike this monk three times in order to defeat it and prevent it from hitting you. After that, the remainder of the stage shouldn't contain any major surprises for you. The stage ends with three red monks, but they are fairly spaced apart, so they will not be able to gang up on you.
Boss: Xing Guan[edit]
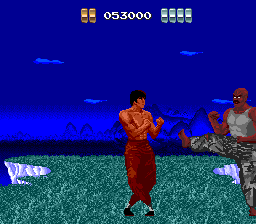
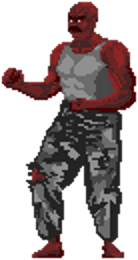
The third and final boss of Area 1 may look similar to the previous two, but he is much darker, and dressed in gray. In addition to the change in appearance, he has a new move, a head-butt attack that has a surprisingly good range. He can successfully hit you with it while standing farther away than his kick range. While the same strategy can still be applied against him (hold ![]() and press
and press ![]() to kick him when he's close), he will not be quite as dumb about it, and will block a number of your attacks. Kick persistently, and one of them will eventually land and hurt him. Although it's a lazy method of attacking him, this boss can do considerable damage to you if you let him, so play it safe and keep your health for the next area.
to kick him when he's close), he will not be quite as dumb about it, and will block a number of your attacks. Kick persistently, and one of them will eventually land and hurt him. Although it's a lazy method of attacking him, this boss can do considerable damage to you if you let him, so play it safe and keep your health for the next area.


