Crystalis/Shyron
Goa Fields[edit]
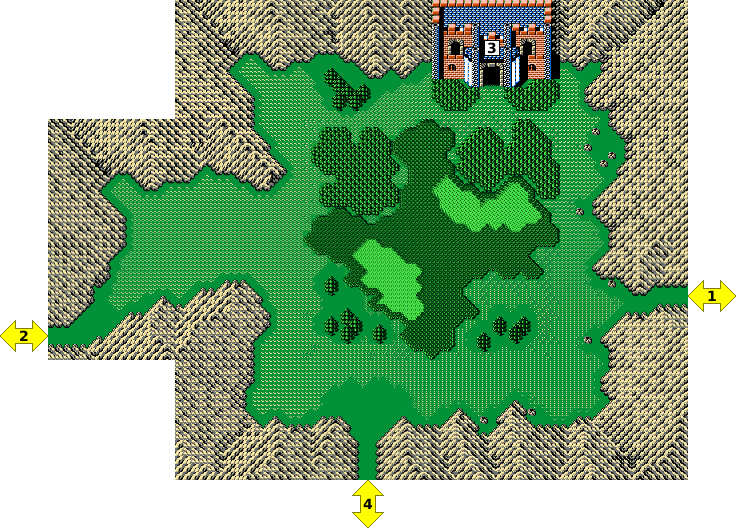
- Key points
- To/from Swan.
- To/from Mt. Hydra.
- To/from Goa.
- To/from Death Desert.
For its size, the Goa Fields are very simple if dangerous due to the Draygonian Archers and Harpies. If you haven't passed through the checkpoint at the west end of Swan, Change into a Soldier to do so now. A destination is at every compass direction. You came from Swan to the east and need to simply go straight across to the west end to reach Mt. Hydra, where the town of Shyron is hidden.
Mt. Hydra[edit]
| Items to Obtain |
|---|
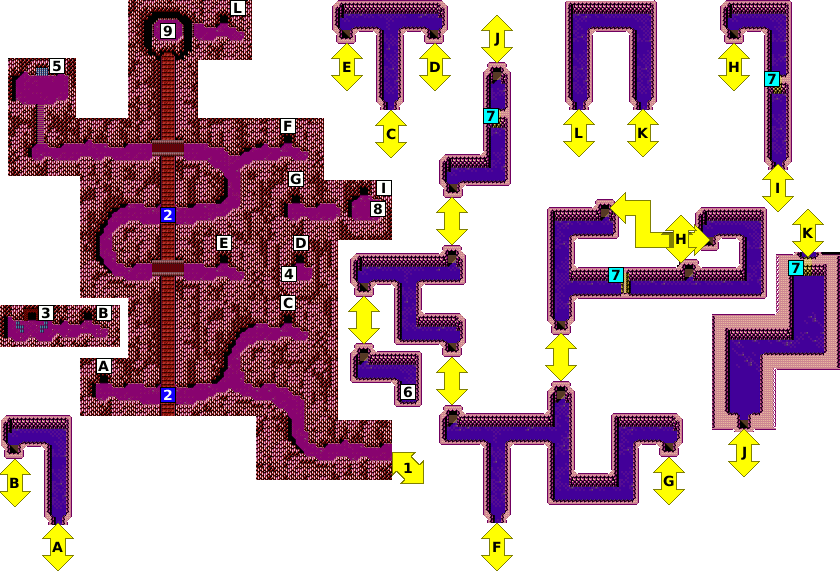
- Key points
- To/from Goa Fields.
- Fire a Level 2 Water bolt to create ice bridges across these channels.
- To/from Shyron. Change into Stom to be admitted the first time.
- Fruit of Lime.
- To/from Styx. Open with Key to Styx.
- Medical Herb
- Fire a Level 2 Wind bolt to blast each of these crumbling walls.
- Magic Ring
- Bow of Sun. Use Flight to cross the gap.
The place sounds very dangerous, but the danger only starts when you climb up. You're actually safe right now at the base of the mountain. Keep going west until you find a narrow lava flow. Despite the heat, the Sword of Water can still freeze an ice bridge here with a level 2 bolt. Pass through the short cave passage. Once you emerge, you will find the gates to Shyron guarded. Since they don't know you, they won't let you in. Change into Stom and they will open the gate.
Shyron[edit]
| Items to Obtain |
|---|
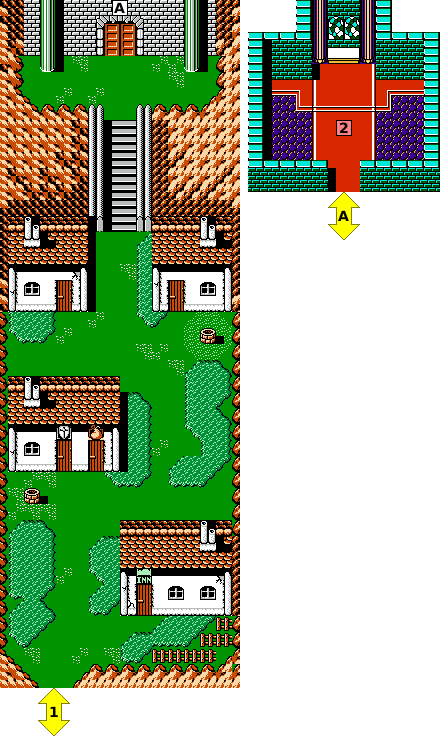
- Key points
- To/from Mt. Hydra.
- a. The first time you visit, Zebu gives you the Key to Styx.
b. BOSS: Mado. Defeat to win Ball of Thunder. You will face him in a later visit.
| Inn | Armor Shop | Tool Shop | |||||
|---|---|---|---|---|---|---|---|
| 150 | 5500 | 6000 | 5000 | 180 | 200 | 300 | 800 |
You will find plenty of familiar people here, including Akahana, who reveals he is a Draygonian from Goa who left because he didn't like the regime. The stores here stock some very rare stuff at surprisingly low prices (the Magic Ring at $800 and the Sacred Shield at $6000, $3000 less than at Amazones). If you have the cash, splurge because the bargain isn't going to last...
At the north end of the village is the Temple. Here, you will meet Zebu who tells you to delve in the heart of the volcano, a region known simply as Styx. He gives you the Key to Styx (The game misspells this as "Key to Stxy".) so you can enter in search of the Sword of Thunder. Leave Shyron and return to the base of Mt. Hydra (NOTE: The guards will now recognize you and admit you in future. You can also Teleport).
To locate Styx, first retrace your steps across the ice bridge to the fork. Take the north fork into the cave network. Fortunately, the way to Styx isn't that difficult. Just take the left branch and exit, then follow the outer path all the way around (creating an ice bridge along the way) and taking the left at the fork until you reach the gate to Styx. Use the key to unlock the gate then delve inside.
Styx[edit]
| Items to Obtain |
|---|
- Key points
- To/from Mt. Hydra.
- Use Barrier to safely pass these constantly-shooting statues.
- Fire a Level 2 Water bolt to create ice bridges across these channels.
- Medical Herb
- Sword of Thunder Once you take it, you will be teleported back to Shyron.
- Psycho Shield. You need Flight to be able to cross the water blocking access.
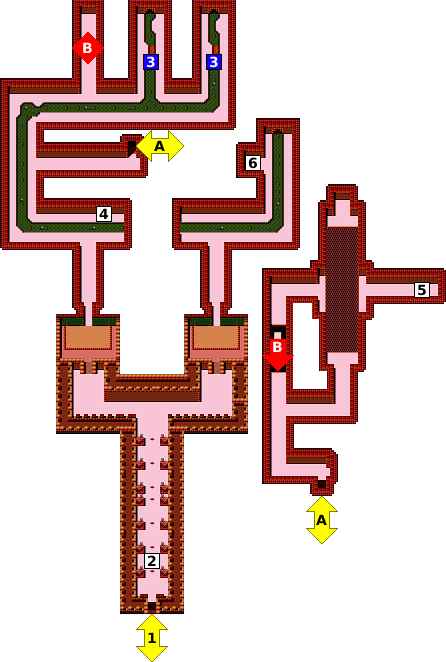
The first thing you should see are pairs of statues constantly shooting rocks between them. Any attempt to try to slip through will only get you hurt. The only way you'll be able to get through this gauntlet is to employ the Barrier spell. It's rather expensive, but it's the only way through. Conserve magic by using it in bursts: just long enough to reach safe points along the way.
You're not equipped to get the item in the right fork, so go left instead. Use Barrier again to protect yourself against the Sorcerer's spells while you quickly hack him to pieces, or there is a spot in the top left or right corners where you are out of reach from his attacks. The path in the next area is pretty straightforward. Follow the riverbank until you can find spots to cross using ice bridges. Eventually, you'll arrive on the right side of the river where you can find a way upstairs.
Be careful here. The Giant Eyes cast Petrify spells while the Killer Moths, like before, scatter paralyzing dust when they die, and they're everywhere. If you bought a Mirrored Shield in Amazones, now would be a good time to equip it, just in case a stray petrify spell comes your way. Though, you may prefer to use the Sacred Shield to protect you from Paralysis. The right path leads to lots of painful spikes where one can use the Rabbit Boots to minimize damage. Additionally, if you already have the Leather Boots found in the Oasis cave you may use them here to be immune from the damage. If you want to avoid the spikes, go up and wait for the moving platform to cross the gap; however, if you slip, you'll fall back to the river area. Once you make it across the gap, you will only need to hop your way past a short stretch of the spikes. But don't open the chest yet if you're not quite at level 12. Once you take the Sword of Thunder, the Elders will teleport you back to the Temple at Shyron.
There, you will meet Azteca, the leader of the Elders and founder of the rebel movement. He and three of the Elders will fill in some of the blanks on the time between your stasis and now: about how Draygon recruited the Finest Four and how he plans to exploit Mesia's power. Your next step is to take the fight to Draygonia. Proceed to Draygonia's capital: Goa.
