
Day 1[edit]
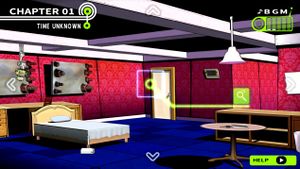

Makoto wakes up in his room, a sight that should soon become familiar. Start by examining everything you can: the lint roller by the bed and the bed itself, the key on the table, the trash can, the piece of paper on the wall to the right, the bathroom door against the far wall, the notepad on the counter to the left and the drawers below it, and lastly, the monitor and the surveillance camera that resemble those in the classroom. Makoto should have found a brand new toolkit in the drawer and a notice by Monokuma. The notice states that the locks on the students' doors have been specially designed to resist tampering or lock-picking, and the water in each bathroom's shower is shut off at nighttime. Additionally, the girls have received a sewing kit in place of a toolkit as well as an additional lock on their bathroom doors. After reading, Makoto crumples up the notice and tosses it in his dorm's trash can. Once everything is examined, turn the camera right and interact with the brown door to leave.
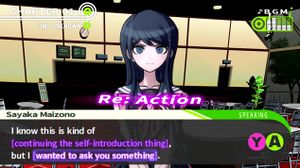
Upon entering the hall, Makoto bumps into Sayaka Maizono, the Ultimate Pop Sensation. After the conversation, turn left until reaching the open space, then turn left and examine the open doors to the dining hall. After speaking to Sayaka, Re: Actions are introduced. Speak to her again and react to [continuing the self-introduction thing], then speak to her once more and react to [wanted to ask you something]. Examine the clock high on the wall to finally discover the time: 7:00 PM. At this point, everyone gathers to share the results of their respective investigations, with the exception of Kyoko Kirigiri. Speak to Sayaka twice for the chance to react to [Byakuya] and [Taka]. From these Re: Actions, valuable information is gathered: the dormitories are soundproof, and the keys each have keychains attached to them with the owner's identity etched onto them. The girls also point out that only their bathrooms have locks on them, though Makoto definitely remembers his own bathroom being locked.
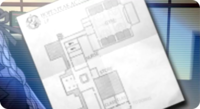
Speak to Sayaka again, this time reacting to [Leon, Hiro, Junko and Chihiro] for confirmation regarding a means of escape. Lastly, react to [Hina, Sakura, and Mondo] and [Celeste, Toko, and Hifumi], then speak to Sayaka one last time. Kyoko finally enters the room to introduce a new piece of evidence: a map of Hope's Peak Academy, which matches the building the Ultimate students have found themselves in exactly. It appears the killing game really is taking place in Hope's Peak Academy, but something still isn't right.
Back in Makoto's room, examine the bathroom door. Apparently, the door itself isn't actually locked; there is simply a problem with the door frame. With that, the day ends.
Days 2 and 3[edit]

The next morning, examine Sayaka's door, then react to [favor] and go to the gym. Examine the sword, which is actually a replica in gold coating. Sayaka pushes Makoto to take it. Speak to her and react to [dream]. Afterward, you are introduced to free time, which would ordinarily give Makoto the opportunity to bond with any of his housemates. However, for now, he is limited to Sayaka, so examine her door and spend some time with her. When prompted with a choice, select "Crane." Makoto is given two more sessions of free time afterward, and he will have the opportunity to choose anyone available from now on.
Day 4[edit]
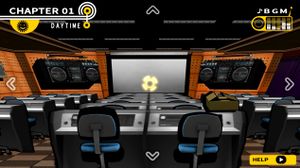

Another morning later, examine the door to speak with Kiyotaka. Head to the dining hall and speak to Kiyotaka again to begin a group discussion. React when Chihiro says [certain murderous fiend]. She brings up Genocide Jack, the infamous serial killer, as a potential suspect behind the killing game. Shortly afterward, Monokuma arrives to give the students a motive to kill: a "special video" showing the students what's happening outside the school. To investigate, head to the A/V room on the other side of the building (marked by a cassette icon on the map). Examine the cardboard box atop the console to find the DVDs Monokuma mentioned, then examine the console to find a disturbing image. Exit the A/V room and head right, then left to find classroom 1-A. Enter and speak to Sayaka. Back in Makoto's room, examine the door to speak to Sayaka. React when she says [something really weird]. It seems Sayaka was a victim of some suspicious behavior, so Makoto agrees to swap rooms for the night.


In Sayaka's room, examine the trash can, the bed, the bathroom door, and the drawers. In the trash can is a DVD marked with Sayaka's name. Makoto recognizes it as part of the bunch that the two of them found in the A/V room. Whatever is on it, it caused Sayaka to go into a great panic. In the drawers is the sewing kit, complete with a map of the body's vital organs just as Monokuma had announced. While Makoto left his toolkit in shrinkwrap, Sayaka seems to have opened her sewing kit. As for the bathroom, Makoto refuses to enter as he believes it would be against Sayaka's wishes, concluding the fourth day at Hope's Peak Academy. Makoto heads to the dining hall as soon as he wakes up to meet the others, but they soon realize that something isn't right. Back in Makoto's room, examine the bathroom door to find a grisly scene.
