Talk to Kyoko before examining the body, then speak to Celeste. It is then that Makoto receives the Monokuma File, giving him access to valuable information on the murder. It reveals the time of death as 1:30 AM and the cause of death as a stab wound to the abdomen, though there was also a fracture in the right wrist. Keeping the basics of the murder in mind, return to the scene of the crime: Makoto's room.
Makoto's Room
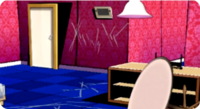

Examine the scuffs on the wall and floor, which will also direct Makoto's attention to the tears on the bed. There was clearly a struggle here, but who would Sayaka have been fighting with to make such a mess? Regardless, nobody would have been able to hear such a scuffle due to the soundproof nature of the dorms, and Makoto receives the Evidence of a Struggle clue, in the form of a Truth Bullet, which should come in handy during the trial. For another Truth Bullet, examine the drawers by Makoto's bed. The toolkit is inside just as Makoto left it, shrinkwrap and all. Mondo points out that none of the guys have opened their toolkits. While this information doesn't seem significant at the moment, Makoto receives the Toolkit Truth Bullet.

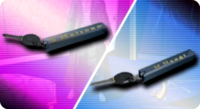


Moving on to the floor, examine the lint roller, which seems to have been used. Examine the sword and sheath for the Replica Sword and Replica Sword Sheath Bullets, respectively. It seems that the sword was used, as it's missing much of its gold coating on the handle and even some on the blade, while the sword sheath appears to be damaged. Examine the key for the Switching Rooms Truth Bullet. It's Makoto's key, which wouldn't be out of the ordinary since the pair agreed to switch rooms, but it does raise one big question: if Sayaka had the key, why would she have let someone in? She was too rattled to recklessly let someone into the room, and even plainly stated to Makoto that she wouldn't open the door unless she made sure it was him. Speak to Mondo and he'll bring up the trash chute, which seems to be as good a place as any to find some evidence disposed of by the killer, but before making a move, speak to Kyoko. React when she says there's something [very unusual] about Makoto's room; Kyoko points out the complete absence of hair in the room, which is where the lint roller comes in for a new Bullet: Makoto's Room Cleanliness. Finally, examine the open bathroom door to move into the next room.
Makoto's Bathroom

The next phase of the investigation is the examination of Sayaka's body. Start by examining the message on the wall behind her, which appears to be written in her own blood: 11037. It looks like a meaningless sequence of numbers, so the significance of it, if any at all, can't be determined just yet. Next, examine the body. The fatal wound was very clearly caused by a sharp object in Sayaka's abdomen. Her wrist is bruised where the Monokuma File mentioned the fracture, but there's some glitter right by the bruise. On her other hand is some blood on her finger, though there are no wounds there. This earns you the Truth Bullet Sayaka's Wrist.
Makoto's Room

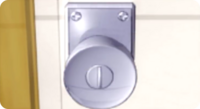
Kyoko approaches Makoto as soon as he returns. React when she mentions [bloody numbers]. Kyoko figures the positioning of the numbers indicates that Sayaka was trying to block them with her body, hiding them from the view of the killer. Kyoko suggests that Sayaka's awkward positioning may contribute to the message's apparent lack of meaning, and with that, Makoto receives another Truth Bullet: Dying Message. The final Truth Bullet in this room is collected in the same conversation, the Bathroom Doorframe. Afterward, examine the doorknob as directed by Kyoko and speak to her again. The doorknob seems to have been dislodged with a screwdriver, but the killer should have known that this was Makoto's room, and as mentioned earlier by Monokuma, the boys' rooms don't have locks on their bathroom doors. However, Kyoko finds this information strange for a different reason. Follow her out of the room and into the hall.
Hall

Examine the door of the room you just left. Despite being Makoto's room, the nameplate on the door reads Sayaka. The nameplate on Sayaka's door, then, reads Makoto, which matches where they were staying for the night. Sayaka and Makoto's plot to switch rooms in order to deceive Sayaka's attacker was all for naught, but this does explain why the killer assumed there was a lock on Makoto's bathroom door, earning you the Dorm Nameplates Truth Bullet. Enter the room marked with Makoto's nameplate.
Sayaka's Room and A/V Room

Examine the trash can to find the DVD that Sayaka disposed of before her death. Exit and go to the A/V Room, then examine the console to play the DVD. This gives Makoto some insight on Sayaka's motive, but not much else. Exit to the Dining Hall.
Dining Hall and Kitchen

Speak to Aoi, then examine the passage behind her to enter the kitchen area. Examine the set of knives lined up on the wall. It seems one of the knives is missing from the lineup, earning Makoto the Kitchen Knife Set Bullet. Return to the dining hall and speak to Aoi again. She recalls the knife set being complete as of last night, confirming Makoto's suspicion. Afterward, exit to the Trash Room.
Trash Room



Examine the gate for an encounter with Monokuma. Speak with Hifumi, standing in the hall outside Junko's door, for access past the gate. Examine the Incinerator to find that it's on. However, Hifumi mentions that the last time he was in the trash room, the incinerator was off, but he's also the only one with access to the incinerator, as the holder of the key. Who could have turned on the incinerator without access to it? Examine the Burnt Shirt Piece in front of the incinerator. Its location and the appearance of blood are very clear indicators of an attempt to dispose of evidence, but many of the students own white button-up shirts, making the search for the killer no easier. Finally, examine the glass, which is actually a Shattered Crystal Ball. It seems like something that would belong to Yasuhiro, so go to the gym to speak to him about it.
Gym
Speak to Yasuhiro and he will confirm that the now-destroyed crystal ball was his. Now that all evidence is collected, Monokuma summons the students to the courtroom, past the big red doors in the hall. Exit to the courtroom to proceed with the trial.
