Examine the door. After the scene, examine the trash bags. After the short conversation, speak to Kyoko. React when she mentions [a reason that I had to survive]. React again when she mentions a [very important reason]. Speak to Kyoko and react to [my purpose, and my ability], then [someone I had to find], and finally the [2nd floor of the dorms]. Speak to her once again to react to [what was going on], [you], and the [work of the mastermind]. Speak to Kyoko and examine the door to begin the final chapter.
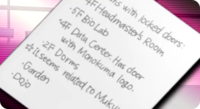
In the trash room, speak to Kyoko. Exit to the gym and once given the chance, speak to Kyoko again. React when she says [let down their guard], then exit to the dining hall. Speak to Kyoko again and react to [what I have to tell you all] and [can't agree]. Speak to Kyoko one last time before heading to the second floor of the dormitories. You also receive your first Truth Bullet, Places to Check. Makoto has made a list of some places to investigate now that all doors in Hope's Peak are unlocked, but will it be enough to uncover the mystery of the mastermind?
Second floor of the Dormitories
Start by entering the door at the end of the hall, around the corner. This is the...
Headmaster's Private Room

Examine the computer behind Kyoko, then the wall to the right of it. React when Kyoko mentions [how to open it]. Examine the computer again for some information on The Ultimate Despair - which is actually a group of people, rather than a sole actor - but still no lead on the password that might open up the way to the headmaster's hidden room. However, Makoto thinks he may have thought of something that even Kyoko hasn't. Examine the computer again to try it out. Afterward, follow Kyoko into the hidden room.

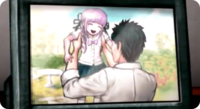
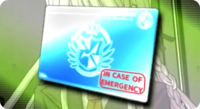
Inspect the gift-wrapped box on the table in the center of the room. Inside the Hidden Room Present is what Kyoko suspects are the remains of her father. Alter-Ego stated in the past that he believed the headmaster was inside the school, but he did not clarify whether or not he was alive. While Kyoko tries to keep it together, examine the Photo of Kyoko and Headmaster atop the drawers in the back of the room. To keep the photo of him and his daughter after all this time, Makoto deduces that the headmaster really did care about her. Finish off the search of the hidden room by examining the desk. Inside a drawer is the Headmaster's e-Handbook, stamped "in case of emergency." With this, you can now explore parts of the school that were previously inaccessible due to e-Handbook security. React when Kyoko asks for a [favor] before taking this useful key down to the locker room, a door back down the hallway marked by a giraffe in a locker.
Locker Room

Examine the still-standing locker in the back, directly to the right of the ones that are completely destroyed. Examine it again to use the newly-acquired emergency e-handbook. Examine what looks to be a pocketbook inside. Upon closer examination, Makoto discovers that this Locker Pocketbook actually belongs to Kyoko. She wrote of a plan to isolate the students of Hope's Peak inside the academy, in which they would live a communal lifestyle under the headmaster. Strangely enough, these words contradict everything Kyoko has told Makoto up to this point, so what could they mean? The last pages also contain a strange message concerning a "second despair," written more sloppily than the previous journal entries. What does any of it mean?
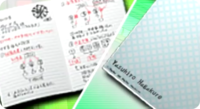
Examine the lone intact locker to the left to also open it with the emergency e-handbook. Examine the crystal ball, the cards, and the notebooks to get a sense of who this locker could possibly belong to. The Locker Notebook is strong evidence that the locker not only belongs to Yasuhiro, but that he somehow took classes here.
Everything of interest on the dormitory's second floor has been accounted for, so continue the investigation by heading to the bio lab on the fifth floor.
Bio Lab
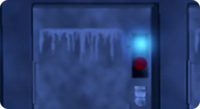
Examine the freezers at the back of the room with lights beside them as well as the unlit freezers to the right. Examine the desk to discover the Bio Lab Secret: it has apparently been repurposed as a morgue. The instruction manual also makes clear what the Bio Lab Lights by the freezers indicate. Apparently, a light by a freezer indicates that there is a body inside. This must have been where the murder victims as well as the executed blackened students ended up, but do the lights match up with everything the students have experienced so far? Examine the tarps before continuing to the dojo.
Dojo
The only point of interest here is a conversation with Toko, which is fruitless nonetheless. Exit to the garden to continue the investigation.
Garden

Enter the toolshed in the back and once inside, examine the Tarp. The tarp that was used to shield Mukuro's body from the sprinklers is marked with a "Bio Lab" stamp that Makoto didn't notice before. This could only mean that it originally came from the previously-locked Bio Lab. With nothing else to look for here, continue to the data center.
Data Center
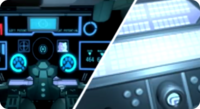
Examine the now-unlocked Monokuma door to enter the control room. Examine the large computer in the center of the room, then return to the data center. Speak to Monokuma, then re-enter the control room. It seems as if this is actually a Monokuma Control Room, and since it is completely separate from the surveillance-centric data center, this would mean Kyoko's theory has been correct all along: the mastermind couldn't actually control Monokuma and monitor the students simultaneously. Exit to be locked out of the data center completely, not that it matters; you've obtained all information you possibly could, so head to the headmaster's office next.
Headmaster's Room
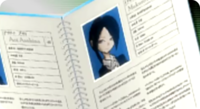
Speak to Byakuya when he mentions [something interesting], [information about Mukuro], and [advice]. The second page of Mukuro's Profile contains some important information about her, such as height, weight, and vitals. It also states that she had no battle wounds or scars prior to entering the academy. Byakuya believes this information is important as far as Mukuro's corpse goes, so make sure to keep it in mind. With the investigation done for now, you should be invited to the gym by Monokuma. Head there next.
Gym
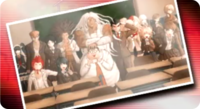
After a run-in with Yasuhiro in front of the gym, examine the doors to enter. Once inside, examine the envelope on the floor as prompted by Monokuma. Inside is a Group Photo. It's reminiscent of the photos Makoto found lying around before, but this one includes all of the students involved in the killing game - including mysterious sixteenth student Mukuro. However, there is one exception, and that's that Makoto himself is nowhere to be found in the picture. Such a situation only could have occurred if everyone else had been friendly at some point, but is that even possible? Exit the gym and head to the archive in the library.
Archive, Dining Hall, and Garden
Speak to Byakuya, or at least attempt to. Byakuya is acting strange, so for now you can only continue to question the others. Head to the dining hall and speak to Aoi, then speak to Yasuhiro in the garden. Finally, head to the bio lab.
Back to the Bio Lab and A/V Room
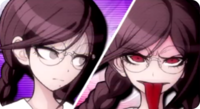
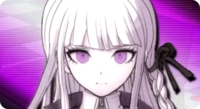

Examine Toko to awaken Genocide Jack. It is here that you learn that Genocide Jack's Memory is separate from Toko's, and that Genocide Jack may remember things that Toko doesn't. After she leaves, examine the body sticking out of the freezer. React when Kyoko says that this must be [Mukuro's body]. Examine the tarps and the freezers while waiting for Kyoko to conclude her examination of the corpse. Once that's done, speak to Kyoko and react for her [report]. According to Kyoko's Account the blow to the head and the stab wound were inflicted on Mukuro after death. React when she asks if there's anything else you'd like to know about [the condition of the body]. Speak to her once more to question her about the pocketbook found in the locker. Before she leaves, Kyoko hands Makoto an Interview DVD. Take it to the A/V room and examine the DVD player to view some startling footage.
With all possible evidence collected, head to the courtroom for the final trial of the game.
