Danganronpa V3: Killing Harmony/Despair Dungeon

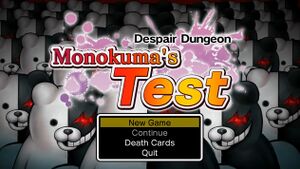
Despair Dungeon: Monokuma's Test (絶望のダンジョン モノクマの試練 Zetsubō no Danjon Monokuma no Shiren?) is where the cards obtained in the Ultimate Death Card Machine and leveled in the Ultimate Talent Development Plan are put to the test in a turn-based RPG. Like the aforementioned bonus modes, this can only be played following the main game (more specifically, after clearing the Ultimate Talent Development Plan once). As in the traditional JRPGs that Despair Dungeon takes inspiration from, a 4-member party is formed to battle monsters and advance through the floors of the dungeon. For a list of characters that can be used in this mode as well as their stats, see the Ultimate Death Card Machine page. For information on leveling them, see the Ultimate Talent Development Plan page.

Characters can perform physical attacks (which deal more damage with a high Strength stat) and Skills (which become more powerful with higher Intellect). Skills come in handy for buffing attacks, defending against attacks, health recovery, and to attack enemies that are weak against certain elements, but they spend Focus (MP). As the characters attack, a gauge below their health and magic fills. Once this gauge is filled up, the "Awaken" option can be used, allowing the characters to attack twice. The more the gauge fills, the stronger the attacks will be. When the party's Influence (HP) drops to 0, the game is forcefully concluded.
If your party doesn't make it very far into the dungeon the first time around, don't fret, as there is a long but steady process of grinding required to clear it:
- Collect G in the Despair Dungeon using the initial selected card until the inevitable game over.
- Use the newly-acquired G to draw Death Cards with higher rarities.
- Use the rarer card in the Ultimate Talent Development Plan. Their higher rarity should allow them to reach a higher level than the previous card. If you are unsatisfied with the card's progress, you can always redo the Talent Development Plan until they achieve the best possible results.
- Collect G in the Despair Dungeon for better equipment and Death Cards, and repeat the process.

Following this process makes the Despair Dungeon more tedious than difficult, but it's certainly doable. Proceeding through the floors also makes receiving Death Cards of a higher rarity much more likely. Be warned that there is a boss fight at the end of every ten floors, but take comfort in the fact that enemies on higher floors drop helpful goodies such as equipment, hundreds of G, and even S or U Tickets, which make obtaining a rare card a guarantee. Tips for clearing each set of floors, bosses that must be defeated, and the rates at which Death Cards of varying rarity can be obtained are listed below.
| Floors | Boss | Tips | Death Card Rates | ||
|---|---|---|---|---|---|
| N | S | U | |||
| B1-10 | Monokumasect | Sports Type cards with high Strength and Influence can carry the party through these floors. Make sure at least one character has access to the Recover Influence Skill. The Monokumasect has less than 1000 HP, so keep characters with high Strength attacking it while staying on top of Influence recovery. | 99% | 1% | 0% |
| B11-20 | Monokuma Tank | Try to collect some S Death Cards using the increased rates before attempting these floors. The Monokuma Hermit enemy attacks with ice, and is thus resistant to ice attacks. The Curse Monogirl is capable of poisoning the party. Monokuma Gather, Monokumantala, Monokumamel B, and the Monokuma Tank boss are resistant to physical attacks, so strong elemental Skill attackers are essential here. A high-level Poison attack can also do considerable damage against the Tank. | 97% | 3% | 0% |
| B21-B30 | Monokuma Boss | Enemies from the previous set of floors make a return here, so elemental Skills are essential yet again. The floors here are also wider, making enemy encounters more common. Exisal Blue can be found protecting a treasure chest on B25; prioritize finding the exit to the next floor, as this is a powerful enemy. If you do wish to try battling it, consider escaping if the party finds itself in a tough spot. As for the boss, focus on hitting it with physical attacks such as the Falcon Kick Skill. | 93% | 7% | 0% |
| B31-B40 | Mon'Duba | Most new enemies here can be defeated with physical attacks. Defeat the Twisty Monokuma enemy as quickly as possible if it appears, as it is capable of absorbing Focus from the party. The boss of this set of floors is resistant to elemental Skills, so focus physical attacks on it. | 85% | 14.5% | .5% |
| B41-B50 | Monokoppa | The rate for S cards should be greatly improved on these floors, so try to make a full party of them to stand a better chance. B49 features a gauntlet of previously-defeated bosses leading up to the tough B50 boss. Use the Defense Up and Awakening Up Skills to defend against it. | 75% | 24% | 1% |
| B51-B60 | Monokumasect V3 | This set of floors is a rehash of the first ten floors, albeit with stronger versions of past enemies. If you reach this point once, you will be able to start from here on subsequent playthroughs. To prepare, make a team with U Death Cards and max out the Recover Influence Skill so that it affects the whole party. A maxed out Wind Barrier Skill to defend against attacks, as well as a maxed Zeal Skill and a high Agility stat to land attacks against dodgy enemies, should also be helpful. | 62% | 33% | 5% |
| B61-B70 | Monokuma Tank V3 | As with the previous set of floors, maxed out Zeal, Recover Influence, and Wind Barrier Skills should make these floors much more bearable. High Agility is also essential in order to hit quick enemies and avoid powerful attacks. | 52% | 38% | 10% |
| B71-B80 | Monokuma Boss V3 | Exisal Pink stands in the way of a treasure chest on B75. The boss will use Zeal. Do the same and make sure to defend against it, though its attacks do considerable damage even with defense raised. A character with high Agility is capable of dodging these attacks. | 45% | 40% | 15% |
| B81-B90 | Mon'Duba V3 | Maxed out Fighting Spirit, Zeal, Wind Barrier, and Recover Influence are necessary to take on this boss. As it has around 25,000 HP, prepare to fight it for a while. If two characters have access to maxed defensive Skills such as Wind Barrier and Recover Influence, the battle should be much easier. | 40% | 40% | 20% |
| B91-B100 | Monokoppa V3, Monokuma V3 | Some enemies on this floor are so quick that attacking first against them is impossible. The boss is also just as aggressive as its previous incarnation. Helpful Skills here are Ultra Defense, Awakening Up, Zeal, and a maxed offensive skill such as Falcon Kick. Defeating the final boss unlocks the hidden boss, Monokuma V3. | 33% | 33% | 34% |
