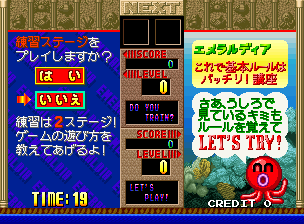
Once you have pushed the joystick to the left, and pressed the Rotating Button to confirm that you want to play in Adventure Mode, the three-script text Renshū sutēji wo purei shimasu ka? (練習ステージをプレイしますか?) will be displayed upon the screen and you will have twenty seconds to select either Hai (はい) or Īe (いいえ) by pushing the joystick up and down and pressing the Rotating Button to confirm your choice; if you select the former, the game will proceed to the Practice Ocean, but if you select the latter, the game will proceed to the opening cutscene. Therefore, if you have selected the latter, you will have to skip the first section for this page (which obviously pertains to it), and scroll down to the section about the South Pacific Ocean instead.
Practice Ocean
Stage 1
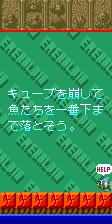
This stage contains seven Red Blocks and one Tai, which is written in Hiragana as たい; the three-script text of Kyūbu wo kuzushite sakana-tachi wo ichibanshita made to otosō. (キューブを崩して魚たちを一番下までと落そう.) will appear on the screen before it starts, and as in Normal Mode, the 3-script text of Shiroku hikatte iru no ga kuzuseru kyūbuda! (白く光っているのがくずせるキューブだ!) will appear on the screen the first time the blocks start flashing to indicate which ones will crack. All you have to do to clear this stage is land a Red Block upon any of the seven existing ones to make them all shatter, and the Tai will jump into the water and swim away.
Stage 2
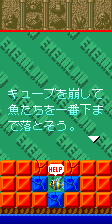
This stage contains seventeen Red Blocks, three Blue Blocks, and another Tai; and again, the three-script text Kyūbu wo kuzushite sakana-tachi wo ichibanshita made to otosō. (キューブを崩して魚たちを一番下までと落そう.) will appear on the screen before it starts. The best way to clear this is to land a Red Block upon any of the seven top ones to make all of them crack, or shatter in the case of the two already-cracked ones, then land a Blue Block on either of the two now-exposed ones to make all three of them shatter, and the Tai will jump into the water and swim away - the game will now proceed to that opening cutscene, described in the next section.
1st Ocean: South Pacific Ocean (南太平洋, lit. Minamitaiheiyō)


Stage 1
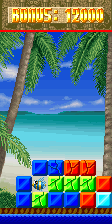
This stage contains six Blue Blocks, four Red Blocks, four Green Blocks, one Cyan Block and a third Tai; the bonus timer starts at 12000, and the best way to clear it is to land a Blue or Red Block on one of the existing ones to make them all crack (or shatter, in the case of the already-cracked ones), then land a Green Block on one of the existing ones, to make them all shatter. The Tai will then jump into the water and swim away - and you will then receive your amount of remaining bonus time in 100-point increments.
Stage 2
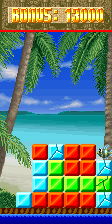
This stage contains nine Red Blocks, six Cyan Blocks, five Green Blocks, and a fourth Tai; the bonus timer starts at 13000, and the best way to clear it is to land a Cyan Block on one of the two uncovered existing ones to make them all crack (or shatter), then land a single Green Block on the now-uncovered one to make them all crack (or shatter); the already-cracked Cyan Block that the Tai is standing on will then land on the one below it, causing both of them to shatter. The Tai will then jump into the water and swim away - and you'll then receive your amount of remaining bonus time in 100-point increments. There is now only one more stage left to go.
Stage 3
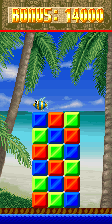
This stage contains six Blue Blocks, six Red Blocks, six Green Blocks and a fifth Tai; the bonus timer starts at 14000, and the best way to clear it is to land a Blue Block upon either side of the screen (uncovered) then land a second Blue Block on it to make them (and the three existing ones next to them) crack; you will then have to land another Blue Block on them, to make them shatter, and land a Green Block on either side of the screen (uncovered). You'll then have to land another Green Block on it to make them (and the two existing ones next to them) crack and a third Green Block on them to make them shatter - and the four existing Red Blocks above them will then fall down onto each other, and shatter, but you will still have to land a fourth Green Block on either side of the screen (uncovered), then land a fifth Green Block on it, to make these (and the three existing ones next to them) crack, with a sixth one to make them shatter. You will then have to land a fourth Blue Block on either side of that screen (uncovered), then land a fifth Blue Block on it, to make these (and the three existing ones next to them) crack, with a sixth one to make them shatter; the Tai will then jump down into the water and swim away, and you will receive your amount of remaining bonus time, in 100-point increments.

To use the Tai No Kagayaku Uroko in the next ocean, push the joystick up and press the Rotating Button; once you do so, the Katakana/Hiragana text Minto ha tai no kagayaku uroko wo tsukatta! (ミントはたいのかがやくうろこをつかった!) will appear upon the screen, and all except the bottom two rows of blocks will be shattered. However, it can only be used in the next ocean and it can only be used on one occasion so you must save it for an emergency.
2nd Ocean: North Pacific Ocean (北太平洋, lit. Kitataiheiyō)
Stage 1
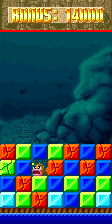
This stage contains seven Red Blocks, eight Green Blocks, nine Blue Blocks, three Cyan Blocks and one Ankō (written in Hiragana as あんこう); the best way to clear it is to land a Red Block upon one of the four existing uncovered ones to make them shatter, then land a Blue Block on one of the six existing now-uncovered ones to make them crack. You will now have to land another Blue Block on them, to make them shatter, then land another Red Block on the right side of the Ankō - and once you have dropped a third Red Block on it and made them shatter, the Ankō will jump into the water and swim away, and you will receive your amount of remaining bonus time, which starts at 14000, in 100-point increments. It's also worth noting that this second ocean is comprised of five stages.
Stage 2
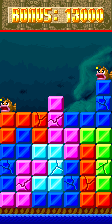
This stage contains: ten Red Blocks, ten Magenta Blocks, fifteen Blue Blocks, five Green Blocks (and two more Ankō); the best way to clear it is to land a Red Block upon one of the two uncovered existing ones to make all five of them crack (and shatter), then land a Blue Block upon the now-uncovered existing one, to make all six of them crack and shatter. You will then have to land a Magenta Block (upon the now-uncovered one), to make all six of them crack and shatter - and the first Ankō will then jump into the water and swim away. But your stage is not over yet; you will then have to land another Blue Block on one of the two other uncovered existing ones to make all six of them crack and shatter, then land a Green Block on one of the two now-uncovered existing ones to make all six of them crack and shatter. You will then have to land another Red Block upon the other now-uncovered existing one to make all six of them crack and shatter - and the second Ankō will then jump into the water and swim away, and you will receive your amount of remaining bonus time, which starts at 13000 in 100-point increments. This is also the first stage to feature multiple sea creatures.
Stage 3
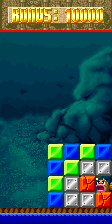
This stage contains four Green Blocks, four Blue Blocks, five Metal Blocks, two Red Blocks and a fourth Ankō; the best way to clear it is to land a Green Block on one of the two uncovered existing ones (to make them crack), then land another Green Block on them to make them shatter. You will then have to land a Blue Block on one of the two existing uncovered ones, to make them crack, then land another Blue Block upon them to make them shatter - and you will then have to land a Red Block on top of the now-uncovered (indestructible) Metal Block, then land another Red Block on it to make all four of them crack (and shatter). The Ankō will then jump into the water and swim away, and you'll receive your amount of remaining bonus time (starting at 10000), in 100-point increments.
Stage 4
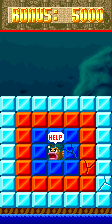
This stage contains twenty-four Cyan Blocks, sixteen Red Blocks, eight Blue Blocks and a fifth Ankō; the best way to clear this is to land a Cyan Block on one of those seven uncovered ones, to make them all crack and shatter, then land a Red Block on one of the five uncovered ones, to make them all crack and shatter, then land a Blue Block on one of the three uncovered ones to make them all crack and shatter. The Ankō will then jump into the water, and swim away, and you will receive your amount of remaining bonus time (which starts at 5000), in 100-point increments - and it is also worth noting that there is only one more stage left for this ocean.
Stage 5
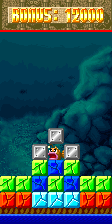
This stage contains: three indestructible Metal Blocks, seven Green Blocks, three Blue Blocks, four Red Blocks, three Cyan Blocks, and a sixth Ankō; the best way to clear this is to land a Green Block upon one of the four uncovered existing ones to make them all shatter, then land a Blue Block on either side of the three existing ones. You will then have to land another Blue Block on it to make them all crack and shatter, then land a Cyan Block on either side of the screen - and, once you have landed another Cyan Block on it to make them all crack and shatter, the Ankō will jump into the water and swim away, and you'll receive your amount of remaining bonus time, which starts out at 12000, in 100-point increments. You'll now be treated to the game's second end-of-ocean cutscene:

To use the Ankō No Hatsu Koi in the next ocean, push the joystick up and press the Rotating Button; once you've done so, the Katakana/Hiragana text Minto ha ankō no hatsu koi kitsukatta! (ミントはあんこうのはつこいきつかった!) will appear on screen, and only one block will fall from the top of the screen instead of three for the remainder of the current stage. However, it can again only be used once in the next ocean so you must save it for an emergency.
3rd Ocean: South Atlantic Ocean (南大西洋, lit. Minamitaiseiyō)
Stage 1
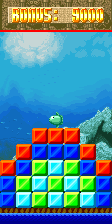
This stage contains seven Red Blocks, nine Blue Blocks, seven Green Blocks, six Cyan Blocks and one Manbō (written in Hiragana as まんぼう); the best way to clear it is to land a Red Block on one of the six uncovered existing ones to make them crack, then land another Red Block on them (to make them shatter). You will then have to land a Blue Block upon one of those eight now-uncovered existing ones, to make them crack, then land another Blue Block upon them to make them shatter - and you will then have to land a Green Block upon one of the four now-uncovered existing ones (to make them crack), then land another Green Block upon them, to make them shatter. You will then have to land a Cyan Block upon one of the four now-uncovered existing ones to make them crack, then land another Cyan Block on them (to make them shatter); the Manbō will then jump into the water and swim away, and you will receive your amount of remaining bonus time (which starts at 9000) in 100-point increments. He will also just say "....." when saved.
Stage 2
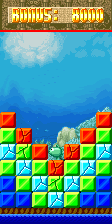
This stage contains seven Red Blocks, thirteen Green Blocks, seven Cyan Blocks, six Blue Blocks and another Manbō; the best way to clear it is to land a Red Block on one of the six existing uncovered ones to make them all crack (and shatter), then land a Green Block on one of the two (now-uncovered) existing ones to make them all crack (and shatter). You will then have to land a Cyan Block on the now-uncovered existing one to make them all shatter - and the Manbō will then jump into the water and swim away (and say "....."), and you will receive your amount of remaining bonus time (which begins at 8000) in 100-point increments.
Stage 3
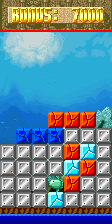
This stage contains: six Red Blocks, six Blue Blocks, twenty-four Metal Blocks, three Cyan Blocks, and a third Manbō; the best way to clear it is to land a Blue Block on one of the two uncovered existing ones to make them shatter, then land a Red Block on one of the three uncovered ones to make them shatter. You'll now have to land a Cyan Block on the now-uncovered existing one to make it shatter - and the Manbō will then jump into the water, and swim away, and you will receive your amount of remaining bonus time (which starts at 7000) in 100-point increments. It is also worth noting that the next stage looks like Blinky from the Pac-Man series.
Stage 4
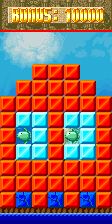
This stage contains forty-two Red Blocks, ten Cyan Blocks, three Blue Blocks and two more Manbō; the best way to clear this is to land a Red Block on one of the seven uncovered existing ones to make them crack, then land another Red Block on them to make them shatter. You will then have to land two Cyan Blocks upon two of those now-uncovered existing ones to make them crack and shatter, and land two Blue Blocks in the spaces between the three existing ones - and once you have landed a third Blue Block on them to make them all crack (and shatter), both of the Manbō will jump into the water and swim away, as you receive a 7650-point bonus (Namco's goroawase number), and your amount of remaining bonus time (which begins at 10000), in 100-point increments.
Stage 5
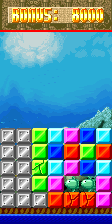
This stage contains eleven Metal Blocks, five Green Blocks, four Cyan Blocks, five Magenta Blocks, three Blue Blocks, five Red Blocks and two more Manbō; the best way to clear this is to land a Green Block on the uncovered existing one to make them all crack (and shatter), then land a Red Block in that space they have left behind. Once you have landed another Red Block on it to make them all crack (and shatter), both of the Manbō will jump into the water and swim away as you receive another 7650-point bonus (Namco's goroawase number), and your amount of remaining bonus time (which starts at 8000), in 100-point increments.

To use the Manbō No Utata Ne in the next ocean, push the joystick up and press the Rotating Button; once you've done so, the Katakana/Hiragana text Minto ha manbō no utata ne wo tsukatta! (ミントはまんぼうのうたたねをつかった!) will appear upon the screen, and the stage will be returned to its original state, but with all the blocks cracked. However, it can once again only be used on one occasion in the next ocean so you must save it for an emergency.
4th Ocean: North Atlantic Ocean (北大西洋, lit. Kitataiseiyō)
Stage 1
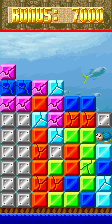
This stage is with five Magenta Blocks, seven Blue Blocks, six Cyan Blocks, eleven Red Blocks, fourteen Metal Blocks, eight Green Blocks, and one Umi Game (written in Hiragana as うみがめ); the best way to clear it, is to land a Magenta Block on that uncovered existing one to make them all crack (and shatter), which will cause the Cyan Block to land on that now-uncovered one and make all three of them crack (and shatter), then cause the Red Block to land on the now-uncovered one and make all six of them crack (and shatter), the Green Block to land on the now-uncovered one, and make all eight of them crack (and shatter), the second Red Block to land upon the now-uncovered one and make all four of them crack (and shatter), the second and third Blue Blocks to land on the now-uncovered ones, and make all five of them crack (and shatter), and the second Cyan Block to land on the now-uncovered one and make all three of them crack, (and shatter). The Umi Game will then jump into the water, and swim away - and you will receive your remaining bonus time (which starts at 7000) in 100-point increments. The stages also appear to be getting harder by this time.
Stage 2
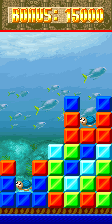
This stage contains nine Blue Blocks, ten Red Blocks, four Cyan Blocks, seven Green Blocks, and two further Umi Game; the best way to clear it is to land a Blue Block on the top of the first Umi Game, then land two more Blue Blocks on it to make them all crack (and shatter). The Umi Game will then jump into the water, and swim away - but the stage is far from cleared. You will then have to land a Green Block next to one of the two existing uncovered ones on the left side of the screen, then land two more Green Blocks on it to make them all crack (and shatter); you will then have to land two Cyan Blocks on the uncovered existing one to make them all crack (and shatter) then land a Red Block next to one of the two uncovered existing ones on the left side of the screen. You will then have to land two more Red Blocks on it, to make them all crack (and shatter), which will cause the existing Blue Block to land on the now-uncovered one and make them all crack - and once you land another Blue Block on them to make them all shatter, the other Umi Game will jump into the water and swim away. You'll then receive your remaining bonus time (which starts at 15000), in 100-point increments; this is also the first stage that many players have trouble with, even after a use for the Manbō No Utata Ne.
Stage 3
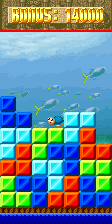
This stage contains: twelve Blue Blocks, nine Cyan Blocks, nine Green Blocks, nine Red Blocks, and a fourth Umi Game; the best way to clear it is to land a Green Block on the uncovered existing one, to make them all crack, then land another Green Block on it to make them all shatter. You will then have to land a Blue Block next to the now-uncovered existing one, then land two more Blue Blocks on them, to make all four of them crack (and shatter) - and you'll then have to land two Cyan Blocks on the now-uncovered existing one to make all six of them crack (and shatter). You will then have to land two Red Blocks (on the now-uncovered existing one) to make all three of them crack (and shatter); once you have done so, the Umi Game will jump into the water and swim away, and you will receive your remaining bonus time (which starts at 14000) in 100-point increments. But still two more stages left to go.
Stage 4
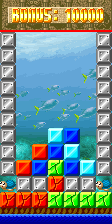
This stage contains twenty-two Metal Blocks, three Cyan Blocks, four Blue Blocks, six Red Blocks, five Green Blocks and two more Umi Game; the best way to clear it is to land two Blue Blocks upon the uncovered existing one to make them all crack (and shatter) then land a Red Block on the uncovered existing one to make them all crack (and shatter) which will cause the Green Block to land on the now-uncovered one. Both of those Umi Game will then jump into the water and swim away as you receive a third 7650-point (Namco's goroawase number) bonus, and your remaining bonus time (which starts at 10000 on this stage) in 100-point increments.
Stage 5
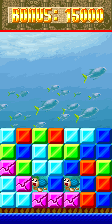
The stage contains nine Cyan Blocks, five Red Blocks, six Green Blocks, eight Blue Blocks, five Magenta Blocks and two more Umi Game; the best way to clear it is to land two Blue Blocks on the uncovered existing one, to make them all crack (and shatter), which will cause the Red Block to land on the now-uncovered one, and make them all crack. You will then have to land another Red Block on it to make them all shatter, then land two Green Blocks on the uncovered existing one to make them all crack (and shatter) - and you shall then have to land two Cyan Blocks on one of the three uncovered existing ones to make them all crack (and shatter), then land a Magenta Block next to the uncovered existing one, on the right side of the screen. Once you have landed a second Magenta Block on it to make them all crack (and shatter), both of the Umi Game will then jump into the water and swim away, as you receive a fourth 7650-point bonus, and your remaining bonus time which will again start out at 15000 on this stage in 100-point increments.

To use the Umi Game No Namida in the next ocean, push the joystick up and press the Rotating Button; once you've done so, the Katakana/Hiragana text Minto ha umi game no namida wo tsukatta! (ミントはうみがめのなみだをつかった!) will appear on the screen, and the Star (from Normal and Versus Modes) will fall down from the top of the screen. However, it can yet again only be used once in the next ocean, so you must save it for an emergency.
5th Ocean: Indian Ocean (インド洋, lit. Indoyō)
Stage 1
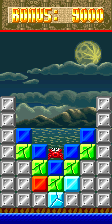
This stage contains in twenty-two Metal Blocks, five Blue Blocks, five Green Blocks, one Red Block, two Cyan Blocks, and one Kani (written in Hiragana as かに); the best way to clear it is to land two Blue Blocks on one of the four existing uncovered ones, to make them all crack (and shatter) then land a Green Block on one of the four now-uncovered ones to make them all shatter. You will now have to land a Cyan Block on the now-uncovered existing one to make them all crack (and shatter) - and once you've done this the Kani will jump into the water and swim away as you'll receive your remaining bonus time (starting at 9000) in 100-point increments.
Stage 2
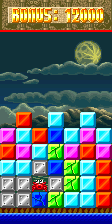
This stage contains: seven Red Blocks, thirteen Cyan Blocks, five Magenta Blocks, three Blue Blocks, four Green Blocks, six Metal Blocks, and another Kani; the best way to clear it is to land two Cyan Blocks upon one of the four uncovered existing ones, to make them all crack (and shatter) then land two Magenta Blocks on one of the three now-uncovered existing ones to make them all crack (and shatter). You'll then have to land a Green Block on the now-uncovered existing one, to make them all shatter, which will cause the Blue Block to land on the now-uncovered existing one, and make them all crack (and shatter) - and once you have done so, the Kani will jump into the water and swim away, as you receive your remaining bonus time (starting at 12000) in 100-point increments.
Stage 3
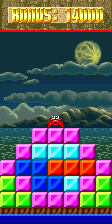
This stage is containing twelve Magenta Blocks, four Cyan Blocks, four Blue Blocks, three Red Blocks, six Green Blocks and a third Kani; the best way to clear it is to land two Magenta Blocks (on one of the six uncovered existing ones) to make them all crack (and shatter), then land two Cyan Blocks on one of the two now-uncovered existing ones and make them all crack (and shatter). You will then have to land two Red Blocks on one of those two now-uncovered existing ones to make them all crack (and shatter), then land two Blue Blocks on one of the two now-uncovered existing ones to make them all crack (and shatter) - and once you have done so, the Kani will jump in the water and swim away, as you receive your remaining bonus time (starts at 14000) in 100-point increments.
Stage 4
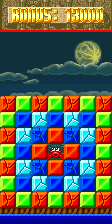
The stage's containing sixteen Red Blocks, twelve Green Blocks, twelve Blue Blocks, eight Cyan Blocks and a fourth Kani; the best way to clear it is to land a single Red Block and two Green Blocks on each of the uncovered existing ones to make them crack (and shatter), then land two Blue Blocks on that now-uncovered existing one, to make them all crack (or shatter). You'll then have to land two more Red Blocks upon that now-uncovered existing one, to make all four of them crack (and shatter), then land two more Cyan Blocks on two of the four now-uncovered existing ones to make them all shatter - and once you have done so, you will have to land a Green Block on either side of the Kani, then land two more Green Blocks on it to make them crack (and shatter). Once you do so, the Kani'll jump into the water and swim away as you receive your remaining bonus time (begins at 13000) in 100-point increments.
Stage 5
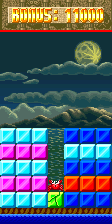
This stage contains twelve Cyan Blocks, nine Blue Blocks, six Magenta Blocks, three Red Blocks, one Green Block and a fifth Kani; the best way to clear it is to land a Cyan Block on top of the Kani, then land two more Cyan Blocks on it to make them all crack (and shatter), causing the three Blue and Magenta Blocks to land upon the three now-uncovered existing ones, then make them all crack (and shatter). You will then have to land two Red Blocks upon one of the three now-uncovered existing ones to make them all crack (and shatter), then land a Green Block next to the Kani on the right side of the screen - and once you have landed another one on it to make them all crack (and shatter), the Kani will jump into the water and swim away as you will receive your remaining bonus time (which starts off at 11000 for this stage) in 100-point increments. You will then be treated to the game's fifth end-of-ocean cutscene:

To use the Kani No Tachikurami in the next ocean, push your joystick up, and press the Rotating Button; once you've done so, the Katakana/Hiragana text Minto ha kani no tachikurami wo tsukatta! (ミントはかにのたちくらみをつかった!) will appear on the screen, and you will be warped forward two stages as the text "STAGE WARP!!" appears on it. However, it can for the fifth time only be used once in the next ocean so you must save it for an emergency.
6th Ocean: Arctic Ocean (北極海, lit. Hokkyoku Umi)
Stage 1
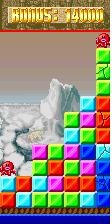
This stage is containing eleven Green Blocks, seven Cyan Blocks, eight Red Blocks, five Magenta Blocks, four Blue Blocks and two Tako (written in Hiragana as たこ); the best way to clear it is to land two Red Blocks on the uncovered existing one to make them all crack (and shatter), then land two Cyan Blocks upon the now-uncovered existing one to make them all crack (and shatter). The first Tako will then jump into the water and swim away - but your stage is far from cleared yet. You'll then have to land two Green Blocks upon the uncovered existing one, to make them all crack (and shatter), and then land two more Cyan Blocks on the now-uncovered existing one, to make them all crack (and shatter); you will then have to land a Magenta Block next to that existing one in the centre of the screen, then land two more upon it to make them all crack (and shatter). You will then have to land two more Cyan Blocks on that now-uncovered existing one, to make them all crack (and shatter), then land two Red Blocks on one of the two now-uncovered existing ones to make them all crack (and shatter) - and you will now have to land two more Green Blocks on one of the three now-uncovered existing ones, to make them all crack (and shatter), then land a Blue Block on that now-uncovered existing one to make them all crack and shatter. You will then have to land a third Red Block next to the existing ones, upon that right side of the screen, then land two more on it, to make them all crack and shatter; and once you have landed a fifth Green Block next to the existing ones, on that right side of the screen, then landed two more on it, to make them all crack and shatter, the second Tako will jump into the water and swim away as you receive your remaining bonus time (start: 14000), in 100-point increments. Many players also have trouble with this stage - and use their Kani No Tachikurami early.
Stage 2
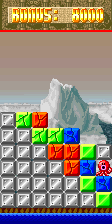
This stage contains: twenty-two Metal Blocks, six Green Blocks, four Red Blocks, three Blue Blocks, and a third Tako; the best way to clear it is to land a Green Block upon the uncovered existing one to make them all crack and shatter then land a Red Block upon one of the two uncovered existing ones to make them all crack and shatter. You'll then have to land a Blue Block on the uncovered existing one to make them all crack (and shatter), which will cause the Green Block to land on the now-uncovered existing one and make them all crack - and once you have landed another Green Block upon it (to make them all shatter) the Tako will jump into the water and swim away, as you receive your amount of remaining bonus time (which will start at 8000 here) in 100-point increments.
Stage 3
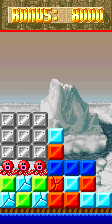
This stage contains: nine Metal Blocks, seven Cyan Blocks, five Red Blocks, three Blue Blocks, three Green Blocks and three more Tako; the best way to clear this is to land two Blue Blocks upon one of the two uncovered existing ones to make them all crack (and shatter), which will cause the Red Block to land on the now-uncovered existing one, and make them all crack (and shatter). You will then have to land two Cyan Blocks (upon one of the four uncovered existing ones) to make them all crack (and shatter), then land a Green Block next to the existing one - and once you have landed two more on it to make them all crack (and shatter), all three Tako will jump into the water and swim away, as you'll receive a 76500-point (the preset high score for Bakutotsu Kijūtei) bonus and your remaining bonus time (which again starts at 8000), in 100-point increments. There are still two more stages left to go for this ocean.
Stage 4
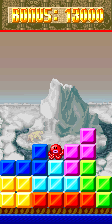
This stage contains four of every regular coloured block, and a sixth Tako, and is made to resemble the seven four-block Tetromino pieces from Academysoft-Elorg's Tetris (from which this game is inspired); the best way to clear it is to land two Blue Blocks on one of the three uncovered existing ones to make them all crack (and shatter), then land two Magenta Blocks one of the two uncovered existing ones to make them all crack (and shatter). You will then have to land two Cyan Blocks upon one of the two now-uncovered existing ones to make them all crack (and shatter), then land two Red Blocks (upon one of the two now-uncovered existing ones) to make them all crack (and shatter) - and the Tako will then jump into the water and swim away as you receive your remaining bonus time (which starts at 13000) in 100-point increments. If you use the Kani No Tachikurami here you'll also warp to the ocean's end.
Stage 5
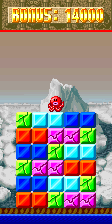
This stage contains six of every regular coloured block (except for gold) and a seventh Tako; the best way to clear it is to land two Green Blocks next to that existing one upon the left side of the screen, then land a third one on them, to make them all crack (and shatter), which will cause the Blue Block to land upon the now-uncovered existing one and make them all crack (and shatter). The Red Block will then land on that now-uncovered existing one (and make them both crack) - and, once you have landed a third one next to it on the left side of the screen and a fourth one on it to make them all shatter, you'll have to land two more Blue Blocks on one of the two uncovered existing ones on the right side of the screen, to make them all crack (and shatter), then land a Magenta Block on the now-uncovered existing one, to make them all shatter. You will then have to land two Cyan Blocks on one of the two uncovered existing ones, to make them all crack (and shatter), then land a fourth Green Block between the two existing ones and land a fifth one on them (to make them all shatter); you will now have to land two Red Blocks upon one of the two now-uncovered existing ones to make them all crack (and shatter), then land another Magenta Block next to the existing one. You will now have to land another one on it to make them all crack (and shatter), then land two more Cyan Blocks upon one of the two now-uncovered existing ones, to make them all crack (and shatter) - and you will then have to land a sixth Green Block next to that existing one, then land a seventh one on it to make them all crack (and shatter). The Tako will then jump into the water and swim away as you receive your remaining bonus time (which starts at 14000) in 100-point increments; alternatively, if you still have your Kani No Tachikurami on this stage, you can use it to warp to the end of the ocean.

To use the Tako No Gekirin in the next ocean, push your joystick up, then press the Rotating Button; once you've done so, the Katakana/Hiragana text of Minto ha tako no gekirin wo tsukatta! (ミントはたこのげきりんをつかった!) will appear on the screen, and every block currently on the screen will vibrate and crack (or shatter, if already cracked). However, it can, for the sixth time, only be used once in the next ocean so you must save it for an emergency.
Last Ocean: Antarctic Ocean (南極海, lit. Nankyoku Umi)
Stage 1
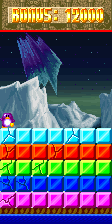
The stage is containing seven of every regular block (except for gold) and one Pengin (written in Hiragana as ぺんぎん); the best way to clear it is to land a Cyan Block on one of the existing ones to make them all crack (and shatter), then land a Red Block on one of the existing ones, to make them all crack and shatter. You then have to land a Green Block on one of the existing ones to make them all crack (and shatter), then land a Blue Block on one of the existing ones, to make them all crack (and shatter) - and once you have landed a Magenta Block on one of the existing ones to make them all crack and shatter, the Pengin will jump into the water and swim away, as you receive your remaining bonus time (which will start out at 12000 here) in 100-point increments.
Stage 2
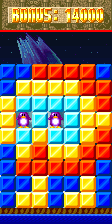
This stage contains fifteen Blue Blocks, sixteen Red Blocks, twenty-one Red Blocks, nine Cyan Blocks, and two more Pengin; it is also made to look like a Pooka from the Dig Dug series, and the best way to clear this is to land two Red Blocks on one of the four uncovered existing ones, to make them all crack and shatter, and land two Gold Blocks on one of the five uncovered existing ones to make them all crack and shatter, which will cause the Blue Block to land on the now-uncovered existing one and make them all crack. You will now have to land two Cyan Blocks on one of the four uncovered existing ones to make them all crack (and shatter), then land two more Red Blocks on one of the nine uncovered existing ones, to make them all crack and shatter - and you will then have to land three Blue Blocks on four of the uncovered existing ones, to make them all crack (and shatter), so the second Pengin can jump into the water and swim away. Once you land two more Gold Blocks upon that uncovered existing one, to make them all crack and shatter, the first Pengin will jump down into the water and swim away, as you receive your remaining bonus time (which will start out at 14000) in 100-point increments; there are still three more stages left to go for this (penultimate) ocean of the game.
Stage 3
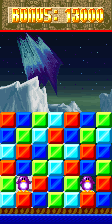
This stage contains ten Red Blocks, ten Blue Blocks, ten Green Blocks, eight Cyan Blocks and two more Pengin; the best way to clear it is to land four Blue Blocks on the two uncovered existing ones, to make them all crack (and shatter), then land two Green and Red Blocks on the two now-uncovered existing ones to make them all crack (and shatter). You'll then have to land two Cyan Blocks on the now-uncovered existing one, to make them all crack (and shatter), then land two more Green Blocks on one of the two now-uncovered existing ones, to make them all crack (and shatter) - and you will then have to land two more Blue Blocks on one of the two now-uncovered existing ones, to make them all crack (and shatter), then land two more Red Blocks on one of the three now-uncovered existing ones on the left side of the screen to make them all crack (and shatter). Once you've done so, the first Pengin will jump down into the water, and swim away; you'll then have to land two more Red Blocks on that now-uncovered existing one on the right side of the screen, to make them all crack and shatter. Once you have done so, the second Pengin will jump into the water and swim away, as you receive your remaining bonus time (which begins at 13000) in 100-point increments.
Stage 4
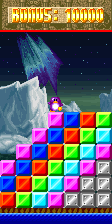
This stage contains - eight Magenta Blocks, five Blue Blocks, six Red Blocks, six Cyan Blocks, five Green Blocks, six Metal Blocks, and a fifth Pengin; the best way to clear it is to land two Magenta Blocks on one of the three uncovered existing ones to make them all crack (and shatter), and then land two Blue Blocks on one of the four now-uncovered existing ones, to make them all crack (and shatter). You will then have to land two Red Blocks upon one of the five now-uncovered existing ones, to make them all crack (and shatter), then land two Green Blocks upon one of the five now-uncovered existing ones, to make them all crack (and shatter) - and you will then have to land two more Magenta Blocks on one of the three now-uncovered existing ones to make them all crack (and shatter). Once you have done this, the Pengin will jump down into the water and swim away, as you receive your remaining bonus time (which starts at 10000 here), in 100-point increments; there is now only one more stage left to go for this (penultimate) ocean.
Stage 5
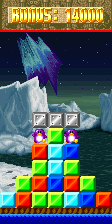
This stage contains: three Metal Blocks, seven Green Blocks, five Red Blocks, four Cyan Blocks, three Blue Blocks, and two more Pengin; the best way to clear it is to land two Green Blocks upon the uncovered existing one on the left side of the screen to make them all crack and shatter, which will cause the Red Block to land upon the now-uncovered existing one. and make them all crack. You'll then have to land another Red Block on the now-uncovered existing one (to make them all shatter) - and the first Pengin will then jump into the water, and swim away. You will then have to land a Blue Block next to the uncovered existing one upon that left side of your screen, then land two more on it, to make them all crack (and shatter); you will then have to land a Cyan Block next to the uncovered existing one upon the left side of the screen, then land two more on it to make them all crack (and shatter). You will then have to land two more Green Block on the uncovered existing one on the right side of the screen, to make them all crack and shatter, then land a third Red Block next to the uncovered existing one (on the right side of the screen), and land two more on it to make them all crack and shatter - and once you have landed a fourth Blue Block next to the existing uncovered one upon the right side of the screen then landed two more on it to make them all crack (and shatter), the second Pengin will jump into the water and swim away, as you receive your remaining bonus time (which begins at 14000) in 100-point increments. You'll then be treated to a penultimate cutscene:


To use the Pengin No Ma-Gokoro in the next (and final) ocean of the game, push your joystick up, then press the Rotating Button; once you have done so, the Katakana/Hiragana text of Minto ha pengin no ma-gokoro wo tsukatta! (ミントはぺんぎんのまごころをつかった!) will appear upon the screen, and it will cause all blocks to come down from the top of the screen pre-cracked for the rest of the stage. However, it can for a seventh time only be used once in the next ocean so you must save it for an emergency - and are you tough enough to go all the way and defeat Jamir as well as help Minto to escape?
Mystic Ocean (暗黒海域, lit. Ankoku Kaīki)
Stages 1 and 2
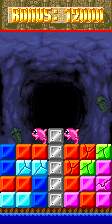
These two stages contain five Metal Blocks, four Blue Blocks, nine Red Blocks, two Green Blocks, four Cyan Blocks, five Magenta Blocks, and two Gamu (written in Katakana as ガム); the best way to clear them, is to land three Red Blocks on the two uncovered existing ones, to make them all crack (and shatter), then land a Green Block on the uncovered existing one to make them all crack (and shatter). You will then have to land two Magenta Blocks upon one of the two uncovered existing ones, to make them all crack (and shatter) - and the second Gamu will then jump into the water (and swim away). You will then have to land two Blue Blocks on the uncovered existing one to make them all crack (and shatter), which will cause the Cyan Block to land upon the now-uncovered existing one and make them all crack (and shatter); you will then have to land a third Blue Block next to the existing one, then land two more on it to make them all crack and shatter. The first Gamu will now jump into the water and swim away as you receive your remaining bonus time (which starts at 12000) in 100-point increments - and this is the longest ocean in the game, with nine stages.
Stages 3 and 4
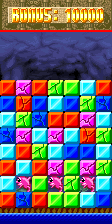
These two stage contain twelve Red Blocks, six Magenta Blocks, twelve Green Blocks, twelve Cyan Blocks and three more Gamu; the best way to clear them is to land two Red Blocks on one of the two uncovered ones on the left side of the screen to make them all crack (and shatter), then land two Blue Blocks on the now-uncovered existing one to make them all crack (and shatter). You will then have to land a third Red Block next to that now-uncovered existing one, then land two more on it, to make them all crack (and shatter), then land two Cyan Blocks on the now-uncovered existing one to make them all crack (and shatter) - and you'll then have to land a Green Block on the now-uncovered existing one to make them all crack (and shatter), then land two more Red Blocks on the now-uncovered existing one to make them all crack (and shatter), which will cause the Cyan Block to land down upon the now-uncovered existing one, and make them all crack. You will then have to land a third Cyan Block next to that existing one, then land two more on it to make them all crack (and shatter), then land two more Green Blocks on the now-uncovered existing one to make them all crack (and shatter); the second Gamu will then jump into the water and swim away. You will then have to land a third Blue Block next to the uncovered existing one, then land two more on it, to make them all crack (and shatter) - and once you have done so, the first Gamu will jump into the water, and swim away. You will then have to land a fourth Cyan Block next to the uncovered existing one, then land two more on it, to make them all crack (and shatter); the third Gamu will then jump into the water, and swim away, as you receive your remaining bonus time (which begins at 10000), in 100-point increments. After the second occurrence of this stage, there are still five more stages left to go for this ocean.
Stage 5
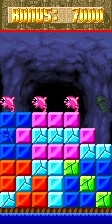
The stage's containing eleven Blue Blocks, eight Magenta Blocks, eleven Magenta Blocks, six Red Blocks, three Green Blocks and three more Gamu; the best way to clear it is to land two Magenta Blocks on one of the two (uncovered) existing ones to make them all crack (and shatter) which will cause the Blue Block and the three Cyan Blocks to land on the two (now-uncovered) existing ones then make them all crack (and shatter). The Red Block will then land on the (now-uncovered) existing one and make them all crack (and shatter) - and the first and second Gamu will then jump into the water and swim away as you receive a 7650-point bonus. You will then have to land two more Blue Blocks upon one of the two now-uncovered existing ones to make them all crack (and shatter), then land a Green Block on one of the two now-uncovered existing ones, to make them all crack (and shatter); once you have done so, the third Gamu will jump into the water and swim away, as you receive your remaining bonus time (which starts at 7000) in 100-point increments. But there are still four more stages left to go for this final ocean of the game (five, if you include that escape one).
Stage 6
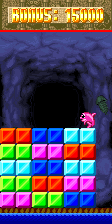
This stage contains six of every regular block (except for gold) and a fourteenth Gamu; the best way to clear it is to land two Cyan Blocks upon the uncovered existing one to make them all crack (and shatter), then land two Red Blocks upon the now-uncovered existing one, to make them all crack (and shatter). You will then have to land two more Cyan Blocks upon that uncovered existing one, to make them all crack and shatter, then land two Magenta Blocks on the the uncovered existing one to make them all crack (and shatter) - and you will then have to land two Blue Blocks on the uncovered existing one to make them all crack (and shatter). The Gamu will then jump into the water and swim away as you receive your remaining bonus time (which starts at 15000) in 100-point increments; the next stage features the highest starting value for a bonus timer but of course you will end up with much less.
Stage 7
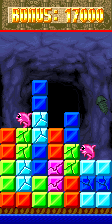
This stage contains eight Blue Blocks, eight Cyan Blocks, eight Red Blocks, nine Green Blocks, two Magenta Blocks and two more Gamu; the best way to clear it is to land a Green Block next to the first Gamu, then land two more on it to make them all crack (and shatter), which will cause the Red Block to land on the now-uncovered existing one and make them all crack (and shatter). You will now have to land a Cyan Block down next to the now-uncovered existing one, then land two more on it to make them all crack (and shatter) - and the first Gamu will then jump into the water, and swim away. You will then have to land two more Cyan Blocks on the uncovered existing one to make them all crack and shatter, then land two Blue Blocks on the now-uncovered existing one, to make them all crack (and shatter); you will now have to land two more Cyan Blocks on the now-uncovered existing one, to make them all crack and shatter. The second Gamu will now jump into the water and swim away as you receive your remaining bonus time which starts at 17000 (the highest) in 100-point increments - and there are still two more stages left to go for this final ocean of the game.
Stage 8
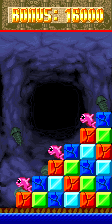
This stage contains: six Blue Blocks, six Red Blocks, five Green Blocks, four Cyan Blocks, (and three more Gamu); the best way to clear it is to land a Red Block next to that uncovered existing one, then land another one on it, to make them all crack (and shatter). The first Gamu will then jump into the water and swim away - and you will then have to land a Blue Block on the uncovered existing one to make them all crack (and shatter), then land two Green Blocks upon the now-uncovered existing one to make them all crack (and shatter). You'll then have to land a Cyan Block next to the now-uncovered existing one, then land two more on it to make them all crack (and shatter); you'll then have to land a third Red Block next to the existing one, then land a fourth one on it, to make them all crack (and shatter). The second Gamu will then jump into the water and swim away - and you will then have to land another Blue Block on the uncovered existing one, to make them all crack (and shatter), then land two more Green Blocks on the now-uncovered existing one to make them all crack and shatter. You then have to land a fourth Cyan Block next to the now-uncovered existing one, then land two more on it, to make them all crack (and shatter); you'll then have to land a fifth Red Block next to that now-uncovered existing one, then land a sixth one on it, to make them all crack and shatter. The third Gamu will then jump into the water and swim away as you receive your remaining bonus time (which begins at 16000) in 100-point increments - and you will then be treated to the following cutscene:

Stage 9
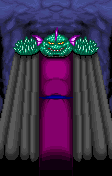
At the start of the mode's penultimate stage, Jamir (the main antagonist of this mode) will appear in the background and speak the following 3-script text:
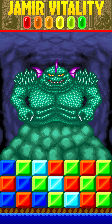
He will then cause twenty-one blocks (four blue, seven green, three cyan, and seven red) to fall down into place from the top of the screen, and possess the first Green Block on the bottom row; once you have landed a Green Block on the first uncovered existing one on the top row, to make them all crack, he'll lose a dot from his vitality meter, and go on to possess a different block. He will also occasionally cast a spell to make ten blocks come up into view from the bottom of the screen, while you are trying to make his possessed block crack again - and once you have made his possessed blocks crack five more times, he'll explode and you'll receive a 100000-point bonus; you'll now be treated to the following cutscene (only the Gamu in it faces to the right):

Escape Stage (脱出せよ, lit. Dasshutsu Seyo)
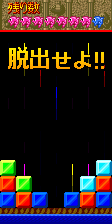
This stage contains two Green Blocks, two Cyan Blocks, four Red Blocks and four Blue Blocks; the objective is to get seven Gamu (who are displayed at the top of the screen under the Kanji/Hiragana text Nokori-sū 残り数) off the bottom of the screen. When only Minto remains the three-script text of Sā, Minto, saigo ha anata no yo! (さあ、ミント、最後はあなたのよ!) will appear on the screen - and, once you have got him off the bottom, that Kanji text of Dasshutsu seikō!! (脱出成功!!) will appear on the screen. You will then receive the "Clear Bonus" of 100000 points, an "Item Bonus" of up to 70000 points, and a "Level Bonus" of up to 99000 points; you can now sit back and enjoy the game's ending cutscene, as you will certainly have earned it, after rescuing all those sea creatures:


After the credits have finished, the game will go into "high-score" mode; your score will most likely be the highest upon the cabinet to date, so you should enter your name at the top of the table with pride. However, as with Normal Mode, this mode forbids the name "AAAAAA" on its high-score table - and if you try to enter it, it will be changed to one of the following references to older Namco games (that are completely different from those of Normal Mode):