Oblivious to the plight of their friends and family, Vyse and Aika leave the temple on Shrine Island. You can save again by your boat, before departing the island and heading home. Once you've set sail you can press Start and select Map to check your position and direction - Pirate Isle will be marked with a red pin, due south of Shrine Island.
Back at Pirate Isle you'll find the place in ruins. Head underground to find the women and children; one of the women will tell you that Vyse's mother is in Dyne's office. Go to speak with her, and you'll be given another Swashbucker choice: "Try and save everyone", or "There's nothing we can do" - the correct one should be obvious. You'll rest up for tonight, and set sail for Valua first thing in the morning.
Setting Sail
As you leave Pirate Isle, you can speak to the children, who are all putting a brave face on things and promising to rebuild the island before you get back. As before, board the ship when you're ready and set sail for Valua.
To get to the Valuan capital, you need to head north past Shrine Island, then turn east. Unfortunately, on your way you'll find yourself coming into some thick fog - and you'll have a brush with the giant arcwhale Rhaknam. You're given the choice to "Attack it!" or "Retreat" (or chicken out completely with "I don't know!") - take the safe "Retreat" choice for your Swashbuckler Rating. Rhaknam doesn't care that you're preparing to back off, though - he wrecks your little boat and both Vyse and Aika black out.
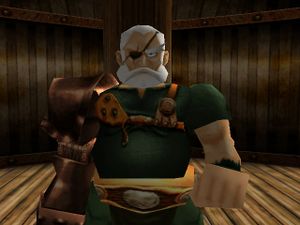
The pair wake on the deck of a ship, confronted by an angry man with a mechanical arm. The man, Drachma, was chasing the arcwhale that destroyed your ship when you were attacked, and the remainder of your ship seriously damaged Drachma's vessel. As a result, he's lost the trail and none too happy about it - you'll have to work for him while you're on board.
Drachma will tell you to move boxes from the middle deck up to the bridge of his ship - there are two, and you can move them simply by pressing ![]() to start the cutscene. After moving the first one you'll get a little bit of conversation out of Drachma, and will listen to Vyse's whole story - unfortunately he's fairly unsympathetic.
to start the cutscene. After moving the first one you'll get a little bit of conversation out of Drachma, and will listen to Vyse's whole story - unfortunately he's fairly unsympathetic.
Once you've moved the second box up, Drachma lets Vyse take control of The Little Jack, and you'll have to sail to Sailor's Island yourself. It's a little to the east of where you met Rhaknam, so head through the tunnel in the rock ahead of you, and you should see the lighthouse on the island fairly soon.
Sailor's Island
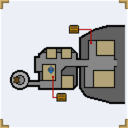
Once on the island, Drachma will leave your party again and head into the tavern - you'll have to find some way to convince him to take you to Valua so you can rescue Vyse's dad and his crew.
First off, you should head into the Sailor's Guild on your right and speak to the Guild Master; he'll buy any discovery information that you've collected. Second, go behind the Sailor's Guild, past the brooding man in purple, and you'll find a chest with three Repair Kits inside - they'll come in very handy. There's also a weapons merchant with some good armor and weapons, and the item merchant can stock you up with healing items.
There's a pair of gossiping merchants standing outside the Sailor's Guild who mention the Ship Merchant having information about a new cannon, so head there now. It's right-hand side at the very end of the island beside the Inn, and has a Ship's Wheel sign hanging outside. Inside, listen to what the merchant has to say and you'll get some news about the Harpoon Cannon, a massively powerful weapon for sale in Valua that might just be able to take out Rhaknam.
Head back to the tavern and speak to Drachma - during the conversation you'll get a Swashbuckler choice about the best way to reveal your information.
- Come right out and say it.
- Beat around the bush.
The barkeep, Polly, will back you up with what she's heard, and you'll find yourself with Drachma back in your party, and a ship to get to Valua. Unfortunately you'll need to get a Valuan Passport to enter the country - but luckily, Sailor's Island is just the place to come across something like that.
The Valuan Passport
Your best bet is the Sailor's Guild, but the Guildmaster has some bad news. A real Valuan Passport would take an entire lunar cycle to obtain, and he's too scared to make you a fake one. Fortunately, a merchant from the desert kingdom of Nasr has overheard your conversation, and is willing to give you his unneeded Valuan documentation if you'll act as his security for his journey home.
Accepting the job and head back to the Little Jack, where you'll get some directions from the Nasrean merchant you're helping on how to find his country. It's pretty simple, really—follow the stone reef east until you reach Nasr.
Just before you reach Nasr you'll be spotted by Baltor, the notoriously vicious leader of the Black Pirates. He's keen to take on the ageing Little Jack in order to steal the cargo from your Nasrean charge, which gives you the first Ship Battle of the game.
Once Baltor's ship goes down in flames, you'll be able to continue your journey to Nasr - once you arrive at the border, the Nasrean Navy will take over the protection of their citizen. The merchant will hand over the Valuan Passport, and you're able to continue with your rescue mission.
On a small circular island between the South Dannal Strait and Sailor's Island
The easiest way to find Valua is to follow the stone reef back to Sailor's Island and head north from there - on your way, keep an eye out on the right (or starboard, if you prefer) for a small circular island with the "Guidestones" Discovery on it.
Vyse hands over the Valuan Passport for inspection, and you'll be given clearance to pass through The Grand Fortress, a hugely impressive structure that protects the only entrance to the Valuan capital. As the giant doorway swings open, you'll see the thick wall lined with cannons that repelled the entire Nasrean fleet for days at a time, during the war ten years ago.
Passing through the Grand Fortress, you'll see the segregated Valuan capital - Upper City on the left shore home to all the rich upper-class aristocracy, with everyone else relegated to poverty in Lower City on the left shore. Drachma tells Vyse to set down in Lower City.
Lower City
While Drachma's getting the Harpoon Cannon installed on The Little Jack, you've got some time to kill in Lower City. Probably the most depressing place in the game, the people are as dank and dirty as the houses they live in. They have some slightly improved equipment in the weapon merchant's shop, and you can stock up on health items if you need them.
There's also a chest under the merchant stores, containing "Sacres Crystal" x2.
Down at the far end of this part of the city, you'll find a young red-haired boy named Marco standing by a lift. He'll talk smack for a few minutes, then let you go onto the lift and progress down to the second part of Lower City. Head down the corridor and you'll find yourself outside the Inn. Speak to the woman at the front desk, and she'll give you a room - Drachma will pick up the bill when he arrives later.
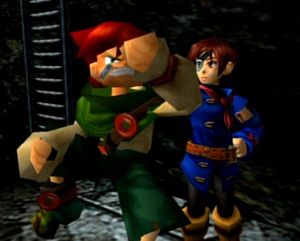
When Drachma finally makes it back from the docks, he's none too pleased to find Vyse complaining about the noise of the Little Jack's engine in among plans for breaking the captured Air Pirates out of whatever Valuan prison they're being held in. Drachma has some bad news, though - Dyne and his crew will be executed in the Valuan Coliseum tomorrow morning.
- Try and break everyone out right now
- Sneak into the Coliseum
- I don't know
Just then, there's a noise from the roof. Vyse runs outside to catch the kid from earlier listening in - you'll be boosted up onto the roof to give chase to the fleeing eavesdropper.
You'll see a couple of arrows appear on each rooftop as you jump across. If you take the same path as the wannabe spy does, you'll catch up with him just as he reaches a manhole cover leading to the Lower City sewers. It turns out it's Marco, that bratty little kid from near the lift earlier.
After questioning Marco for a bit, you'll learn that the sewers lead into a network of underground catacombs that could take you directly under the Coliseum - you could break in there and free your friends and family before they're executed tomorrow. With that plan, Vyse and company head back to the inn to get a good night's rest before the morning's rescue operation.
Catacombs
When you wake up, take the stairs above the lift and follow the path around to the manhole cover you caught Marco at the night before. Head down by pressing ![]() , and you'll find yourself on a narrow path beside what looks like a bright green river - very sanitary.
, and you'll find yourself on a narrow path beside what looks like a bright green river - very sanitary.
Follow the footpath to the end, and go down the ladder. Along the corridor, there's a small side path to the left that will take you to a couple of chest containing a Pyri Box and Sacri Crystal x3. Back on the main route, keep following the corridor and you'll come to another fork. Straight ahead is another room with some chests, with Heavy Armor and an Assassin Blade inside. The left-hand fork will take you across a broken pathway to a large square room with a Save Point in it. To the left of that are a set of stairs that lead you up to...
With Bliegock defeated, it's a good idea to head back and save your game again - if you're running low on items you might even want to go all the way back to Lower City and stock up again. Once you're ready, head up the ladder at the back of Bliegock's room to the Coliseum.
Coliseum
As Dyne is lead to the executioner's block, proceedings are interrupted by Vyse's team pushing guards out of the way to free the Air Pirates. With the prisoners escaping to the Catacombs, the Valuan executioner steps forward - he's determined that he'll kill some Air Pirates today.
After defeating The Executioner, you'll find yourself back in the Catacombs where you defeated Bliegock. Head straight down the stairs to the Save Point and you'll see Marco standing beside a hidden door - he saw your performance in the Coliseum and has come to help you out. He's led your dad's crew through to a secret part of the Catacombs, so follow them through to the hidden room.
Unfortunately, it seems Fina was being held separately from the Air Pirates. Dyne overheard that she was taken to the Royal Palace, but to get there you'll have to make it through Upper City. Drachma offers to take the Air Pirates to the Little Jack, and they'll meet you at the docks with Fina. You'll receive Dyne's Yellow Moon Stone before you leave.
Make your way through the sewers, and you'll come to a ladder again - only to realise you're being followed. Marco has come after you to beg Vyse not to go into Upper City. His parents were killed for entering the rich area of Valua, and he's worried the same will happen to you.
Meanwhile, Lord Galcian has arrived at the Colliseum to investigate what went wrong. A guard tells him that Air Pirates have been seen heading towards Upper City, and he guesses that you'll be looking for Fina.
Upper City
Back with Vyse, climb the ladder and you'll find yourself in Upper City - although depending on your tastes it's not a much nicer place than Lower Valua. You can talk to several people here, and there's a Save Point which is worth using.
Head up the stairs and Vyse will spot the train tracks below you. More importantly, he'll see Fina being loaded on by a couple of guards - but you'll never make it to the platform before the train leaves. Appalled by Vyse's decision to jump as the train goes past, Aika follows regardless and you'll find the pair running along the roof of the train.
Train roof
As you make your way towards the lead carriage of the train, you'll be open to random battles against varying numbers of Valuan troops. None of them are particularly difficult, but be sure to watch your health between fights or you might get caught out.
Once you've made it about halfway, the train gets a violent shunt from the back - turning round, Vyse is confronted with the sight of Galcian advancing along the train after you. If you're feeling suicidal you can run down and fight him, but it's an entirely unwinnable battle. Keep heading towards the front of the train and you'll find yourself in the lead carriage, where Fina's being held by two Royal Guards.
With the guards taken care of, you'll be reunited with Fina - but the celebrations are soon interrupted by Galcian. Vyse and the Admiral stare each other down for a minute before something flashes past the window.
The Little Jack opens fire on the train, separating the front half of the carriage with Vyse, Aika and Fina from Galcian's section of the train. As the rear section of the transport grinds to a halt, Aika celebrates their narrow escape - but you're not out of the woods yet.
The Grand Fortress
You're still inside Valua, and to get out you'll have to make it out of The Grand Fortress before the door closes, with a Valuan cruiser blocking the exit. Fortunately, your newly-equipped Harpoon Cannon will help you clear out the obstacle.
With the Grand Fortress closing fast, Vyse punches the Little Jack's engines to full speed, aiming for the narrowing gap between the wall and door. Sparks fly as Drachma's ship scrapes through seconds before the Grand Fortress locks down, giving Vyse the boasting rights to being the first person to ever escape from Valua's Grand Fortress.


