Road to Mascon
As soon as you enter the next section, you will immediately notice the smoke and fog that blankets the area. This section of the tree is burning. In the first screen that you arrive at, there's a 25% chance that Wing Boots will appear if you defeat the Charron and two Hornets that occupy the room. However, they are placed in such a way that you must obtain them from above, or use another pair of Wing Boots just to collect them. They're not worth the effort.
The path to Mascon is relatively short. You must walk to the left, climb up to the screen above, and walk back to the right. When you reach the upper level, you will meet a new enemy, Sir Gawaine. These deranged dwarfs approach you and stop just short of striking distance. As long as you don't take a step towards them, they won't hit you. Better yet, you can strike them continuously until they are defeated. Above the entrance to Mascon is an optional path for you to explore, but you should visit Mascon first.
Mascon
| Meat | |
|---|---|
| Serving | 180 |
| Shop | |
| Large Shield | 3500 |
| Thunder | 1200 |
| Mattock | 800 |
| Red Potion | 600 |
| Keys | |
| Key J | 500 |
| Key Q | 600 |
| Hospital | |
| Treatment | 1000 |
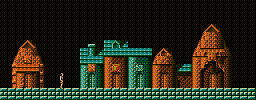
The first building in Mascon is a bar. You'll get useful information from the bar maid, and somewhat interesting info from the man in the back. The next building is the dried meat shop. Two servings at 360 gold is far better than spending 1000 at the Hospital at the end of town. After that comes the item shop. If you didn't buy the Magic Shield earlier, you should buy a Large Shield for 3500 gold at this time. You can also purchase the next spell, Thunder, for 1200 gold.
The first door in the next part of town is the Key shop. You will need at least two Queen Keys, but purchase at least one if you can't afford two. The inhabitants of the next house will tell you some information the Tower of Suffer, which is your next destination. And finally, there is the hospital.
Optional: Potion tower
Before you search for the Tower of Suffer, there's a tower that you can visit which is completely optional. The only thing you will find there is an unlimited supply of Red Potions, but that's not such a bad thing. The only problem is that it also contains a new type of enemy that can hit you from anywhere on the screen, and you can't avoid it. You will absolutely need at least one Red Potion, so make sure you have one before you head out.
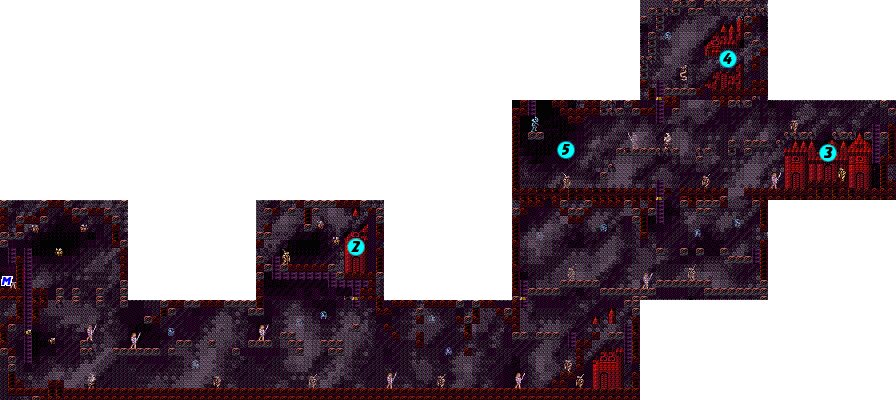
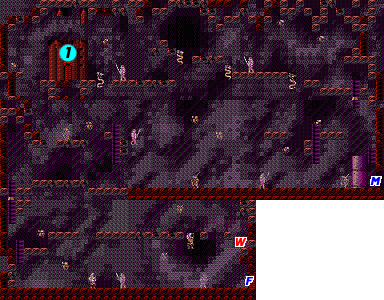
From Mascon, exit left, and climb up the ladders that lead to the screen above. Once there, you will encounter a new enemy, the Naga. They look like floating snakes. While they are often positioned in annoying locations, they are actually quite beneficial—when you defeat them, they drop bread which restores the most health of all breads. Because they are positioned over chasms, the bread usually falls through the bottom. The first Naga in the second screen is the easiest one to catch the bread from. Keep going left. Before you reach the door (1), watch out for the gap in the ledge. Prepare a Key Q for use and enter the door.

Once you enter the door, immediately prepare a Red Potion for use. Inside, you will encounter the Sugata, possibly the most aggravating enemy in the game. These enemies bang on a drum which injures you anywhere on the screen at regular intervals, and you can't do anything to defend yourself except to defeat them as quickly as possible. Defeat the first Sir Gawaine and advance to the next room. Climb up the ladder and return to the previous screen. Get to the right and climb up the ladder to defeat the Sugata as quickly as possible. At this time, you may need to use the Red Potion. Keep an eye on your health.
Continue back to the left and drop down to where the two enemies are. Defeat them and climb up the ladders to the path in the upper left corner of the room and head left. When you arrive in the next room, you will see a new boss, the Rokusutahn occupying the floor below, and a Red Potion to the left. You should carefully leap from one platform to the next until you reach the Red Potion. From here, if you leap back across the top, exit to the right, and immediately return to the left, another Red Potion will appear. You can repeat this over and over until your inventory is full of Red Potions. You won't have to actually fight the Rokusutahn unless you fall to the bottom.
Once your inventory is full, you can drop down and fight the Rokusutahn, or simply leap back to the right and make your way out of the tower. Head back to Mascon when you are back outside.
The next tower
Your next goal is to reach the Tower of Suffer. Make sure you have at least one Queen Key before you leave Mascon. But there are a few destinations to visit along the way. You were told about an out-of-the-way shop that you need to look up to find. Looking up is not enough. You'll have to drop down in the right location in order to reach it. Exit Mascon through the right side. You'll encounter three Hornets. Carefully remove them, and drop down to the floor. You will see two small gaps and two large gaps. You need to fall down through either large gap on the right.
| Death | 9800 |
| Hour Glass | 5600 |
| Elixir | 4300 |
| Red Potion | 300 |
If you fall properly, you should land on the small platforms above the floor on the screen below. Make your way to the right. You will notice a new floating enemy, the Bihoruda. They aren't much of a nuisance, and you should be able to avoid them or slash them out of your way. Carefully cross the platforms so that you don't fall to the floor below. Continue to the next screen, and stay on the platforms. You should be able to reach a ladder that leads to the screen above. Climb it, and you will find a building (2).
You'll need to shimmy across the ladders until you can climb up to the top. Battle the Sir Gawaine and two Hornets, and then visit the shop. The shop doesn't contain anything that you need, but some of the wares are very useful. If you used up your Elixir, you can purchase another one, but it's expensive. Additionally, if you didn't save up for Death early on in the game, this is your last chance to buy it. Both Death spell and Hour Glass can be very useful in the Tower of Suffer. At least the Red Potions are inexpensive.
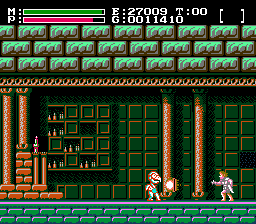
Continuing on in your journey, exit the shop, climb down the ladder, and drop down to the floor. Head two screens to the right, and you will encounter another building. This happens to be a strangely located house, but the inhabitants don't have much useful to say. Make your way to the ladder that leads to the screen above. Walk to screens to the right, and climb up another set of ladders. When you reach the next level, head right and you will find three doors (3). The outer doors lead to abandoned buildings occupied by enemies. You can't use your weapons in here, but you can cast magic if you wish to fight against them. If you beat the Giant Strider in the right building, there is a 25% chance that Wing Boots will appear. The middle door contains a Guru who can raise your rank and give you a mantra. When you're done, climb the ladder on the right, and cross back to the left along the upper platforms. Now you can reach the ladder which takes you up to the Tower of Suffer (4).
Tower of Suffer
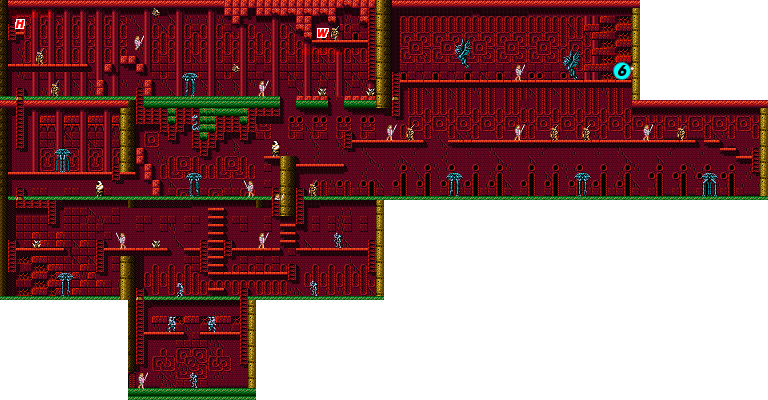
The Tower of Suffer is completely optional. It has many branching pathways and can be largely divided into two sections; the left wing and the right wing. The left wing has a few items that you can obtain, such as an Hour Glass and Wing Boots, but these items can be obtained much easier in other locations. Instead, you should focus on the right wing where you will locate an important unique item.
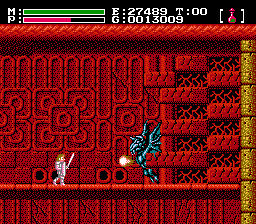
From the start, defeat the Ikeda, and watch out for the Snowmen. Climb up the right ladder and head to the right. Get past the two Ikeda, and climb up the ladder on the right. Defeat the Sir Gawaine and head to the right. Now you will have to fight your way past a series of Rokusutahns until you reach the right side of the tower. They are easy enough to defeat. Simply allow them to walk up to you, then jump up and stab them when they are close.
When you reach the right end, climb up the ladder and head back to the left. Watch out for the Sir Gawaines as you walk along the top platform. Jump over the large gap and land beneath the ladder. Climb up the ladder, and you will encounter a Ripasheiku. You can fight it, or avoid it, but you must cross over to the right side of the room, where you will find… another Ripasheiku (6). This one you must fight and defeat. You should be able to charge at it and leap off the ground while you stab it's head. Keep charging it until you defeat it, at which time you will discover the Pendant, an item which increases your strength. (However, after collecting it, you may find that enemies take more hits to kill. This is because, due to a bug in the game, the Pendant actually lowers your offensive power. Basically, you start the game with the pendant effect already active and lose it when you get it. Pick it up if you want a challenge, otherwise leave it be, as it can be skipped.) Once you collect it, there's nothing left to do but exit the tower.
Flying to Victim
With the Pendant in hand, it's time to head to the next town. If you don't have Wing Boots, you can obtain a pair in the Tower of Suffer (the red W), or you can visit the room to the right of the cathedral (3) and defeat the Giant Strider until Wing Boots appear. Once you get them, or if you already have Wing Boots, climb down from the ladder that lead to the tower, and head to the left (5). Activate the Wing Boots and fly up to the platform so that you can reach the ladder above.
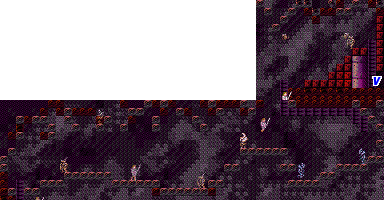
In the first screen that you arrive in, you will encounter an unusual enemy known as Nash. He only appears here, but he appears so high that neither of you can hit each other unless you fly up, so just ignore him. Make your way to the far right until you need to climb ladders and shimmy across to make it up to the screen above. Watch out for the Sir Gawaine and two Hornets as you get to the top of the ladder and climb down.
