Faxanadu/Mystery town Victim
Victim[edit]

| Hospital | |
|---|---|
| Treatment | 2500 |
| Meat | |
| Serving | 250 |
| Shop | |
| Full Plate | 5200 |
| Mattock | 1200 |
| Red Potion | 800 |
| Keys | |
| Key K | 1500 |
| Key Q | 1200 |
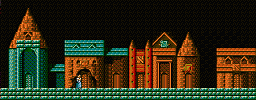
Victim starts out with a Cathedral. Stop in to get a rank increase if you've earned one, or to get a mantra so you don't lose your progress. The price for staying at the hospital takes a serious hike in Victim, increasing 150% over the price in Mascon to 2500 gold. The residents of the house have somewhat interesting information, but nothing too helpful.
The right side of town is far more useful. The dried meat store sells servings for 250 gold each, giving you absolutely no reason to ever visit the hospital. The Key shop now sells a new type of key, the King Key. You will need quite a few for the remainder of your journey, but at the very least, you need one for right now. At the item shop, the price of Red Potions continues to rise, but the item you'll want to purchase as soon as possible is the Full Plate armor. Although expensive at 5200, it provides considerable protection. But don't spend your coin yet - if your rank is Soldier or higher, you can get Full Plate for free! Simply talk to the man on the left in the bar, and he will give you his Full Plate. If you want to avoid promotions and preserve a longer Wing Boot time, however, you may want to simply purchase the Full Plate. The Mattock is useless at this point of the game. When you're ready, exit through the right side of town.
Path to Tower of Mist[edit]

You'll be back out in the smoke when you leave Victim. There's good news and bad news concerning this area. The bad news is that the enemies you encounter will be quite strong. The good news is that a large number of the enemies that you encounter drop bread. From the flying squid Yareeka, to the tendril like Lamprey, there will be many opportunities to collect food and maintain your health, so don't pass up these opportunities.
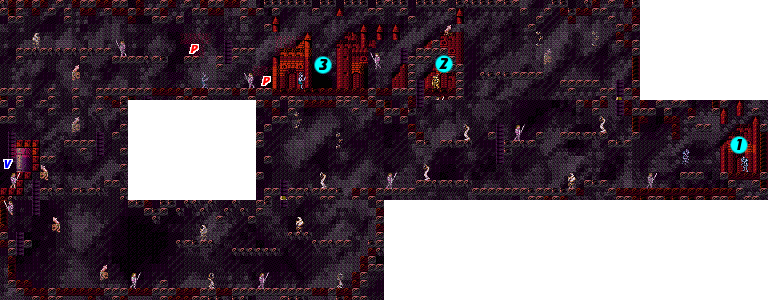
You'll encounter two Yareeka flying back and forth outside Victim, and in the screen below as well. Fight them if you need some health, or simply drop down and proceed to the right. You will encounter a Lamprey and a Charron on the next screen, and the one beyond, before you have to climb ladders up to the screen above. When you reach the next level, you will encounter a Lamprey accompanied by a pair of Giant Bees. Bees don't do a lot of damage, but they are very persistent and like to hover right on top of you. Attack the two Lampreys in the next screen over to recover health. From here, you can continue right, or climb up. If you climb up the ladder, you will reach a small closed off section of the map and arrive in front of a door to a tower (2). This tower is known as the Useless Tower. Going in is completely option, requires the use of a Key K, and is not particularly recommended.
Optional: Useless Tower[edit]

All that you will find in this "tower" are three rooms. Each room contains one Ishiisu which can cast magic, and one Fire Giant on the top level. The truth is that even if you run all the way to the right, climb up the ladder, and cross the top platforms back to the left, the only thing you will find of value in this tower is a single Red Potion that is impossible to collect without using up Wing Boots. Even if you do manage to clear the first room of monsters (and you need to be on the floor to defeat the Ishiisu), the Red Potion will appear high off the ground. It is truly best to ignore this tower entirely.
Continuing to Mist[edit]

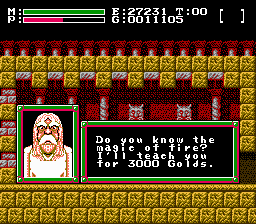
Below the useless tower, continue heading to the right. Defeat the Charron on the ground and continue one more screen. You'll find two Ikedas jumping around outside of a door to a house (1). Step inside the house, and you'll find a man who will offer to teach you a new magic spell. His services don't come cheap though, as it will cost you 3000 gold. For that money, you will learn the spell of Fire, which has an interesting ability to repel enemies to the back of a room. It's purchase isn't required to complete the game, but it is considerably helpful and this is your only chance to buy it.
When you're done, head back to the left, and note the Lamprey on the top platform. Return one more screen to the left with the two Lampreys, and climb up the ladder to the middle platform before returning right. Jump over the gap, and attack the Lamprey you noted before, and climb up the ladder to the level above. You'll find a Yareeka accompanied by two sets of Giant Bees. Head to the left, and you will be on the path that takes you above and over the Useless Tower seen below. Get pass the Yareeka and head one more screen to the left.
You will arrive at a screen with two doors (3). A single annoying Sugata patrols the area outside. Remove him quickly. You'll find the door on the left only opens with the as of yet unavailable Ace Key, so ignore it for now. The man in the house next door, he will tell you that you are on your way to the Tower of Mist, and instruct you to return if you collect the meteorite. Back outside, watch out for the appearance of vials of Poison if you clear the screen of enemies.

After beating the Sugata in the next screen, it is best to climb the ladder and proceed left along the higher platforms. This will get you over the gap strewn floor below. Continue to the left as far as you can go, past a series of Ikedas. Note the location having an Ikeda at the upper platform, where killing the two has a 25% chance of yielding Wing Boots, which can be helpful for shortcut use. When you reach the far side of the path, you will encounter another new enemy, a Raiden. They aren't terribly difficult to deal with, but they can be frustrating at first. Climb the ladder to the level above.
The Yareeka that flies back and forth on the lower portion of the screen is the last bread dropping monster that you encounter on the way to the Tower of Mist. Take advantage of this fact and climb down and back up the ladder as many times as necessary to restore your health. Then proceed all the way to the left, ignoring the Hornets and Raidens that try to get in your way. When you reach the door to the Tower (4), use the Key K to enter.
The Tower of Mist[edit]
Simply put, the Tower of Mist is loaded with powerful enemies, many of them boss-class. In addition to two Ripasheikus, the boulder dropping Zorugeriru, and the far easier Rokusutahn, you'll meet a slew of new enemies, including the club wielding Mask Man, the fast Geributa, and the powerful Wolf Man. A new boss, the Zoradohna, appears not once but twice in this tower. There are some important items in this tower, and knowledge of them can help you considerably, not just by keeping you alive, but also knowing which path to take.
From the entrance, watch out for the Mask Men in that room and the next. then watch out for the two Geributa running around in the next room. This room is important. If you defeat both Geributa, there is a 25% chance that Ointment will appear. You do not want to proceed to the next room until you are able to collect that Ointment. Leave the room and return until you collect it.
Once you have the Ointment, you'll need to move fast. In the next room, you can climb up the ladder to the top level, or down to follow the lower path. You only need to take the upper path if you do not have an Elixir, and would like to acquire one. However, if you do, you will have to get past a Ripasheiku, and then past the boulder dropping Zorugeriru before crossing a series of high platforms to the right, occupied by Giant Striders, until you can climb down and run back to the left. You'll have to pass Hornets to reach the end of the path where a Zoradohna guard the Elixir. You aren't actually required to fight him to collect the Elixir, but if you read the strategy below, you'll find that it's not particularly difficult to defeat if you choose to. Once you collect the Elixir, you'll have to backtrack all the way to the right, up, and back to the left, and deal with the Zorugeriru again, although you can fall through the gaps in the floor to avoid it entirely.

The main purpose of exploring this tower, is to follow the lower path. After collecting the Ointment, climb down the ladder, and rush past the Ripasheiku. Remember that the Ointment won't defend you again the fireballs it breathes. Continue to run right past the Raiden and Rokusutahn, and on to the next room. Let the Geirbuta fall down to the floor with the Wolf Man and climb up to the higher platform. Jump over the gap in the next room to remain on the platform and continue right until you see the Zoradohna boss. At this point, the Ointment will wear off. You'll need to climb down the ladder and face the Zoradohna. You will likely get hit as you climb down, but once you do, you can simply walk off the ladder to the left and drop down.
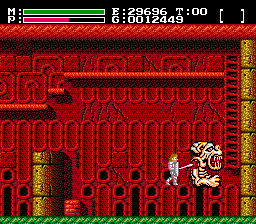
Defeating Zoradohna is actually fairly straight forward. He will hover towards you until he is roughly within striking distance. Then he will "leap" over your head. You'll goal is to get him to leap towards the right side of the screen. He will land, and turn around and attempt to leap back over you to the right. Just as he begins to leap, jump up and strike him with your sword. This will stop him short and force him to face the wall again. He will land and repeat his attempt, at which point you continue to jump up and turn him around. If you repeat these steps, you will force him to remain against the side of the screen as you slowly defeat him. Once he is killed, the Black Onyx will appear on the pedestal to the left. Collect it, and you will be ready to leave the tower.
The Ace Key[edit]
Now that you have collected the piece of the meteorite that the boss was guarding in the form of the Black Onyx (which, incidentally, increases your defense slightly) you can return to the man in the house on the screen with two doors (3) and show it to him. He will reward your bravery with Key A, the key you need to unlock the neighboring door. However, don't be so quick to use it. There is no key shop in the next town and you will need a Key K to get to the next one. So, if you don't have at least one Key K in your inventory, head back to Victim and purchase one or two. Then return to the locked door and use the Ace Key to proceed.
