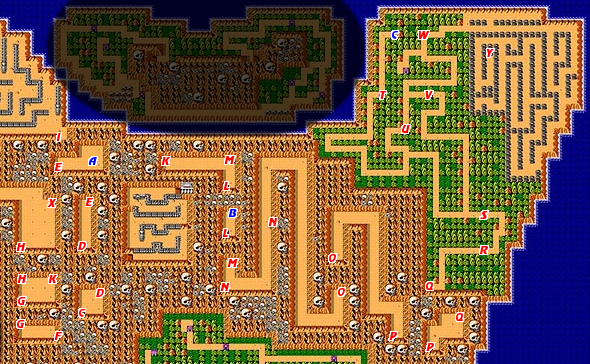
- Red letters indicate action zones. Blue letters indicate shops or help.
Main objectives
- Pass through tunnels K and L to reach the hut (blue B).
- Continue talking to the occupant of hut B until you obtain the third devil pass.
- Return through tunnel L, and pass through M, O, P, and Q to reach the north east peninsula.
- Pass through Zones R through W to reach the maze.
- Travel through the maze to reach the gates at location Y.
Walkthrough
You will obtain the third devil pass very early on, and quite easily compared to the first two. Once you obtain it, you must continue to pass through the tunnels until you reach another area filled with battle zones along a pathway that leads to a maze. At the heart of the maze is the gate that leads to the third island where the final Hadouken Sword is stored.
Devil Pass
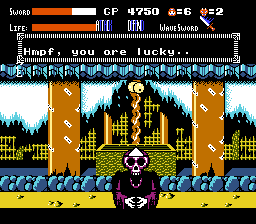
Once you return to the main island after retrieving the second Hadouken sword, travel back through the maze to tunnel I, and pass through I and H until you reach the entrance to tunnel K. Take K to L, and pass through L to reach hut B. When you enter hut B, you may be bracing yourself for another encounter with a large demon, but communicating with the inhabitant won't actually result in anything. In fact, if you meet with him two more times, he will say the same thing. Next he will argue with you, and then he will pretend to be sleeping. This will go on a few more times until he finally gives up and relents and hands over the third and final devil pass.
Out of the valley
With the pass in hand, you can return through tunnel L, and take tunnel M. Tunnel N can actually be completely skipped, or you can take it just for the experience and possibility of increasing your sword strength (which should be nearing full strength by this time.) Continue around to tunnel O, and follow it through to tunnels P and Q until you are finally out of the valley and onto the next pathway that will lead to the maze where the gate is found.
Zone R
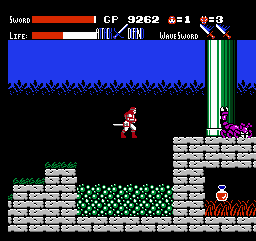
The zones on this part of the main island will appear to take place in a old Japanese village with many cottages in the background. You will see a sun in the background as well, but beware of jumping into it as it can actually harm you. You will encounter an insect that runs around and attacks you by coming to a stop, raising its tail in the air, and firing a projectile at you. You should be strong enough to remove it with one hit. A new kind of skeleton warrior will also attack. You will soon reach a cavern. The green stones that line the floor and ceiling are poisonous. Among the green stones on the ceiling are a few red ones. These red stones will fall as you approach and hurt you if you get hit by them. Try to allow them to fall first before advancing. After that, you will need to activate your Rock Sword to cut through the barriers along the path. Then you must run through a long stretch until you see a moon in the sky. This moon will actually fall down and try to roll you over. You can't attack it, so just avoid it. You will come to a pit lined with poisonous green stone, and a Medicine vial on the other side of a stone wall. But the Rock Sword won't cut through the wall, and it doesn't appear that you can make the jump to the top. The fact is that there is an invisible platform above the green stones. Use it to make the jump to the upper level, then double back for the Medicine. Then exit the zone.
Zone S
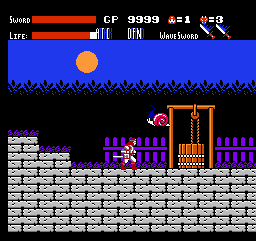
This zone will begin much list Zone R ended, with insects and skeletons attacking you. Before you reach a cavern another "moon" will fall from the sky and try to bounce on you. Remember that these moons are indestructible. Inside the cavern, the green stones have become purple, but they are no less deadly. And once again, watch out for the red stones that line the ceiling and try to fall on you. Use the floating platforms to reach the opposite side, and watch out for the skeleton when you land. When you reach a well, several snails will pop out of it to attack you. You can stand still and defeat them. Once three drop items appear, they will stop popping out, so collect the items and return to where you were standing to repeat the process, or simply move on. This can be an effective method of restoring your health, or maxing out your gold and even your sword strength. Continue along in front of more cottages, and two more "moons" will drop and attack you. You will reach the exit shortly after.
From here, you have a few options. You can approach Zone W through either Zone U or Zone V, or you can visit Shop C by passing through Zone T.
Zone T
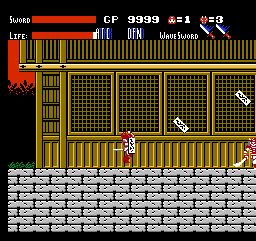
The setting for this zone should be familiar by now. You will start out by being attacked by a few insects in front of the huts. Soon you will reach another hut with more pieces of parchment attached to the door. Only these pieces of parchment are larger than normal. As you get close and attack the skeleton in front of the hut, these pieces will fly off the building and attack you. They are indestructible, so all you can do is try to dodge them. They don't hurt very much, they are more of a nuisance. Ride the floating platform over the poisonous green rocks and continue on. More "moons" will fall from the sky. When you reach a gray rock structure, activate your Rock Sword and start cutting through the columns. You will find both a 1-Up and Medicine inside, guarded by insects. Jump over the green stones that follow and proceed to the exit.
At the shop on the other side of Zone T, you will find Medicine, a Blue Charm, and a Defense Gem, all selling for 400 gold a piece. At this point, money should be absolutely no problem, so buy whatever you need and return through Zone T.
Zone U
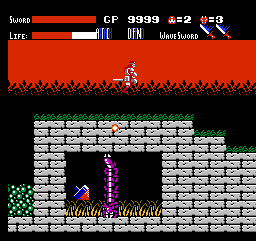
Assuming you approached this zone from the south, you will be moving to the right. You will start out atop small gray structures that you must jump on or over. After leaping over a pit with green poisonous stones, you will see a top trapped in some rock with an insect. There are two "moons" that will drop as you pass over it. You must activate your Rock Sword and break through the rock from the right to the left. The moon will interfere with you as you do, but ignore it and it will eventually scroll off screen. Attack the insect, and collect the top which is actually the Devilish Top, a powerful weapon that will be the key to succeeding against the boss that guards the third Hadouken sword. Cut your way back through the rock to the right, and activate the Top if you like, since it makes you a nearly invincible weapon when you leap through the air. Continue running right until you must leap across a series of pillars. Carefully jump over them and run through the small tunnel. Continue right, avoiding the falling moon, and attack the insect on the platform. On the other side, you must choose either the high or the low path and defeat one more skeleton until you exit the zone.
Zone V
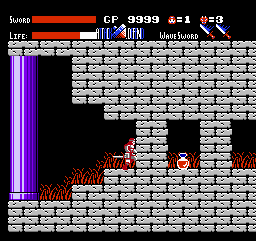
There isn't much reason to visit Zone V, especially if you've already passed through Zone U. The only benefit to coming through Zone V is if you happened to need a free vial of Medicine. There are no new surprises in this zone, and the pathway isn't even that challenging. You will face the usual monsters of the area; insects, skeleton warriors, moons, and large pieces of parchment. If you have already collected the Devilish Top from Zone U, you can activate it to make passage through here slightly easier. Once you collect the medicine, before to exit through the left, regardless of which way you entered.
The hut that you can enter just before Zone W contains a man who will reward your bravery by restoring some of your lost health.
Zone W
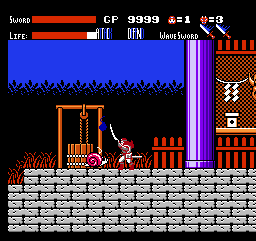
Zone W looks nearly identical to Zone V. It will start out with some insects, followed by two "moons" that fall from the sky. A skeleton warrior waits beyond the three gray structures, followed by more insects. You will come across many more moons in this zone, and in fact not all of them will even fall, but keep an eye out for the ones that do. Attack the snails that pop out of the well in order to restore any of your lost health, and proceed to the right when you are full. Then simply battle your way past the remaining skeletons and insects until you reach the end of the zone.
You will now be at the entrance to yet another maze. Your goal is to reach the gates at the location marked Y on the map above. The mechanics of this section should be entirely familiar to you by now. Some of the monster encounters that occur on the map will throw you into a familiar scenario, while others will put you in a new alternate background where the only enemies are the projectile spitting ghosts and the club wielding demons. Make your way through the maze, and reach the gates at location Y. The demon here will only allow you to enter if you managed to collect all three devil passes. Otherwise, you will have to turn around and get whichever pass you missed. The demons inside will take two hits to defeat, even if you are at full sword strength, so beware.