Getsu Fuuma Den/Third sword
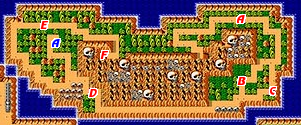
- Red letters indicate action zones. Blue letters indicate shops or help.
Main objectives[edit]
- Pass through Zone A, and then either through Zone B or Zone C, and then through Zone D
- Optional: visit Hut A to restore some health.
- Pass through Zone E to reach the dungeon entrance F.
- Enter the dungeon, and reach the entrance to the boss zone.
- Pass through the boss zone and defeat the boss to collect the third and final Hadouken sword
Walkthrough[edit]
There are a few more zones to visit than on the previous islands, but you should be at full strength and in possession of the Devilish Top at this point, so they shouldn't prove to be tremendously difficult. There is nothing left but to tackle them and reach the third dungeon.
Zone A[edit]
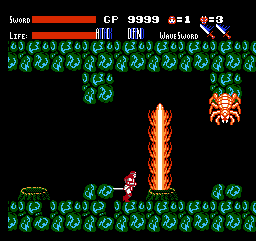
The first thing you'll notice in this zone is the lava spewing fountain. You can attack the small droplets, and they may even provide spirits for you to collect, but the best strategy is to avoid them completely. Also, be highly aware that the yellow and green stuff on the bottom of the screen is not ground. If you fall down, you will fall through it and die. Next, you will encounter a flame demon who will throw fireballs at you. Slice it down and continue on. At the next volcano, you will encounter another new enemy, a small demon pulling a cart behind him. They will bounce back and forth on the screen until you defeat them, so take care of them quickly. Once you reach th cavern, you will have to remove a spider before you reach a flame geyser. Time your jumps over these geysers carefully and you'll make it through unharmed. The exit lies just beyond
After you pass through the zone, you will be presented with the choice of taking either Zone B or Zone C. You do not have to take both. Zone B features more pits in the ground in which to fall to your death. Zone C compensates by throwing a lot more enemies at you, but it is generally safer, and also features an extra life.
Zone B[edit]
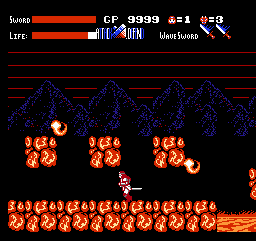
The monster you will encounter in this zone is a kind of running beast. They are quite powerful, take two hits to destroy at full strength, and can do a lot of damage. Fortunately, the spirit energy they leave behind restores a lot of health. Once they appear on the screen, they will continuously run back and forth until they are defeated, although it's possible for them to slip through the bottom of a pit. Be especially careful when jumping across the small platforms so that they don't knock you into the pits below. In the middle of the zone, you will reach some platforms that have fireballs circulating around the outside edge. You can't defeat these fireballs, only avoid them. Beyond that, it's simply more jumps and more demon beasts. Activating the Devilish Top is a good idea for this stage, as it typically allows you to strike the beasts while avoiding them at the same time.
Zone C[edit]
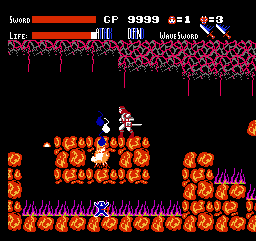
Zone C is a little more reminiscent of Zone A, but there are a lot more enemies in here. You will first encounter lava fountains and flame demons. While the ceiling is perfectly safe, the purple flames that line some of the floors are harmful and should be avoided. Early on into the stage, you will encounter a lava fountain over a purple flame lined path, and in that lower path is a 1-Up doll. Quickly dive in, collect the doll, and get out. You can use the lava drops to collect spirits and restore your health. You'll have to jump over more flames, and fight more flame demons until you reach the flame geysers once more. Carefully time your leaps over them and attack the flame demons spiders in between. The zone ends with a large number of the small cart-pulling demons that like to run back and forth across the screen. They are interrupted twice by another set of spiders, flame demons, and geysers before you reach the exit.
Zone D[edit]
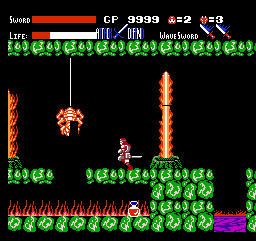
You will be greeted by a flame geyser in this zone. Leap over it and take care of the small cart-pulling demon before activating your Rock Sword and breaking through the barrier. Leap over the next geyser and take out the spider, and then leap over the flame lined floors. Soon enough, you will reach a section that contains a vial of Medicine along the floor. If you don't have one, be sure to collect it, and if you do, use your Medicine before you pick up the one here. Then continue on. You'll have to break another barrier down with the Rock Sword amidst two flame demons throwing fireballs at you. All that remains in the zone are a few lava fountains, which you can use to restore any missing health if you are careful enough. Then exit the zone.
Once you exit the zone, you will be able to access the hut at the location marked by the blue A on the map. The occupant will restore of bit of your health before you move on to Zone E.
Zone E[edit]
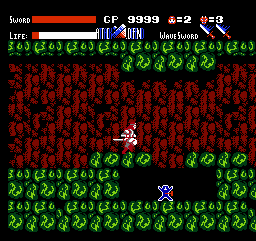
This dark zone contains long jumps over bottomless pits, and more demon beasts that like to charge back and forth at you. It won't take long before you see a fire lined pit that contains Medicine. If you already have Medicine and a good amount of health, don't risk your life to collect this one; simply move on. After a few more demon beasts, you will have to leap from one fireball occupied platform to the next. Beyond that, you'll have to continue fighting more demon beasts. Remember to activate the Devilish Top, especially if your health is getting low, or attack them from a safe distance with your Shuriken. Fortunately, you will find a very easy 1-Up doll to grab, so don't miss it. Beyond that pit, you must cross two small fireball platforms that lie over fire. If you fall into the fire, your only escape is back to the right, so you must successfully leap across both platforms to continue to the exit.
Dungeon[edit]
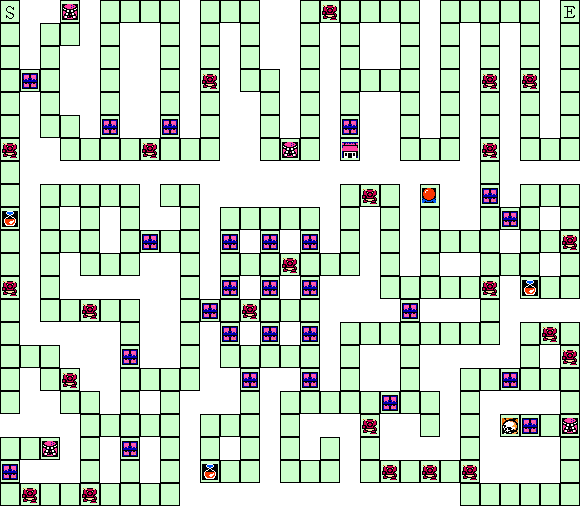
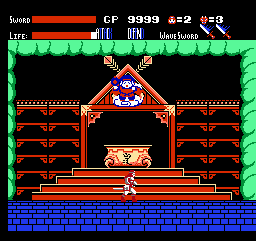
From the entrance of this dungeon, there are effectively two paths that you can take to the boss zone. One is by traveling along the north route (which spells out the name "KONAMI") and then head south on the east side of the dungeon. The other is by heading south immediately along the west side of the dungeon, and crossing along the southern half. The second option is longer, but it will also allow you to find more vials of Medicine to restore your health. At the left base of the A, you will can find a bonus room, where a man riding a cloud will distribute four 金 symbols periodically and without end. However, money is essentially useless at this point in the game, so it won't serve you much good.
Unlike the previous dungeons, there are four different types of monsters that you will encounter, and naturally, they will be the toughest yet: a spell casting magician, a winged flame breathing demon, a flame spirit that teleports about, and a horned demon that likes to get close and personal. But the strategy to defeat them is entirely the same; jump up and strike them clear across the head. The Flame spirit can be particularly difficult to defeat since it moves about very quickly. Once you manage to hit it once, attack it relentlessly before it has a chance to move again.
The boss zone at the end of the dungeon is the same as before, with various platforms occupied by pole arm wielding guards. At this point, your sword strength should be maxed out, so there is no reason to endanger yourself by attacking up close. Stick to using your Shuriken to remove them from a safe distance. When you reach the end, activate your Rock Sword to cut through the barriers that block your progress. Before you pass through to meet the boss, fight the last guard over and over again in order to collect spirits and restore any lost health.
Boss[edit]
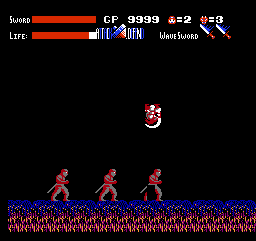
The boss guarding the third Hadouken sword has two forms. The first form is a trio of ninjas, while the second form combines the ninjas into one giant fire dealing death machine. To say that this fight will be difficult is an understatement. However, possession of one item, the Devilish Top, can change this fight from impossible, to nearly effortless.
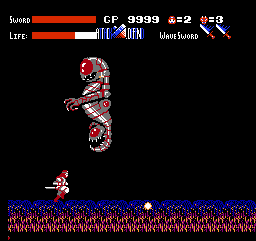
When the three ninjas appear, they will wander back and forth along the floor of the screen. You will have to deal enough damage to each of them in order to trigger their transformation into the final form. As long as you have the Devilish Top activated, you can simply jump in the air over and over again, and deal damage to any of them that pass close to you. In order to avoid taking damage, you must be sure to press the jump button as rapidly as possible, so as to spend as little time vulnerable on the ground as possible. Once the ninjas sustain enough damage, they will all walk over to the right side of the screen, and stack up on one another's shoulders. At that point, they will transform into a giant creature. This creature will float back and forth, occasionally crashing into the ground when it gets close to you. It will spew fireballs the entire time as well. Once again, continue jumping as rapidly as possible non-stop until it sustains enough damage and is destroyed. Without the Devilish Top, your options are very limited. It moves around to quickly to use your sword against it effectively, it stays above the ground too often to use the Curse Dynamite against it, and the Shuriken won't deal enough damage to it to kill it before it kills you.
All three swords have been collected, and if you look at the inventory screen, you'll see that you have obtained the seventh attack item; the use of the Hadouken sword. You can activate it in any zone, and you will find its power quite formidable against any foe. In order to proceed to the final battle against the Dragon Master, you will have to travel all the way back to the start of the first skeleton maze from the first map.