Gradius 2/Venom's Ship
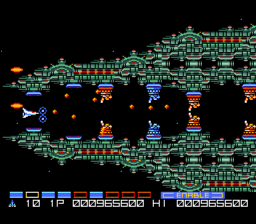
- After the last pre-stage of the game, you will approach the nose of Venom's Ship, which has a narrow entrance that you must pilot the Metalion through. This entrance is heavily defended by a large array of cannons which should be destroyed as quickly as possible so they don't flood the tunnel with bullets.
- Once inside, beware of enemy ships that materialize very close to your current location before darting off in some direction. Keep firing, and change your position as soon as you see them appear in order to keep them from closing in on you.
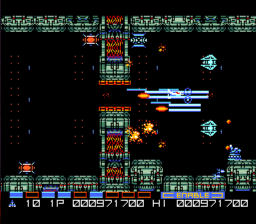
- Once you clear the first big chamber, you must pass through the small gap to the next chamber before the gate is sealed off. As it scrolls to the left, the gate slowly closes until it is impossible to pass through. Immediately following the first such gate, there is a time-limited Vector Laser power-up in the top corner of the next chamber.
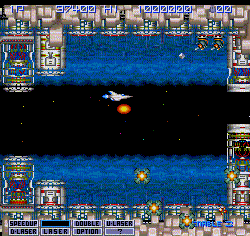
- Further into the ship, the walking tanks known as Duckers will appear from the left side of the screen, along both the top and bottom walls, and walk to the right in an effort to get into position to shoot at you. Additionally, the pods which appear while invading the boss ship cores also materialize around the edge of the screen to home in on you.
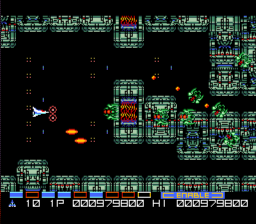
- Assuming you have Up Lasers and Missiles, it's highly recommended that you stay more to the right side of the screen, in an effort to clear out as many tanks as possible before they have an opportunity to fill up the screen with a barrage of bullets.
- You will eventually arrive at a point where the path splits into, forcing you to choose between an upper path and a lower path. Neither path is inherently more dangerous than the other. The top path is trickier to navigate and has a gate that closes to off, but it gives you more room to fight enemies. The bottom path is very straight, but you have to lure enemies forward and then back up in order to shoot at them.
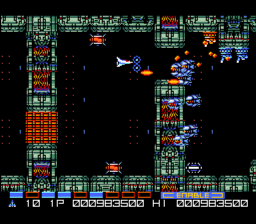
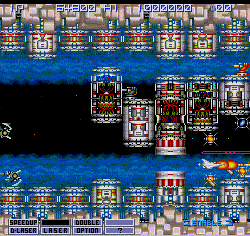
- After the paths join back up, you'll be forced through a section that contains one gated area after another. While you are trying to pass through these areas, squadrons of fighters will appear from the right and dash towards you. You must time your passage through the gates so that you don't crash into these enemy fighters, but also so that you can survive the spray of bullets created by the cannons in each chamber. You may often find that space is so cramped in these areas that a Force Field won't offer you adequate protection. There is a time-limited Enemy Slow power-up for you to collect in a bottom corner which should help.
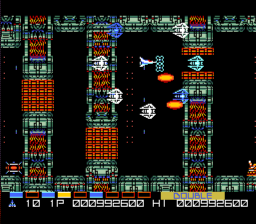
- Once you are through all of the gates, there is another split in the road. This time, the bottom path is gated and offers more room to maneuver, but it's packed with cannons, whereas the smaller tunnel above only has two. As long as you are comfortable with making small adjustments to the Metalion's position, the upper path is the safer way to go. Just watch out for any Duckers that may be trying to walk up behind you.
- You must go through a second series of very frequent gate passages. These gates are placed much closer together. It's advisable to stay close to the right side of the screen while you attempt to pass through all of them. You will know that you are close to the end of the stage, and the final confrontation with Venom, when you reach a wide chamber full of red cannons.
Boss: Venom's Ship Core[edit]
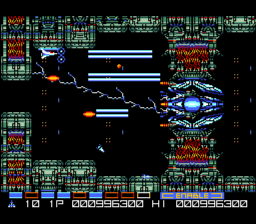
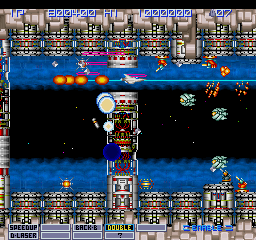
As expected, this fight will be the most challenging boss fight of all. The core of Venom's Ship occupies the right wall. Naturally, the vulnerable portion is right in the center, and there are only two small guns flanking the top and bottom of the core which constantly fire at the Metalion. These guns aren't precise, their aim is a little inconsistent. But Venom's Ship needs no greater defense. Whenever the core itself is shot, it releases a devastating arc of electricity in the direction of whoever fired at it. Normally, you must keep the Metalion in constant motion to prevent this arc of electricity from wiping you out. Fire at the core and then move out of the way when the arc of electricity is released.
However, there are a few select locations around the room where the arc seems unable to find you. The location shown in the image on the right is one example. Directly above and close to the right wall is another, although you are much more at the mercy of the guns in that location. Though it's incredibly difficult to do, ideally you should reach the core with two Options so that you can position yourself in one of these safe locations while the Options do all the work of shooting at the core. Defeating the core without Options is incredibly difficult to do. If you don't have any, you will be forced to fly around a lot more in order to avoid getting destroyed. If you manage to overload the core and send it into meltdown, you will fly out of the ship and be presented with the ending of the game.
Nemesis '90 Kai changes[edit]
The remake mixes things up a bit in this final stage by removing the pre-stage and putting you right at the entrance to Venom's Ship. Before it appears on screen, it will announce its arrival with two very large laser beams that can take you by surprise if you're not ready for it. You'll be safe if you stick to the middle of the screen. Once you're inside, the pressure doesn't let up. More groups of eight Zabu will materialize around you, backup, and then dash into the middle of the circle. When the path splits in two, you won't find a gate at the end of the top path. However, the gates that do close near the end of the stage close more gradually. Since the screen is scrolling by faster, they start to close earlier, forcing you to dedicate yourself to safe passage through the gap early on.
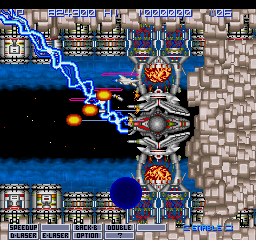
The final boss of the remake is just as challenging, and yet can be defeated with almost the same small amount of effort as long as you are sufficiently powered up and know where to sit. A couple of changes have been made to this boss to increase the difficulty. Rather than the cannons firing single shots, they shoot two semi-circles of bullets that radiate outward. These bullets fan outward, but you are actually safe from them in the center of the left side of the screen. You are also safe from them directly above or below either cannon, if you can get the Metalion so close to the structure as to touch it without crashing into it. If you are able to accomplish this, not only are you safe from the bullets, but you are also safe from the electrical beams shot out by the core. The core has a secondary mode that it goes into a regular intervals. During these moments, the blue core turns red, and it fires a set of randomly directed electrical beams around the room in rapid succession. Unless you are very close to the structure when this occurs, these can be difficult to avoid. As long as you situate yourself close enough to the structure and allow your Options to shoot the core or drop missiles on it, you will be able to defeat the boss without having to dodge any attacks.
