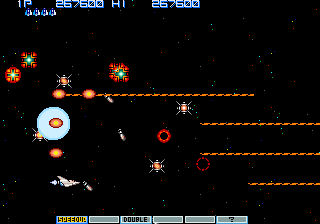
- Instead of the usual pre-stage, the screen will become flooded with Zabus who materialize at random positions throughout space. The first half of Zabus which appear are red and leave power-up capsules behind. You should be able to collect enough to reach a reasonable level of power if you're starting from scratch. After the red Zabus stop appearing, the remainder will be blue. This will continue until a giant ship appears on the right side of the screen. The Zabus will stop appearing, and from this moment on, you will fight a collection of bosses, all of whom appeared in one of the two prior games from the series, Gradius or Salamander/Life Force.
Note: If you have four Options with you, it is still possible for the Option Hunter to show up on the left side of the screen and attempt to steal a few of the Options away from you, so be on alert.'
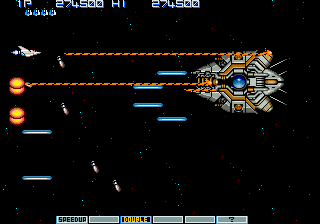
- The first boss battle has you facing off with the original Big Core from Gradius. He hasn't been changed too significantly. However, this time, the core will never turn red and self-destruct after a period of time, you must destroy it however long it takes. The other major change is that whenever you destroy one of the barriers guarding the core, it explodes in a spread of bullets that fan out across the screen (a detail that was further employed in Nemesis '90 Kai.) Other than that, the strategy is the same; move up and down to avoid it's lasers while trying to focus your shots, or the shots of your Options, on the barriers and ultimately the core itself.
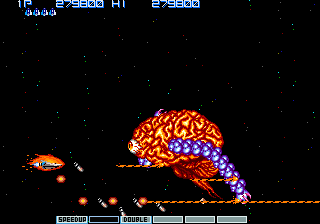
- Next, you go up against one of the most memorable and iconic bosses from Salamander/Life Force: Golem. The giant brain with two tentacle arms will take its place in the center of the screen, before beginning to move in a circular motion. It will always stretch its tentacles out in an attempt to grab you in whatever direction you move in. Periodically, a giant eye will appear in the frontal lobe. This is the target you must shoot in order to destroy Golem. Despite being a giant brain, Golem has only gotten a little smarter; he doesn't keep his eye open the entire time, he shuts it away periodically, forcing you to wait until he reveals it again before continuing your assault.
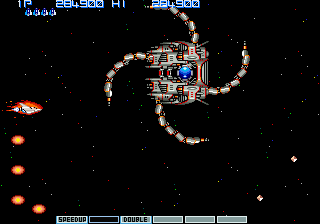
- Continuing with the Salamander bosses, you go up against Boss: Tetran|Tetran next. Other than the fact that you'll be fighting it from the horizontal orientation instead of Salamander's unique vertical orientation, Tetran is pretty much the same. Four metallic tentacles rotate in circles around the central body. As they rotate, the occasionally fold inward and then back out again. Just like a Big Core, the weak point is the core at the center, guarded by a set of barriers. You must wait for the blue core to be exposed before the barriers will take any damage. Also like the Big Core, the barriers will emit bullets when destroy, and they can be tough to hit, particularly when the tentacles get in the way. Because of the wide circles that Tetran makes around the room, you are forced to move away from the left side of the screen and circle around to the right and back again before you can resume your attack.
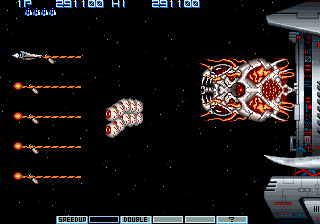
- The next boss that you must face is a bit unusual; it's the Japanese arcade version of Life Force's counterpart to the original Death. In that version of the game, mechanical opponents were redesigned to look much more organic. This particular boss was known as Gow. Like Death, Gow has two phases. In the first phase, it occasionally fires a pair of lasers while it frequently spits out a group of eyeballs, all of which can be destroy by your weapons. After you focus enough fire power on the "mouth" of Gow, it will explode, causing Gow to go into a frenzy and move much faster. It won't spit eyeballs anymore, but it will increase the quantity and frequency with which is fires lasers. Dodge the lasers while you continue to assault the front of Gow until it is destroyed.
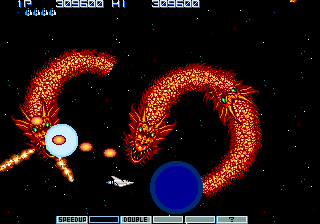
- Up next is the boss from the fiery third stage of Salamander, known as Intruder. He is a giant serpent-like dragon who writhes through space and spits fire. He will appear from the ship on the right side of the screen, and he will move around in an effort to encircle you. The only vulnerable spot on him is his head, and he won't take any damage until his eyes shine, so you must simply avoid him and his attacks for the first few seconds. Once you hit his head with enough firepower, he has a nasty surprise for you. Instead of being destroyed, he actually break apart into three distinct Intruders, each a third of the original size. In order to complete the battle, you must now destroy all three individual Intruders.
Boss: Covered Core[edit]
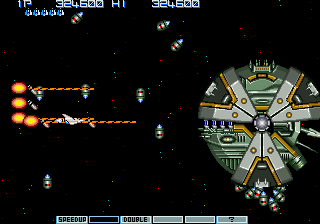
The final boss that you face is a large spherical craft known as the Covered Core. It is, by far, one of the most heavily defended boss ships in the series. It has three blast shields which rotate around the craft and stop at certain intervals. However, these shields never fully stop in front of the barriers that lead to the core, so you can always chip away at the barriers as long as you aim is good. While you attack it, it counterattacks by sending waves of warhead missiles at you from above and below. And endless supply of them fan out and pick a lane to fly through, forcing you to constantly correct the position of the Vic Viper in order to avoid destruction. The good news here is that the Covered Core doesn't actually move too much. It moves in a small circle on the right side of the screen, so you can easily hit it if you have enough Options clustered up near the middle of the screen. Your focus should not be on the Covered Core to the right, but rather on your half of the screen on the left. Watch the warheads as the fly up and down across the screen, and continually reposition your ship so that you don't get struck, but maintain a level of firepower near the barriers and core of the ship. You'll have to survive the onslaught for quite a while before you are able to chip away at the barriers and finally shoot the core.