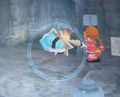
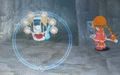
Once you enter, you will see a cut scene with a mysterious girl at the start. She casts a spell and a gigantic rock falls before you! Who is this girl? Puku appears and mumbles something (or nothing), and doesn't reveal what he knows. But, he tells Parin that a certain mole is capable of destroying this rock.
-
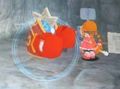
Mysterious girl.
-
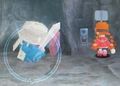
A gigantic rock blocks your path!


Through the entrance

Off you go to find Doug the Mole. The cave is just a little below Spinach Caverns, you can't miss it. Once there, Doug agrees to help, but on one condition. You will have to beat him. It's not a fight though – rather, it's a contest to see who can destroy the most rocks! No problem for you and Parin! Just destroy more rocks than him, and once you get about 40 rocks, time will run out and Doug will go help you out.

No good, the rock's no ordinary rock – it's a really, really hard rock. Doug talks about his brother Digby, and if both of them can combine their skills, it should do it! Talk to Puku and Doug and you will know that Digby is heading for Monster Village. You will find him at Monster Village and he will agree to help you. However, he got lost and you will then have to head to both the Fountain Clearing and then to Asparagus Lake to find him and lead him to the right location.

That does it! You finally managed to get both of them together at Bracken Hollow. It's time for them both to work their magic! It's done in a matter of seconds, since "Brothers can do anything if they work together." Now it's time to move on.
Spinach Caverns
-
Danger! Spinach Caverns.
-
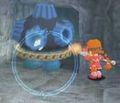
Frozen ball with spikes.


The dungeons are starting to get difficult, and its a good idea to be prepared and well equipped. As soon as you arrive, you will notice a sign with a skull in it. Danger – you will definitely need a good gas mask to survive this place. Upgrade to level two so that you are immune to poisonous gases. With your gas mask, destroy all the vases at the entrance and the two spore plants at each side.
Look to the right and left walls from here and you will notice weak walls at each side. Beyond each wall is a spore plant and a lever. You need to pull on both before the gate at the front opens. Next up are steps leading to another gate, but there are some ball spikes monsters frozen up here. You will have to unfreeze them and destroy them. The gate will open once you clear the three monster balls.
Phantom elevator

The next part of the map is very interesting. On your right when you enter, you will see a sign and what looks like an elevator. Parin will find a coin slot and it will ask you to deposit an amount ($10, $20 and so on). Each time you slot in coins, a new phantom will appear and each will be tougher then the previous. Its like an arcade game.
It is very tough to win if you have low drill energy, especially with the last two phantoms, as they have very long life (like a boss) and are still dangerous without their initial gear! After the seventh phantom, you will be asked to put in $2,000. There will be no more phantoms though, just a nice little gift box! Inside you will find a pair of Joke Glasses!
You're not sure what this is used for yet, though Parin mentions Chucky – perhaps a clue? After this, you will realise that you cannot operate the machine anymore, and even if you redo this dungeon, you will not get another chance with the phantoms. Clear the room of the pillars, stumps and vases, then move on.
-
First arcade phantom.
-
Second arcade phantom.
-
Third arcade phantom.
-
Fourth arcade phantom.
-
Fifth arcade phantom (King Boxer).
-

Sixth arcade phantom.
-
Last arcade phantom.


Through the dungeon

In the next part, there's nothing much on the left side, so walk to the right and you will notice three phantoms engrossed with each other, and a spore plant on the left. You can walk right amongst them without being seen. Do that and perform a drill tornado attack, then one more and you will destroy all three of them. There's a mould here for your drill and a little drainage system here to the extreme right. On one side is a gate, and on the other end is a weak wall! Smash through beyond that and you will come up (on the left side, you will have to jump up) to a jar and a chest. You've got a Power Oil!

Get back to where you found the three phantoms. On their left, you should also notice another weak wall. Smash though that and it will take you up where you will see a lever. There's also a healing portal here and a closed gate. Pull on the lever and blocks will appear on the previous part of the map.

Backtrack to where the blocks are and jump up one by one, being wary of the swinging trap. Pull the lever and the gate will open. Time to head back, but make sure you smash all the jars first. The next room has lots of water, so make sure you have your goggles on. Swim to the first part on the left and pull the crate onto the switch. Smash the thrashcan for some good junk. You'll see some phantom bats above the water surface, so use targeted attacks to kill them, and make your way to the other switch in front. Once both crates are in place, the gate to the ultimate exit will open.
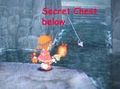
Secret Chest #1
Before you proceed, there's a secret! In the screen on the left, you will see a normal stream leading to the next part (on the left is your crate and switch). If you drop down to the bottom there in the water, you will find a secret passage leading to another surface!
-
Secret Chest #1.
-
Secret passageway!
-
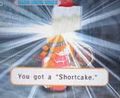
You got a shortcake!


There you will find a nice piggy bank and a chest (Secret Chest #1)! Inside the chest is a shortcake! After you get the secrets, go back to where you started and climb those steps. Move on farther and you will be greeted by two phantoms. Each time you kill one, another one will appear until you kill about 6–8 of them. These are nothing like the ones during the arcade, so there shouldn't be any problem destroying them, but eat a cookie if you must.
Secret Chest #2

Do not dash forward first! There is another secret right here. Check out the water hole nearest to the exit. Jump in there and you will find that there is a path to another part of the map. There you will find Secret Chest #2! Inside this one is a mystery bag.

If you have Cat ears, they allow you to hear nearby chests and jars (level two upgrade needed), so you can find all the secrets on your own as well. Now head to the exit and claim your reward! It's a Hat Rack! It belongs to Pierre, so head back to Monster Village when you are done to return it to him.