Half-Life/Apprehension
In this level, you will encounter a couple of new enemies as well as a new weapon. There is a maze of underwater passageways followed by a showdown with several of one the deadliest enemies in the game. As long as you don't get lost, this level is a piece of cake. The thing to be worried about most is where your next air supply is coming from. Stick to this guide, though, and you shouldn't have any problems.
Taking a Swim[edit]
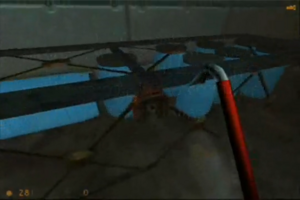
After the fancy tram car has been started up, it won't stop. No, we're not leading you to your doom, just sit back and enjoy the ride. Make sure to duck down to prevent as much damage as possible. Keep your arms and legs inside the vehicle until it has come to a complete stop- at the bottom of a rather large vat of water. When it does, however, calmly swim out and up to the surface for air. When you have caught your breath, swim back down to the bottom and look for a bunch of barrels inside a cage. Break the lock on the cage and the barrels will float up to the surface. Back at the surface, you can see that they've made a convenient bridge to the red doorway.
Through the red doorway, you'll run into two mawmen at the stairs. There's some ammo in crates around here as well as a battery. Continue up the stairs and out to the ledge. There are two sides divided by the concrete barrier. Jump down to the side you haven't explored yet (the side without the barrels). Equip your crowbar and dive down to the bottom. Look for a passageway near the bottom and head through it, swinging the crowbar wildly at any hagworms that get in your way. Keep moving through the passageway, stopping for nothing, lest you die of asphyxiation. Though you can make it all the way through, there is a metal door about halfway through that leads to a small room where you can take a breath of air, but you will be continuously bitten by hagworms. When you reach the pile of debris that you must duck under, you're almost there. Soon, you'll get to a hallway with a blocked metal door. Stop to get some air, then break the grate on the floor and swim through the tunnel. Follow the tunnel, taking a right at the fork, and swim up the vertical shaft. Break the grate and surface. Grab the ammo scattered here (don't miss the crossbow bolts, which you will need later), then push the computer bank blocking the metal door out of the way. It will fall over and the door will open. Swim through this hallway and it will eventually rise out of the water.
Here Fishy Fishy![edit]
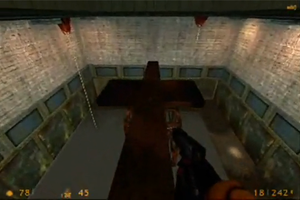
At the end of this hall, you see what dangers are in store for you this level. Yea. That just happened. Continue along the catwalk carefully avoiding barnacles. The first door on the left will take you straight down into that pool. You're not ready to face the monster fish yet, so let's avoid this door for now. Walk around the pool until you reach the ladder. At the top, you will find a scientist who informs you that there's a shark cage and a tranquilizer gun in the shark cage. Walk out to the end of the rusted cross and look down. You will see the "tranquilizer" gun in the cage free for the taking (certainly this couldn't be a trap?). Drop down into the cage and collect the crossbow. Immediately, the cage will lower into the water, putting you face to face with the vicious fish. Shoot the Ichthyosaur with the crossbow until it is safe to leave the cage, then swim up to the surface for air.
Deja vu[edit]
Dive back down to the bottom and locate a wheel next to a barred door. Turn the valve wheel until it is high enough, then swim under it. At the surface is another hallway that leads to a flight of stairs. Take the stairs and continue until you reach the metal door. Beyond this door, you get an up-close look at barnacles, which you can easily dispatch with one swing of the crowbar. Equip the shotgun and go downstairs for some ammo. As you rummage through the crates, a pair of Vortigaunts warp in. Take them out with the shotgun, then go through the corridor at the bottom of the stairs to yet another giant pool with an angry Ichthyosaur at the bottom.
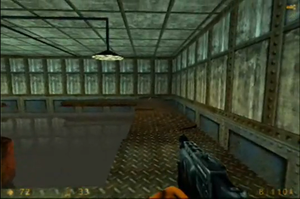
If you don't want to fight two more Ichthyosaurs, make sure not to fall off any of the walkways. If you do, there's a ladder in one of the corners that leads back up to the walkways. For the first jump, aim for the craggy part of the broken walkway that sticks out, but make sure you don't go too far or you'll slide on the wet floor into the water. After you make this jump, for the next section of the walkway, make sure that you stay in the very center. About halfway across, your weight will break off a section of the catwalk except for a beam in the very center. The scare tactics continue as a Vortigaunt warps in in front of you. The last jump is rather difficult, so save beforehand unless you really feel like you want to beat up another Ichthyosaur. If you do make the final jump (it is possible), you'll see two openings. Though the doorway would seem like the obvious choice at first, there is a broken electric wire on the other side. Instead, jump crouch through the hole, landing in the water on the other side. Don't worry, that mean ole monster fish can't reach you here.
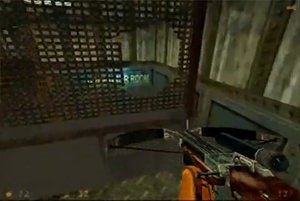
There's another underwater hallway in this room that leads to a room with several hydraulic pumps. There are two bullsquids hiding in this room. Send them to the great animal shelter in the sky, then head through the doorway marked "Generator Control". This will lead you to a balcony overlooking the whole area. Up here, you'll find two metal crates needed to reach the next section. Push them off the ledge through the convenient hole in the railing. If you are low on ammunition, the hallway continues to a storage room with some supplies. Back in the generator room, press the button on the panel to start up the pistons. Jump on the first piston while it is lowering, then onto the second piston before you get crushed. From the second piston, jump onto the balcony off to the right to get two satchel charges. Drop down to the floor and drag the metal boxes over to the other pair of boxes in the corner. Arrange them so you can climb up to the taller box and break the crate to reveal a ladder.
Freezer Burn[edit]
At the end of the ladder is a hallway where a bullsquid will teleport in. Beyond this is a computer filled room where you will find three Vortigaunts and some Headcrabs. When they are taken care of, make use of the HEV charger, then listen to the scientist. I would advise saving before heading into the freezer in case you get hopelessly lost. Equip the Combat Rifle and run into the cold storage unit. Don't worry about enemies you see here unless they are in the way, it will only cause you more cold damage. Stay to the right and you will eventually find a ladder in the floor. Descend it as quickly as possible to leave the damaging freezer. Go down another ladder to the ground.
Continuing through the only route available, you will reach a hallway where multiple Vortigaunts teleport in both in front of you and behind you. Make use of the crates for cover as well as extra ammunition and health. Continue down the hallway and take the lift to the top. At the top of the stairway, a security guard tries to warn you about something, but is suddenly assassinated before he can finish.
In this next area, you will run into a new kind of enemy: Assassins. Assassins are easily faster than you and on the Hard difficulty settings, will be cloaked. Don't try to chase an assassin, for even if you manage to corner it, it can easily jump out of the way, usually landing right behind you. The .357 Magnum or Assault Rifle are ideal for dealing with an assassin, as are trip mines or a shotgun if it comes around a corner. There are three assassins in the next part, so make sure to save beforehand.
When you have taken care of the assassins, go up to the very top and turn the old rusty wheel until the door opens. Walk through the opening and into the darkness.