Interstellaria/Sakari
How not to lose any crewmen on Sakari[edit]
If your health ever falls below 5, return to your ship, give your other crewman the pistol, and bring him back to the field of action. If a health pack (a red box) drops, be sure your weaker crewman or a fully healthy crewman touches it first. You can make your life easier by visiting Zephyr first to get some quick money for a Needle Rifle and an extra crewman.
Colony A[edit]
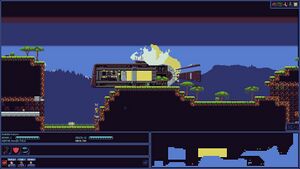
Head over to Sakari, pull up planet view and select Colony A. Disembark your armed crew member(s). The only things to your right are resources you can collect later. To your left are some Spikey Bots (~2 HP). Try to move onto their level when they overlap. Guard. Jump up the hill when they get close to avoid taking damage.
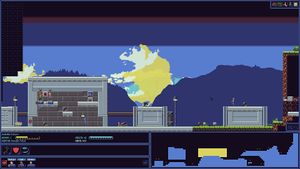
Advance to the red Simple Bot (~7 HP) and use the same tactics. Keep going left until you meet a blue Android. He'll tell you about the key to Colony B if you talk to him. Right click the red button on the upper left to unlock the door. Use the middle platform to avoid the Spikey Bots. Jump down after they pass and guard. When they get close, jump back up. When you reach the next pair of enemies, you won't be able to dodge them by jumping.
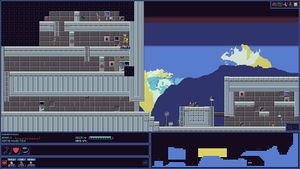
Enter the large building. Press the two switches and position yourself between the higher switch and the hole. Guard and wait for the Simple Bot to fall in the hole. Use the shoot-and-jump tactics again. Climb the ladder to the left when the next Simple Bot is on the far left. You know the drill for killing him. Collect the keycard and kill the last Simple Bot. Now, set both crewmen to harvest all the resources scattered around. They will automatically avoid the exploding data station. Use the fast forward button if you don't want to wait. When your crew say "No more resources," you can take off and go to Colony B.
Colony B[edit]
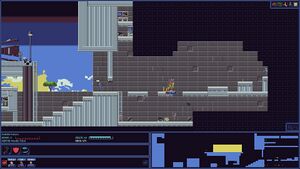
Disembark your armed crewman and kill the Spikey Bot at the bottom of the screen. Then talk to the blue Android and enter the building on the right. Try not to fall down to the bottom if you can help it. This may require jumping one hole at a time. If you do fall, get out quickly. Kill the first Simple Bot from the doorway platform. Take advantage of your bad accuracy to kill the next one from the right side of the third hole. The blue Shoot Bot has a gun with more range than yours has, so you can't dodge him. Unfortunately, the weapon that drops around here is the Riot Shield, and it is hard to use effectively on the small platform with the Shoot Bot. At this point, you should orbit and land to repair your armor.
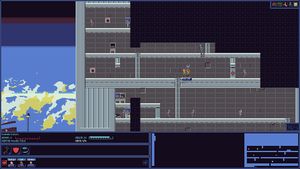
Wait for the four Simple Bots to move to the left end of the next floor. Move into range and guard. When one gets close, back up and guard again. When you run out of space, just climb back down and wait for more room. Duel the next Shoot Bot.
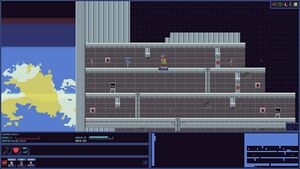
Use the shoot-and-back-up tactics on the three Simple Bots as you hit the switches. Grab the Interstellaria and the coins. You are now free to leave and go to Trade Co.
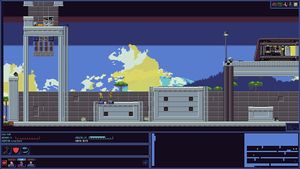
If you want all the resources, head left and kill the two Spikey Bots and the Simple Bot. Then come back to the building on the right and use the shoot-and-back-up tactics on the group of enemies on the bottom floor. You can now safely auto-harvest.
Hills[edit]
You don't need to come here, but you can use the resources available. If you get the Tech Cache event when you land, choose "leave it." It will deal 20 damage to your ship if you don't. Use your discretion to determine if you have enough health to fight all the enemies. Many of the resources can be collected without fighting any of them.
To Trade Co[edit]
If you see a hostile ship, try to outrun it by allocating your weapon energy to engines. You may have to go to Zephyr to shake it off if it keeps you from getting to Trade Co. Once at Trade Co, talk to the person in the Spacebar. He'll tell you about Nomad Bryan and give you a log item. Before you head to Xiwang, check out the shops on the right. If you fought any battles on your way here, you will have noticed you need a third crewman. Your next priority is crew weapons, followed by ship repair. Ship repair will take precedence if you took too much damage to your ship. Be sure and sell all your Valuable Scrap—Trade Co pays extra. If you have enough money, buy a Medical Box and heal your crew. Assuming you have collected everything mentioned above, you should be able to afford a crewman, Needle Pistol, and Medical Box. If you have extra money, you will be better off buying a Needle Rifle at Zephyr instead of the Needle Pistol. Be sure to install any new stations (like that Medical Box) when you orbit.