Kid Icarus: Uprising/The Space-Pirate Ship
Congratulations, you have beaten all of Medusa's commanders! But before you take on the big boss herself, you'll need the Three Sacred Treasures. Hence, this chapter.
Air Section[edit]
The chapter starts slowly enough, as Pit ascends into the air with the occasional enemy. Just be sure to shoot them while listening to the plot. Once you're in space, you'll see some Remoblams and Remoblamlings. Defeat the larger Remoblams to detonate their smaller relatives. Nothing should pose too much of a threat for a while.

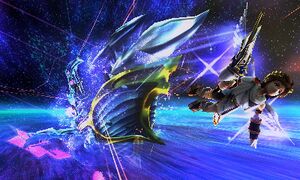
After collecting some Recovery Orbs, you'll eventually find the Space-Pirate ship. While following it, you'll encounter a number of enemies, including Gyrazers, Reapettes, and Komaytos. Watch out for the Orne that shows up later on! As always, they can kill with one hit.
Ground Section[edit]

Collect the food nearby and get ready to meet the Space Pirates. As a group, they're not particularly menacing. Pirates generally act like slightly more intimidating versions the Skuttler family of Underworld baddies, meaning that you should be used to fighting more powerful threats by now. Still, between the Pirates and the Underworld army, this section contains a lot of enemies. The good news is, the Pirates and Underworld are not allies, meaning that you can let them take each other out at points. This comes in handy for some of the more powerful foes in this section.
As you begin your advance in the ship, bear in mind that many Space Pirates used ranged attacks. That said, they are also adequate melee fighters. Defeat them one at a time, and try to avoid being flanked. Clear the first few rooms of them as you would Underworld enemies, collecting food and items along the way. Be careful when shooting the small pods lying about though; they're explosive.
The first notable landmark should be the generator room. The Pirates here are a touch more dangerous, since they have space to shoot at you from a distance. However, there are no particularly powerful Pirate enemies, so the they should be an annoyance at most. On top of the elevator though, is a Belunka. It will spawn Underworld forces, so take it out quickly. As you move on, you'll see a Level 6 Intensity Gate to your right. On lower levels, ignore it and go straight.
The Constellation Room will contain both Underworld and Pirate enemies, who will be busy with each other. Kill the survivors and move on to the jump pad ahead. However, as you progress down the upper path, DO NOT jump on the second pad unless you have cleared this Chapter already. Instead, keep going straight along the path until you can fall off the ledge. A door to a Zodiac Chamber will be nearby, granting access to a new weapon. Go back to the jump pad when you collect it.
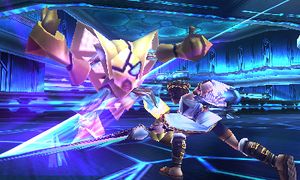
The next corridor will contain a new enemy: the Collin & Phil. Basically, Collin is a suit of armor that shoots a bug out of its cannon-arm. Melee the bug back at it to deal damage. Otherwise though, its immune to all your attacks. This makes it a problem to deal with in larger groups, but for now, defeat the lone opponent to clear the way.
A quick trip outside will grant access to a Treasurefish. Be careful to only shoot it if its above the walkway. Also be careful not to fall off, as this deals notable damage. The enemies will not be much trouble. Back inside, melee the switch to open the door. The next room contains three doors and two switches. Quickly rush to and melee the switches to stop the flow of enemies, then take out the survivors. You can then enter an interesting room. It contains two switches and three chests. The switch to the left simply opens the door ahead. The switch to the right allows access to the three chests. All three chests grant some reward or another, but the two on the sides will attack you first, meaning that they should be avoided unless you feel confident in your dodging abilities.
You'll now arrive at an intersection. To your left is a small alcove. Go in it, and you'll be rewarded with hearts. Ahead is a door leading to a hot spring. Rest here until you recover your health. To the right is a corridor that leads outside again. Here's you'll encounter various pirates and Underworld forces fighting each other. Kill them while they're distracted. One of the enemies is a Belunka, which will spawn a mighty Clubberskull before you can do anything about it. Just hang back and let it kill the Space Pirates. When it heads towards you, it will fall over the edge, rendering a potentially dangerous enemy harmless.
Next up is a Grind Rail, but it shouldn't have too many surprises. Just shoot the enemies that appear until you reach solid ground. On the ground, you'll see more Underworld forces fighting Pirates. Team up with the Pirates until they win, and then kill them before they attack you. A couple of waves of enemies will follow. One of them contains both a Collin & Phil and some weaker enemies. Defeat the weaker ones first so you can devote your full attention to the greater threat.
After defeating all the waves, head into the side door. There will be four switches. Hit all of them in rapid succession to gain access to the treasure chest without having to deal with any enemies. When you go through the main door forward, focus your attention on the new Clubberskull from a distance while it takes out the Pirates. You do not want to fight this thing at a close range. Take the Drink of the Gods in the next Room, then go up the elevator to take on the Space Pirate Captain.
Boss: Space Kraken[edit]
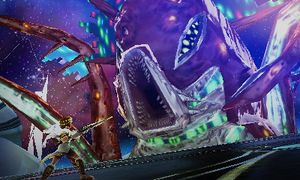
As it turns out, your enemy is actually a giant Space Kraken. Huh. This boss has two stages. In the first, it will extend its four tentacles around the arena, occasionally thrashing around. Honestly, so long as you constantly attack the nearest tentacle, you should be safe from retribution. Don't worry if a tentacle slithers away either; all four of them have their own health bars that carry over from location to location, meaning that you can beat them however quickly or slowly suits you.

The Kraken's main body is harder. Attacks that are easy to dodge at a close range are nearly unavoidable from a distance, and vice versa. Fortunately, the Kraken is vulnerable to both ranged shots and melee attacks. Just do whatever suits your weapon of choice best and you'll be fine.
Despite its intimidating appearance, the Kraken is an easy boss, especially considering its relatively late appearance. Consider it something simple after the more complicated Dark Pit and Thanatos fights.
