Before embarking on this chapter, please do note: lava hurts. It will not kill automatically like in some games, but casually dashing about here is not just pointless; it's hazardous. Also, remember the cool Three Sacred Treasures from last chapter? They're gone now. They have to be saved for the final battle with Hades.
Air Section[edit]
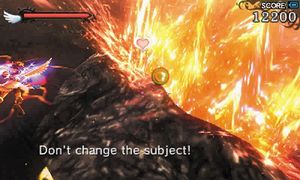
As usual, the chapter opens with a flyby of Monoeyes and other common enemies. As you get closer to the ground, you'll see lava bursting out. Be sure to avoid these by flying to the left or right, since they cause burn damage. Once you go through the cave, you'll be flying over a sea of magma, complete with pillars rising and falling like surfacing whales. Remember though, these whales will hurt.
In a canyon of lava, you'll receive some recovery orbs. After exiting, you'll be presented with a choice: going left or right. Going right will result in the rest of the level being similar to what you've already experienced, so if you're doing well, go there. Alternatively, if you're looking for excitement, go left.
Tunnel[edit]
As you enter the tunnel, keep up your continuous fire to take out enemies that appear around curves. Fly above or below the horizontal pillars of magma. Don't worry about actually being caught by a wave of magma; that's Palutena's job.
After either section, it's time for ground battle.
Ground Section[edit]
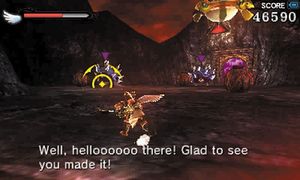
Grab the food immediately ahead. Remember not to fall into the many lava pits this level, or you'll be badly burned. Proceed along the path of stone, making sure to stop before you go over the Girin below ground. Through the doorway, you'll have to fight a couple of waves of enemies. You can use the large boulders lying around to your advantage though; they explode upon being shot. Just be careful not to stand to close.
In the next area, you will find an Exo Tank atop of the hill. Get in and prepare to skip by a good chunk of the level. Just drive through enemies and use the boost to fly from one platform to another. If you succeed, you'll get a treasure at the end. If not, oh well. Keep on driving and slaying enemies until you reach the jump pad and have to get out.
In the next room, shoot the explosive enemies from a distance and grab the food. Then, go upstairs and hit the switch atop the platform. The way forward will be cleared. The area ahead contains a Guttler. These large enemies eat their friends to become bigger and more powerful. Destroy their friends first to limit their growth. If it catches you, mash the controls in every direction until you are free.
The leftmost path heads to a Zodiac chamber, so stop by there if this is your first time in Chapter 10. The rightmost door leads to a hot spring, so stop by here. The middle path leads to a complicated room, full of magma to fall in, jump pads to ascend, treasures to get, and enemies to slay. As a general rule, be extra careful when dodging here, as one bad leap can lead to some serious pain. The good news is, the path ahead should always be fairly obvious, so feel free to avoid grabbing treasures if low on health. Remember, Jump pads equal progress, side paths equal rewards.
One of the enemies is a hand that comes out of a box and grabs you like a Guttler. This is called a Sinistew, and it is a very dangerous enemy, especially on higher difficulties. It can only be hurt with melee attacks, so as soon as you see it, rush at it and strike!
Around this time, you may also start to notice platforms with arrows pointing towards each other. You can leap between them by dashing. The game will eventually explain this, but only when it's mandatory to progress.
Up ahead, keep on moving forward, defeating familiar enemies like you have in the past. You will encounter some fairly formidable enemies, including another Sinistew and a Tempura Wizard, so don't let your guard down! Eventually, you'll find a Drink of the Gods. Grab it, because that means you're about to fight the Phoenix.
Boss: Phoenix[edit]
Remember Fawkes from Harry Potter? This is nothing like that. The Phoenix is a giant, flying bird with a variety of powerful ranged and physical attacks. Usually, it is in the air, making it only vulnerable to ranged attacks unless you use the jump pad to catch it midair. Unless you're completing a specific challenge, it's best to fight this enemy with continuous fire or charge attacks.
When firing at the Phoenix, trying shooting ahead of it. It moves around enough so you'll have to predict where it will be by the time your shots reach it.
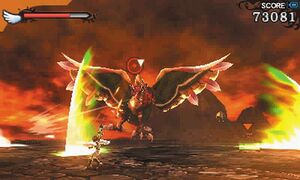
The Phoenix has a wide variety of abilities. While flying, it will send fireballs and balls of magma down upon you, which can be easily dodged. When it lands on the ground, it can send three energy waves at you, so continue attacking from a distance. Its most powerful attack is a flying charge that covers much of the screen. The only easy way to dodge this is the jump pad in the middle, which lets you go above it.
Fittingly enough for a boss after Medusa, the Phoenix could be a challenge, especially for those who prefer melee to ranged combat. Try sticking towards the center of the battlefield until the time is right though. Eventually, the Phoenix may fall to the ground, dazed for a few seconds. This is a prime time to charge at it with all your melee prowess.
