King's Quest VI: Heir Today, Gone Tomorrow/The Catacombs
Climbing the Logic Cliffs[edit]

The Logic Cliffs serve as the copy protection for this game, as climbing them requires the information contained in the Guidebook to the Land of the Green Isles included in the game box. Three of the Logic Cliffs puzzles are riddles, which this walkthrough will give solutions to. The other two are also riddles, but require you to know the "alphabet" of the Winged Ones, i.e. a set of symbols from the guidebook. This walkthrough can not provide that set of symbols for copyright reasons.
Unless you have the Guidebook to the Land of the Green Isles or a copy of the relevant information from that guidebook, you will not be able to proceed past this point in the game.Now that you're back on the Isle of the Sacred Mountain, it's time to climb the Logic Cliffs. No one has climbed them in centuries, but you'll have to give it a try for Cassima's sake.
Each screen of the Logic Cliffs consists of a puzzle set into the rock: you can LOOK at the puzzles or use the HAND on them to try and solve them. Successful solutions will cause a new set of steps to emerge from the rocks. WALK on each step to ascend the Logic Cliffs, but be careful: one false step will send Alexander plummeting to his death.

The first puzzle is the words "IGNORANCE KILLS WISDOM ELEVATES", and the clue from the Guidebook is "RISE". Click on the R in IGNORANCE, the I in KILLS, the S in WISDOM, and any of the E's in ELEVATES to solve the first puzzle [1]. Go up the stairs to the second puzzle.
The second puzzle is "A MASTER OF LANGUAGES WILL ----", and a set of ideograms corresponding to the Winged One's alphabet. The answer to the riddle is "soar". Using the Guidebook, find the ideograms that correspond to the letters S, O, A, and R, and enter those to solve the second puzzle [1]. Go up the stairs to the third puzzle.
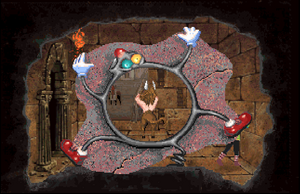
The third puzzle is a set of four circles etched into the stone. The solution comes from the following riddle in the Guidebook:

Four men standing in a row,
Third from the left and down you go,
The rest, in order, move you on.
The Youngest, the Oldest, and the Second Son.
Click on the rightmost circle, the leftmost circle, and the second circle from the left to solve the puzzle [1]. See the screenshot if you're confused about which circles to click on. Go up the stairs to the fourth puzzle.

The fourth puzzle is "SACRED FOUR" and another copy of the Winged One's alphabet. The Sacred Four are the color azure, the emotion tranquility, the animal caterpillar, and the element air. These all correspond to letters of the Winged One's alphabet. Specifically, they correspond to the letters O, D, Q, and G. Use your Guidebook to enter the ideograms corresponding to these letters [1]. Go up the stairs to the fifth puzzle.
The fifth puzzle is the words "ALL SILENT CRY THE NOBLE BOULDERS", and the clue from the Guidebook is ASCEND. Click on the A in ALL, the S in SILENT, the C in CRY, the E in THE, the N in NOBLE, and the D in BOULDERS to solve this final puzzle [1]. Go up the stairs to the top of the Logic Cliffs.
Getting the Peppermint[edit]

Congratulations: you've made it to the top of the Logic Cliffs! And there seems to be someone here to greet you: there's an old woman up here who's offering you some berries that she claims will give you the power to fly. Those berries look like deadly nightshade, though, and the "old woman" has suspiciously glowing eyes. It's your old friend the genie again, trying to trick you into doing yourself in. Just ignore "her" until she gives up in frustration and disappears.
Now that she's gone, there's a cave by the nightshade that you'll want to explore. Use the HAND on the cave entrance to go in [1], but be very careful not to click on the nightshade by mistake. Doing so will be an immediate game over, as Alexander will eat the deadly berries and die shortly afterwards.

Enter the cave. It's pretty dark in here: once you get away from the entrance, Alexander won't be able to see anything. There's another room in the cave, but if Alexander can't see it, he can't go in. USE the tinderbox to generate some light [2], and then use the HAND on the small opening on the right side of the screen to move into the next room.
The second room will have some more light due to a naturally occurring window. There's some sort of green plant growing by the window: it's peppermint. Use the HAND on the peppermint to take some [1]. You know that mint is a weakness of the genie's, so this is good to have.
You're all done here: time to explore the rest of the island. Exit the cave and walk north along the path.
Meeting Lord Azure and Lady Aeriel[edit]
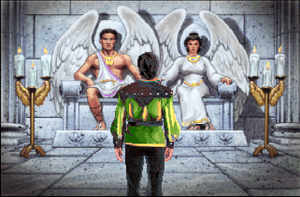
Once you walk north, you'll run into two Winged One guards, who will demand to know what you're doing there. When Alexander says that he climbed the Logic Cliffs, they'll scoff and dismiss such a thing as impossible, especially by a mere human. They'll also mention that the rulers of the Isle of Wonder stole the sacred golden fleece from their island. It seems there's a rash of thefts going on between the islands. The guards will then forcibly escort you to the palace of Lord Azure and Lady Aeriel, king and queen of the Isle of the Sacred Mountain.
A brief cutscene will play as Alexander meets with Lord Azure and Lady Aeriel. The vizier apparently left them orders to have you killed, but they're torn, as you've just fulfilled a prophecy regarding a hero who would come and climb the Logic Cliffs. The rest of the prophecy states that you'll defeat the minotaur, who has taken residence in the Catacombs and demanded sacrifices. Their daughter, Lady Celeste, is the next sacrificial victim, and they're desperate to save their daughter.
In the end, Lord Azure will decide to kill two birds with one stone: the vizier ordered you to be killed, but he didn't say how, and the catacombs should do the trick nicely. So the prophecy is fulfilled, you're out of his way, and he can sleep easily at night. Alexander will boldly say that he's ready to face the catacombs, and the guards will throw you in and shut the door behind you. The only way out now is to find and defeat the minotaur. Good luck: you're going to need it.
Catacombs (First Floor)[edit]

The catacombs are filled with traps to make sure uninvited guests don't make it out alive, but Alexander is resourceful and clever. If you want to try and figure out the catacombs on your own, and you have the Guidebook to the Land of the Green Isles, one of the background images from the guidebook is hiding a map of the Catacombs. If you want to do things the easy way, just follow this walkthrough, which will guide you through step by step.
There are a couple of things you'll need to acquire while you're in the Catacombs. If you don't get them on the first try, though, they won't be lost forever: the Catacombs will stay open after you defeat the minotaur, and you can return anytime to retrieve those items. But since we're here, we might as well get them all now.
From the entrance, walk two screens north, two screens east, and one screen north. You'll find yourself in a room with several skeletons on the floor, and a skull. Use the HAND on the skull to take it [1]. As much as you hate to disturb the dead, you need a skull for one of your spells, so you'll have to beg the corpse's forgiveness and take the skull with you.
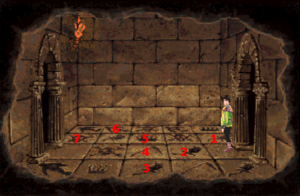
After acquiring the skull, walk one screen south, two screens west, one screen north, and one screen west. You'll come to a room with a number of tiles on the floor. Be careful where you tread: the tiles are another trap, and a single misstep will trigger a spike trap that will kill Alexander. The solution is in another riddle from the guidebook:
Three roses laid upon the bower
A scythe for he who cuts the flower,
A crown, a dove, most noble race!
Thy bones make sacred this dread place.
If that isn't enough to solve the riddle, see the screenshot and follow the numbered tiles to safely pass the tile trap [3].
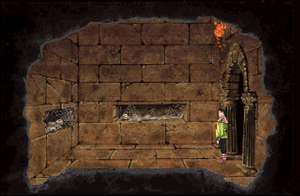
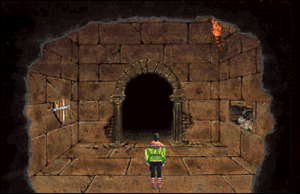
After surviving the tile trap and exiting the room, walk one screen north, and use the HAND on the shield on the wall to take it [1]. This looks like just the thing you need to get past the archer statue on the Isle of the Beast without being skewered by an arrow. Walk three screens north and two screens west, and you'll come to a room with two skeletons laying in recesses on the wall. If you look at the skeleton in the recess on the north wall, you'll see something glowing on its eyes. No, it's not the genie this time around: in ancient Greece, they used to put coins on the eyes of dead people to pay the ferryman in the underworld. This poor soul has presumably already made the journey, so the coins are of no further use to him or her. They could be useful to Alexander, though. Use the HAND on the skeleton to take the coins [1].

Walk two screens east, one screen south, and one screen east. Zounds, it's another trap! Alexander is locked in a room where the ceiling is descending quickly, and if you don't do something fast, Alexander is going to be squashed like a bug. The gears of the mechanism are exposed, so maybe you can jam them with something. No, not the skull: you need something a lot stronger than that. You do have a brick which will do the job quite nicely, though. USE the brick on the gears to throw it into the mechanism [2]. The brick will cause things to screech to a halt, and the trap doors will open, allowing Alexander to leave.
Walk two screens east, one screen north, and one screen east. Whoa, a trap floor! Unlike the other pit traps in the catacombs, though, you need to fall through this one to get down to the lower level. Just let Alexander fall down to the lower level of the catacombs.
The Secret of the Minotaur's Lair[edit]
The first thing you'll notice down here is that it's pitch black. You'd better get some light in here quickly, before the minotaur finds you stumbling around in the dark and kills you. USE the tinder box to light things up [2]. Alexander will note that a torch is out, and light it, giving you enough light to continue.

Walk five screens west, two screens south, and one screen east. When you enter the room, the game will note that the roaring of the minotaur is particularly loud here, as if coming from the next room. There's no window in the east wall, but you have your own "window" that you can use. USE the hole-in-the-wall on the east wall [1], and LOOK at the hole-in-the-wall [1]. You'll see the minotaur through the hole-in-the-wall. He'll reach behind a tapestry to trigger a hidden latch that opens a door, and go through that door, which will close after him. The hole-in-the-wall will run off afterwards, but you've just learned the secret entrance to the minotaur's lair. Now all you have to do is find the tapestry that you saw through the wall.
Of course, it won't be easy to find the tapestry: you'll have to take the long way around to get to it. Walk three screens west, two screens south, one screen east, one screen south, two screens east, one screen north, one screen east, and two screens north. Whew! But you've finally reached the tapestry after all that walking. Use the HAND on the tapestry to trigger the hidden latch you saw before [1], and the door will open. You're almost done with the catacombs: now all you have to do is defeat the minotaur. That shouldn't be a hard task for a resourceful adventurer such as yourself.
Battling the Minotaur[edit]
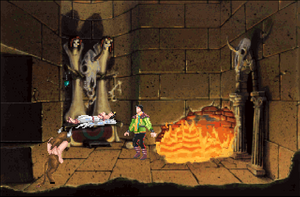
As you enter the room, you'll see the minotaur preparing to sacrifice Lady Celeste. WALK into the room to get his attention. The minotaur will growl at you, and maneuver you into a position where the fiery pit is at your back, and the minotaur is at your front. Not the best position you've ever been in.
If you could get the minotaur to charge into the pit, you'd be all set. But wait a second: the minotaur is half-man, half-bull, and bulls will charge at the color red. If only Alexander had a red cloth of some sort...oh, wait, he does! The scarf that you picked up from the Red Queen on the Isle of Wonder will do just nicely. USE the red scarf on the minotaur [3], and he'll charge you and plummet into the fiery pit, never to trouble anyone again.
Alexander will automatically go over and free Lady Celeste. She doesn't seem particularly grateful for the rescue, but she will at least give you her dagger as a reward. It's better than nothing, I suppose. Once Alexander frees her, she'll walk out of the minotaur's lair, and Alexander will automatically follow suit.
Meeting the Oracle[edit]
The guards waiting outside the Catacombs will be very startled to see Lady Celeste walk out alive, with you right behind her. After Lady Celeste berates the guards for failing to achieve what a mere human was able to do, she'll fly home, and the guards will take you back to Lord Azure and Lady Aeriel. Lord Azure will thank you for what you've done, and have his guards take you to the Oracle in fulfillment of the prophecy. However, he'll warn you not to come back again, as he still feels obligated to obey the vizier's orders. Given the reception you've gotten, that's a demand you'll have no problem with.

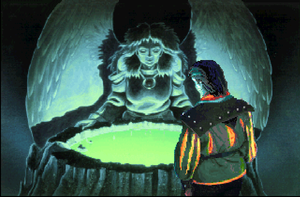
A cutscene will play where you meet the Oracle. She'll look into her pool, and see two spirits crying out for revenge. She'll tell you that the spirits can help you in your quest to get into the castle, but there are other ways to get into the castle as well. If you do want to seek the help of the spirits, she recommends talking to the Druids, as they know the most about the afterlife. At the end of the cutscene, you'll automatically receive sacred water that the Oracle gives you [6]. Another spell ingredient down!
At the end of the cutscene, the guards will deliver you back to the beach. Pull out your magic map: there's a new island there! The Isle of the Mists must be the home of the Druids that the Oracle mentioned. That's your next stop: select the Isle of the Mists to go there.
You should now have 114 out of 231 points.