Arrival[edit]

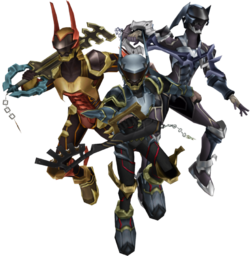
Before Terra can even land, he is attacked on his Glider by a swarm of Jellyshades. These should be familiar as the enemies that Terra could defeat in one hit in the final round of Unversed opponents at Olympus Coliseum. Use ![]() and
and ![]() to attack, and
to attack, and ![]() to defend (though that won't be necessary here). Defeat enough of them to trigger a scene, and Terra will find himself inside the ship's Prison Block. After the short scene, defeat the Unversed that spawn. All of these enemies should be familiar by now, with the exception of the Sonic Blaster, which surveys its surroundings before launching accurately-fired projectiles Terra's way. Attack them while they're in survey mode (indicated by the satellite dish above them) rather than attack mode (indicated by the tail below them, which they can use to slash at Terra).
to defend (though that won't be necessary here). Defeat enough of them to trigger a scene, and Terra will find himself inside the ship's Prison Block. After the short scene, defeat the Unversed that spawn. All of these enemies should be familiar by now, with the exception of the Sonic Blaster, which surveys its surroundings before launching accurately-fired projectiles Terra's way. Attack them while they're in survey mode (indicated by the satellite dish above them) rather than attack mode (indicated by the tail below them, which they can use to slash at Terra).

After the battle, hop onto the elevator to the left as it drops and ride it to the top. Facing the cell, hop onto the platform to the left and Examine the cell to open it up, revealing a chest containing High Jump. Equip High Jump; if it is leveled high enough, you'll be able to reach a higher platform further left, holding a cell which hides a Mega-Potion. If not, Air Slide from a high platform on the opposite wall to reach it. For the final chest on this wall, return to the platform in the center that held the first chest. Hop onto an elevator that drops to the right, and open up the cell if necessary for a break. Ride the elevator up and open the cell to the right for a Pulsing Crystal. Air Slide directly across to the other wall and onto the elevator. Air Slide to the elevator to the right, then hop off to the next elevator. This one is lower, but at the top of it is a cell holding a Mega-Ether. Jump back up to the previous elevator and ride it back to the top, then Air Slide to a platform at the end of the wall to find the final chest, containing Brutal Blast.
Traversing the Ship[edit]

Exit to the next area to find a save point up ahead and a Map to the right. Examine the transporter to be taken to a new area. Defeat the Jellyshades that spawn and open the chest by the transporter for a Hi-Potion. Exit to a new area, where Terra will once again don his Keyblade Armor and ride his Glider. Defeating all the enemies here isn't necessary; you can simply push through to the next area if Glider combat proves to be a pain. In this next area, the Blobmob Unversed is introduced. This one provides a great amount of experience, as it splits off into smaller Blobmobs whenever its larger forms are defeated, so try to defeat it completely whenever you come across it. Open the chest to the right behind the purple block for an Abounding Crystal. To the right of the machine at the back of the room is a Wellspring Crystal. Hop onto the purple blocks to the right and into a new area, where you will find a save point and a chest containing Mine Square.

Return to the previous area and activate the machine to turn off the gravity, but be wary of the blasters nearby; they can be broken if they prove to be too much of a nuisance. Now hop up to the high platform to the left (you can Air Slide across from here to a high platform on the right for Thundara) and exit to the next area. Drop off to the left, and at the end of this platform, drop off again to find a chest containing a Fleeting Crystal. Take note of the anti-gravity machine on the next platform, and keep dropping until you reach the ground floor. Open the chest for a Mega-Potion before turning on the machine. Now jump up to the first layer, and then the second to find a Hungry Crystal. Return to the first layer and exit through the door here. In a room to the right is a save point, a Command Shop, and a Hi-Potion. Exit through the door at the end of the hall to the Ship Corridor. Open the chest up ahead for an Ether, then the one down the path for a Hi-Potion. Head through the only door here for a boss fight.
Boss: Experiment 221[edit]


221 can put up a tough fight if Terra isn't highly leveled. Generally, he has two forms; when he gives up his legs, instead gaining a wispy tail, 221 will fly around the arena erratically in order to avoid Terra. Give chase with aerial combos and quick commands, as he is most vulnerable in this state despite his ghost-like appearance. When his legs return and he lands on the floor, Slide away, as he will launch a massive Thunder attack with impressive range; if you manage to dodge in time, you can use this opportunity to target him with Shotlock. If you're willing to risk Terra's health, you can also delay the attack by stunning 221 with a combo, but make sure to Slide away shortly afterward.

When 221 lands in the center, he will launch orbs of Thunder in all directions. These can be dodged quite easily when spread out, as long as you keep your distance. Slide between them toward 221 to execute a counterattack. When you take out enough of his HP, 221 will begin to mix up his offense. The first of these attacks will have him charge across the room three times in a row. This is very easily avoided, and only really serves as another evasion tactic. The second and third new attacks, on the other hand, give him much more power. When he enters one of the large guns in the center of the room, both will move on his command, firing two rounds of shots before pausing. You can either take this pause to attack one of the guns, concluding this attack forcefully, or dodge continuously until he finishes. Only use the first strategy if over-leveled and impatient, as one round of bullets does a good deal of damage. The third attack of his has him hover high above the ground and summon masses of thunderous energy, launching them toward Terra in an attempt to catch him in their shockwave. While this can easily be dodged, in the event that Terra is caught in it, it can very well prove fatal. Additionally, 221 cannot be attacked during this sequence, though there is a short period immediately following the attack's conclusion in which he hovers without action, serving as a somewhat opportune moment to counterattack.
As always, make heavy use of Shotlock and Command Styles. Fittingly, after the battle, Terra obtains the Thunderbolt Command Style. For clearing the world, he also obtains a D-Link with Stitch and the Hyperdrive Keychain.
Upon revisit[edit]
After leaving the world, return to the Control Room save point and reenter the Ship Corridor from here. At the end of the path is a door that was previously shut, now open. Past this door, two chests can be found: one off in a room to the left containing a Pulsing Crystal and one at the very end of the path containing Warp.
