
-
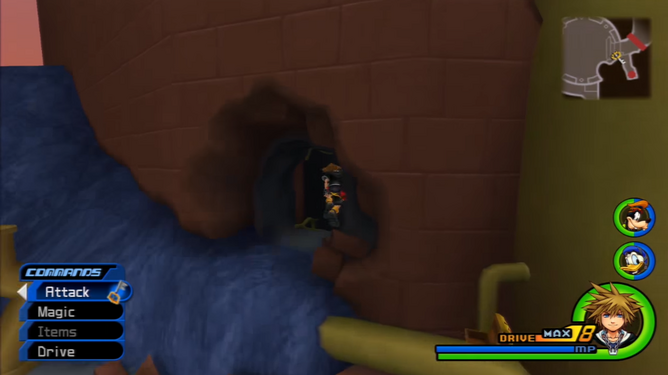
Find the hole in the Postern to enter...
-
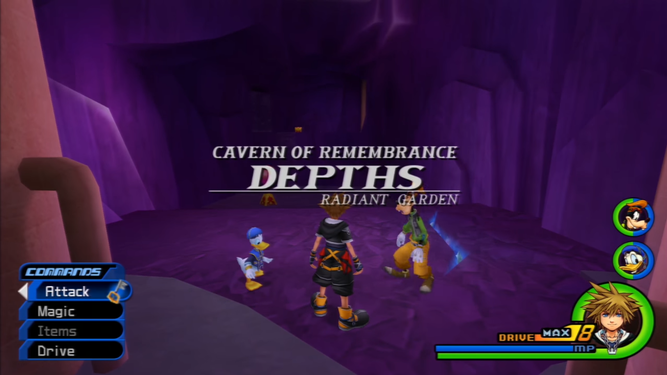
...the Cavern of Remembrance.


The Cavern of Remembrance is a Final Mix-exclusive optional dungeon containing many chests and, at the end of it, access to the Data Organization XIII bosses. However, clearing it requires abilities obtained from all maxed Drive Forms (except for Limit). A high level is also recommended (preferably immediately before or sometime after The World That Never Was), as the enemies within the second half of the dungeon are incredibly tough, especially in groups. Once ready, head to the Postern at Hollow Bastion. There should be a hole in the wall by the entrance of the area, which opens after meeting Sephiroth in Hollow Bastion's second visit, before the battle of 1000 Heartless. Go through it to fall into the mysterious dungeon.
Depths

The first of the forms required is Valor, represented by the red bubbles at the entryway that drop drive orbs when hit. Take note that, because Master Form gains experience from the collection of drive orbs, this is a good place to level it if you haven't already. Simply drain the bubbles at the entrance for drive orbs, run back to the Postern's save point, and warp to the world map. Return to the Postern to have your Drive Gauge restored, allowing you to continue the grind. Back to the dungeon, Valor's High Jump actually isn't required here if you have Master Form's Aerial Dodge or Final Form's Glide. Begin by jumping up to the ledge for an AP Boost, then heading through the path to the open area.

Jump down to the ground below for a Power Crystal by the back wall. Defeat the enemies here for unique drops (such as Remembrance Shard, exclusive to Final Mix). Forward and to the right is a Frost Crystal. Back at the entrance, follow the upper path to the end, then jump off the cliff to the next small ledge. Use Aerial Dodge/High Jump to get to the next one, and the next, before jumping to the final platform. From here, you can make it to the door; land in front of it, but don't leave just yet. Jump from the door to another platform across, this time to the right, for a rare material, Manifest Illusion (Final Mix only). From here, you should be able to glide to a platform across the room, holding an AP Boost. Return to the exit by gliding, or climb up the ledges with High Jump or Aerial Dodge to enter the next area, the Mineshaft.
Mineshaft and Mining Area

Open the large chest for the Depths of Remembrance Map. Head straight down the path for the next chest, containing an AP Boost. By the chest are two more bubbles, this time indicating the Wisdom Form requirement. Starting at the edge of the ledge, use Quick Run to dash past the pipes and onto the ledge on the other side, where the exit to the next area can be found. Defeat the enemies that stand in your way to gain access to the exit, but before exiting, turn around and head left to be taken back to the first area, albeit a previously unreachable section of it. Open the chest for a Remembrance Gem, then continue to the next passage. Open the chest in the crevice to the left for a Serenity Gem. Destroy the valves up ahead, then backtrack to the Mineshaft and finally take the exit to the Mining Area.

Head forward to see a yellow platform moving up and down. Hop onto it for a ride up, then turn back toward the entrance and glide to the ledge above it. Ride the wind to the next yellow platform higher up, then glide to the platform across for an AP Boost. Glide across to the other, lower side of the area to find the path you opened up by destroying the valves. Jump across to another ledge for a Serenity Gem, then return to the ledge above the entrance. Glide to the exit from here, but first, open the chest on the ledge across from it for a Serenity Crystal. Ahead is another ledge which can be reached by gliding, holding a Dark Remembrance Map and Manifest Illusion, then glide back to the exit. Back at a different section of the Mining Area, open the chest for a Power Boost. A sole yellow bubble up ahead indicates the Master Form requirement. Jump toward the first set of pipes, then wait until you drop below them to use Aerial Dodge. Defeat the Heartless before exiting to the Engine Chamber.
Engine Chamber

After defeating the Heartless that spawn, head past the insignificant conveyor belts to the yellow platforms moving in and out of the wall. Use them to reach the higher ledge, where another two conveyor belts await. Ride this one to the edge, avoiding the smoke that billows out of the pipes along the way, and head to the next on the other side. You don't have to bother with the enemies here, as falling will result in having to start the area over, and on top of the smoke hazards, battles can get frustrating. At the end of the second belt are steps leading to a Remembrance Crystal. Use Aerial Dodge to hop up to the high ledge to the right, then jump across the gaps and glide to the exit. Before leaving, glide across to the other side of the area for an AP Boost, and glide northeast from here for Manifest Illusion. Exit to the next area for a Magic Boost, and use Final Form's Glide (jump only once before you begin gliding) to get to the AP Boost and the exit on the other side.
Transport to Remembrance and Garden of Assemblage

Down this hall will be an army of Nobodies, and due to the amount of experience they give out, possibly the best spot in the game to grind to level 99. Get through all rounds to reach the end of the hall, where you'll find a door leading to the Garden of Assemblage; turn on the computer in the center of the room to change it. Now, surrounding the room are warps to fights with all of Organization XIII (though for the doors to the Nobodies defeated in Chain of Memories, the Absent Silhouettes must be defeated first). Defeating them all is one of three requirements to the Gold Crown (doing so will make a chest appear containing the Proof of Nonexistence), though be warned; all of Sora's stats will be capped at 80 regardless of how high they actually are.
These battles were constructed to be challenging on every difficulty and every level, though they were also constructed to be doable. Go to the optional bosses page for information and strategies to defeat all of the Data Organization XIII. Open the chests on the ground below for the Garden of Assemblage Map and Lost Illusion, and past them is the door to Hollow Bastion, opening up an alternate entrance to the Cavern for easy access to the boss fights.