Kingdom Hearts II/Mushroom XIII

The Mushroom XIII appear in the Final Mix version of the game once the world that they reside in is cleared completely (this includes all visits, as well as beating Xemnas in The World That Never Was). Instead of simply fighting them, they must be satisfied by fulfilling certain conditions. If you manage to do well enough, they will drop Tranquility materials as well as some rare weapons before disappearing; do even better to successfully satisfy them, and they will drop even more materials, as well as shooting off fireworks, indicating completion of the final requirement in Jiminy's Journal. Satisfying all of them is one of three requirements for the Gold Crown, alongside the Data Organization XIII and Lingering Will boss fights.
No. 1[edit]
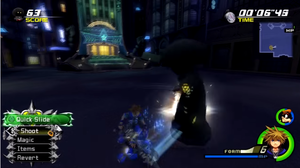
Mushroom No. 1 can be found at Memory's Skyscraper at The World That Never Was, and represents the Organization's own No. 1, Xemnas. The object of this mission seems simple, as Sora must land 70 hits on the mushroom within 30 seconds. However, just like Xemnas, the mushroom cannot be attacked directly, as it will only attack back and waste time. To accomplish the mission, you cannot let the mushroom hit you once. If it does, exit and return to restart. While performing the Reversal reaction command seems like the obvious solution, it is actually insufficient, as the mushroom will only perform its own Reversal, unleashing a cycle if Sora does not stop it. Instead, you must wait half a second after the Reversal command pops up, as it will be replaced by Quick Slide; Quick Slide is effective in confusing the mushroom, allowing Sora to land some hits on it. Again, this may seem simple enough, but timing is crucial.
Go into Wisdom Form, as its normal nine hit combo will be sufficient for each time you manage to catch the mushroom off-guard; attacking it any more than this will cause it to attack back, wasting time. Start the duel and it will begin with a Reversal. Instead of watching for the reaction command to pop up, watch the mushroom's movements. Immediately after it finishes its Reversal, press ![]() for Quick Slide. Hit it with a nine hit combo and it will perform Reversal once again. Repeat the pattern until you land 70 hits. This one may take a good amount of practice, as all it really is is getting the rhythm of the mushroom's movements down and adjusting your timing accordingly.
for Quick Slide. Hit it with a nine hit combo and it will perform Reversal once again. Repeat the pattern until you land 70 hits. This one may take a good amount of practice, as all it really is is getting the rhythm of the mushroom's movements down and adjusting your timing accordingly.
No. 2[edit]

Mushroom No. 2 can be found at the Christmas Tree Plaza in Christmas Town and represents the Organization's No. 2 and Xemnas' right-hand man, Xigbar. The object of this mission is to avoid the mushrooms projectiles by either blocking or dodging until the score reaches 80. While you can perform this challenge with standard means, such as with Guard or Aerial Dodge, but this task is made much easier with the use of Final Form, as many of Final Form's actions (including jumping) block Sora from incoming attacks. Begin by locking on to the mushroom after starting the duel, and prepare yourself for an attack by jumping and going into a stationary Glide (![]() +
+ ![]() without moving the analog stick). Sora will float in place, never touching the ground for as long as
without moving the analog stick). Sora will float in place, never touching the ground for as long as ![]() is held, and consistently blocking all incoming attacks without any effort on your part - that is, as long as you are facing the attacks. The mushroom tends to move around the field more as time goes on, so take time to readjust your position before taking on the next set of projectiles.
is held, and consistently blocking all incoming attacks without any effort on your part - that is, as long as you are facing the attacks. The mushroom tends to move around the field more as time goes on, so take time to readjust your position before taking on the next set of projectiles.
An alternate strategy is to use Guard/Reflega and summon Stitch. If the mushroom lands an attack on Sora, Stitch will stun it with his guns before it can land a second, allowing Sora to regain his stance and return to guarding or spamming Reflect magic. Either strategy will make defeating this mushroom much easier than it should be.
No. 3[edit]
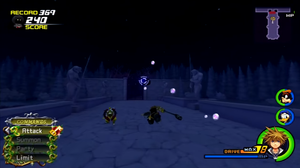
Mushroom No. 3 can be found at the Bridge in front of Beast's Castle and represents Xaldin. The object of this mission is to collect all of the orbs that the mushroom drops as it floats across the area. It will usually move slowly, dropping a few orbs at a time, but will occasionally speed up and drop a big group of orbs. Make sure to get a decent chunk of every one of these big groups, as they are the most important to collect to reach the required score of 450.
Equip Sora with the Follow the Wind Keyblade, received from Port Royal, the Draw ability (as many that are available to him), and Draw Rings (which can be found in the 100 Acre Wood at Rabbit's House and is a reward for completing the Duality puzzle in the form of the Rare Document recipe, which must be synthesized). You can now either use Glide, Quick Run, or a combination of the two to follow after the mushroom as quickly as possible; this is completely necessary as orbs disappear after a short amount of time. Going into Wisdom or Final Form may be necessary in order to utilize max level Quick Run and Glide, at the cost of being unable to use the other ability. In this case, while Glide is faster, Quick Run is recommended, as Sora can reach all orbs that fall to the ground (with Glide, following the mushroom more closely is necessary, as Sora must reach the orbs before they hit the ground).
No. 4[edit]

Mushroom No. 4 can be found at the Palace Gates in The Land of Dragons and represents Vexen. The goal of this mission is to defeat 85 of the of the mushroom's clones (which can be destroyed in one hit) without getting hit himself. The mushrooms will spawn continuously and in batches all around the area, which may make this mission seem intimidating. However, with the correct strategy, No. 4 is actually one of the easier mushrooms to defeat.
As with many of the other mushrooms, Wisdom Form is a vital key to defeating this mushroom without any trouble. Go into Wisdom Form, then begin the duel. Move around the arena in a circular motion while shooting nonstop. Because Sora is able to shoot from a distance while sliding across the ground with decent speed, stopping to attack any of the mushrooms (in the process giving them the opportunity to attack back) isn't necessary. Just keep moving along the edges of the arena while shooting and keep your distance until you reach 85.
No. 5[edit]
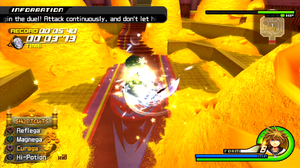
Mushroom No. 5 can be found in the Treasure Room of the Cave Wonders in Agrabah and represents Lexaeus. The goal of this mission is to drain the mushroom's health, which will be restored continuously, within 10 seconds. The speed of the attacks you use to defeat it must beat the speed at which the mushroom heals itself, as well as beating the clock. Again, this may seem like a difficult task, but there is actually a very easy strategy to defeating it.
Begin by equipping your strongest Keyblades, one to Sora and one to Final Form's second Keyblade slot. Next, fill Sora's item slots with all sorts of cheap items you don't mind using, such as Potions or Ethers (at this point in the game, Elixirs should prove much more useful). Make sure to set them to a shortcut to save time. Go into Final Form and start the duel. Stick close to the mushroom and use whichever item you've set to your item slots and the shortcut. The damage dealt while using items in Final Form is surprisingly tremendous, and should clear the goal much faster than any normal combo in Final Form would.
No. 6[edit]
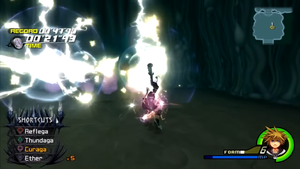
Mushroom No. 6 can be found in the Atrium of the Underworld Caverns at Olympus Coliseum and represents Zexion. Like Zexion in Chain of Memories, this mushroom creates weaker clones of itself that appear all around the arena. These clones appear in groups, and must all be defeated within 45 seconds. Like No. 4 and No. 5, defeating this mushroom only seems like a difficult task. Using the right strategy makes this another easy mushroom to satisfy.
Using magic is the most efficient way to destroy all of the clones from any position, but even Sora's strongest spells are not enough to reach all of them in time. The remedy to this is Final Form, as all of Sora's magic is given a significant boost in reach and strength. Go into Final Form, then begin the duel. Lock on to spot the mushrooms, wherever they are, and use Thundaga as you move in on them; with Thundaga, Sora doesn't have to be close enough to his enemies for the spell to hit them (as with Firaga) and he doesn't have to aim (as with Blizzaga), making it your best option. When those are destroyed, lock on again to find the next group, and again, use Thundaga. Repeat until all mushrooms are defeated, which should be done within the time limit without any trouble.
No. 7[edit]
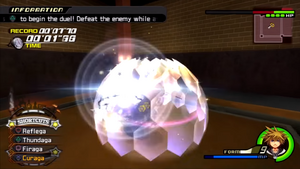
Mushroom No. 7 can be found in the Tunnelways of Twilight Town, which only open during the third visit, and represents Saïx. Like Saïx, the mushroom is capable of going berserk, hurting Sora whenever he comes into contact with it. The goal is to drain all of its HP within 10 seconds, essentially defeating it and clearing the requirement. The mushroom's are not only strong, but knock Sora back, wasting time. Because of this, keeping a distance from it is crucial, making the use of Wisdom Form's shooting attack or Final Form's Thundaga viable strategies. However, the easiest strategy may get Sora hit by the enemy once or time. Regardless, continuing to use the strategy despite any attacks that may set Sora back is a relatively easy way of defeating No. 7 quickly.
Go into Final Form, then begin the duel. As soon as it starts, cast Reflega. Continue to do so, as the mushroom will keep attacking. When Sora's Reflega combo concludes, he will be exposed to the mushroom's attacks, inevitably getting hit by the mushroom at least once. Ignore the attacks and go back to spamming Reflega. Doing this for the rest of the battle will deal just enough damage to defeat the mushroom in time, clearing the requirement in Jiminy's Journal and taking you one step closer to the crown.
No. 8[edit]
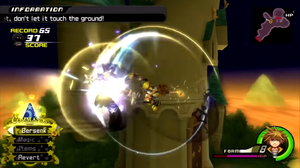
Mushroom No. 8 can be found in front of the Tower, accessible by train from Twilight Town's Central Station (available only after the third visit), and represents Axel. To satisfy this mushroom, it must be juggled without touching the ground, ultimately being bounced into the air a minimum of 85 times. Their are a few strategies to accomplishing this, such as using Wisdom Form to keep shooting it into the air or aerial combos with Horizontal Slash, but because those strategies have such a small margin for error, the easiest way involves the use of Master Form and the Fatal Crest Keyblade. Fatal Crest is unlocked by clearing the Goddess of Fate Cup in the Underworld of Olympus Coliseum.
Equip Fatal Crest as Sora's Keyblade, as it gives Sora the ability to chain unlimited combos as well as Berserk Charge, which increases Sora's strength while his MP recharges. To facilitate this, use Curaga (as it consumes all MP) after going into Master Form. Now begin the duel and lock on to the mushroom as it flies into the air, attacking it at the same moment to begin an aerial combo. With the use of Fatal Crest, this aerial combo will not end until the goal is met, so make sure to follow it until 85 or it will drop and you'll have to start over. Make sure to exit to the world map from the save point in the Tower before losing Master Form to restore your Drive Gauge and move on to the next mushroom.
No. 9[edit]
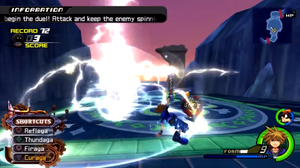
Mushroom No. 9 can be found at the Castle Gate of Hollow Bastion, where Demyx was fought. Fittingly, No. 9 represents Demyx. The goal of this mission is to keep the mushroom spinning with a total of 75 hits. This is accomplished by hitting it without break, something that can be done with a couple of strategies. One such strategy is the use of the Fatal Crest Keyblade and its Berserk Charge ability. As with No. 8, it is possible to chain a strong combo without end by using Curaga to eat up all of Sora's MP before starting the duel, and then beginning with an attack by Fatal Crest. The Horizontal Charge also comes in handy with the use of this strategy.
Another strategy involves the use of Wisdom Form, and is a bit simpler as it does not require you to change up any of Sora's equipment or abilities. Simply go into Wisdom Form, then start the duel. Begin by casting Thundaga until Sora's MP is drained, then shoot to keep it spinning. This should be enough to reach 75 hits.
No. 10[edit]
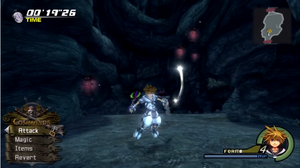
Mushroom No. 10 can be found in the Moonlight Nook of Isla de Muerta at Port Royal and represents Luxord. Like Luxord, it shuffles itself within clones and requires Sora to spot him afterward. This is one of the more irritating of the mushrooms to satisfy, as there aren't any shortcuts to defeating it, only tips. To defeat it, you must drain its health within 55 seconds, though you only get the opportunity to attack it after it shuffles.
Begin by going into Final Form, as it allows Sora to land as many hits as possible in the time that he can attack. Clones of the mushroom will appear only for all of them to fly across the screen, attempting to confuse Sora into losing the original. If you have trouble following the mushroom with your eyes, as is entirely possible, stay close to the screen and pause continuously. Pausing every second will allow you to follow its movements down to the frame. Additionally, whether you pause or not, make sure to keep your distance when the mushrooms begin shuffling, as they can travel into nooks out of your vision if Sora is close enough. Fortunately, the more times you select the mushroom correctly (and consecutively) by attacking it, the more time you'll have to attack. With the use of Final Form, it should take only three correct guesses to defeat it.
No. 11[edit]
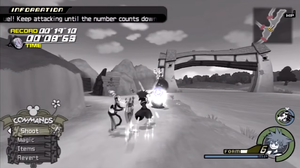
Mushroom No. 11 can be found at the Waterway of Timeless River, accessible through the door in the Hall of the Cornerstone at Disney Castle, and represents Marluxia. Like Marluxia and the hit counter he places over Sora, this mushroom has a hit counter over its head. However, unlike the battle with Marluxia, this hit counter must be taken down to zero, and to make matters more challenging, within the short time span of nineteen seconds. Fortunately, this challenge isn't nearly as difficult as it appears.
Equip all Finishing Plus abilities and the Rumbling Rose Keyblade (which has its own Finishing Plus ability attached to it). Go into Wisdom Form and begin the duel, making sure to shoot the mushroom the entire time. This strategy makes use of Wisdom Form's finisher, which deals a great number of hits with its many shots. There are other strategies to defeating this mushroom, but this is the simplest, dealing more than enough hits within the time limit.
No. 12[edit]
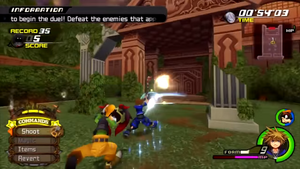
Mushroom No. 12 can be found in front of the Old Mansion outside of Twilight Town and represents Larxene. This, like No. 1 and No. 10, is one of the more difficult mushrooms to satisfy due to a lack of shortcuts. The goal of this mission is to defeat all of the clones that the mushroom spawns within the area, for a total of 40 clones, within the time limit. This proves challenging due to the many hiding places around the field behind columns. Make sure to check both sides of the field, as well as the front doors of the mansion and the gate at the other side, for mushrooms. To hit each mushroom in the smallest amount of time, Wisdom Form works best.
Go into Wisdom Form, then start the duel. Use ![]() to turn the camera to any nearby mushrooms and shoot. Move around the field as you do so, so as not to miss any mushrooms on either side of the field. Eventually, the mushrooms will begin to float higher into the air; these can only be shot from a distance. Ignore them to look for other mushrooms if these cause you too much trouble, as moving back for every one of these may prove wasteful of your time. This is a mission that may take numerous trials to perfect, but as this is the last mushroom to satisfy before No. 13, the practice should be worth it.
to turn the camera to any nearby mushrooms and shoot. Move around the field as you do so, so as not to miss any mushrooms on either side of the field. Eventually, the mushrooms will begin to float higher into the air; these can only be shot from a distance. Ignore them to look for other mushrooms if these cause you too much trouble, as moving back for every one of these may prove wasteful of your time. This is a mission that may take numerous trials to perfect, but as this is the last mushroom to satisfy before No. 13, the practice should be worth it.
No. 13[edit]
Mushroom No. 13 can be found in the Great Maw of Hollow Bastion, where the battle of 1000 Heartless took place, and represents Roxas. If you see all twelve mushroom cheering you on in the area, a Look Up reaction command will appear once you step into the spotlight. Use it to watch No. 13 descend. Use another reaction command (the same Ready, Go! reaction command that appears for all other mushroom duels) and No. 13 will reward you with the Winner's Proof Keyblade and the Proof of Peace, taking you one step closer to the Gold Crown if you have not received it already.
