First visit
Investigation
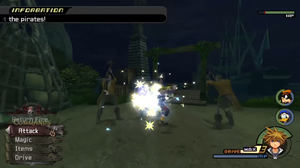
Turn around and open the large chest for a Naval Map. Head to the other side of the Rampart for a Dark Shard, and continue around the corner for a Mythril Stone. Return to the save point and round the corner to the left for a scene. Once back in control, take a few swings at the pirates to find that the Keyblade has no effect on them. The moonlight will expose the pirates as undead in the next scene, making this battle possible. Make sure to keep the pirates away from the shade, as attacks only have an effect on them in their undead state. After defeating them all, cross the bridge to follow the pirates into Town.
Rescuing Elizabeth
After the next scene, the Heartless will finally make an appearance in the form of Shadows and Cannon Guns. Avoid the Cannon Guns' targets and clear them out. After Sora introduces the party to Will, head into the alley and open the chest for a Mythril Shard. Destroying the explosive crates here causes the wall to be destroyed as well, opening up two new passages; the one on the right leads to an AP Boost while the one on the left leads to the other side of town. Go through here and break through the next wall for another chest containing a Mythril Gem. At the end of this alley is a Dark Stone. Leave the alley and take a right to the exit to the Harbor.
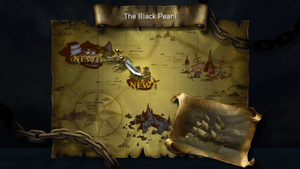
In the next scene, you are introduced to Captain Jack Sparrow, who joins as an optional party member. Keep Goofy and Donald in the party if you wish, or swap one of them out for Jack; keep in mind that Jack's limit will come in handy, particularly for the pirates that must be lured out of the moonlight. Once Jack's limit is activated, he draws all nearby enemies to him. While they float defenselessly, Sora and Jack are free to attack. While it isn't necessary, the use of Jack is recommended, particularly on Critical. You will now find yourself on the Interceptor, a ship that allows Sora to select a destination inaccessible by foot. Enter the Interceptor's Hold to find a save point and a moogle. Speak to Jack on the ship's deck to travel to any available location, but for now, choose the Black Pearl. Doing so should spark a random encounter.
When traveling on the ship, voyages will often be interrupted by invaders, whether they be pirates or Heartless. Defeat them all to continue traveling or exit to the Hold for safety. Defeating them all is recommended, of course, for the valuable experience that they drop. Be wary of the pirates, as there are areas of the ship that are covered by shade (this can of course be countered by Jack's limit). Once you hit land, Jack leaves the party to search for Elizabeth with Will, leaving Sora, Donald, and Goofy on guard duty. Unsatisfied with waiting when there are Heartless crawling around, Sora leads the group off of the ship. Exit the menu for another scene. Afterward, you find yourself at the Isla de Muerta Cave Mouth. Defeat the Heartless that appear, then open the chests to the left for a Bright Shard and a Mythril Shard. Exit for a scene, then survive against the pirates until time runs out, in which case Sora, Donald, Goofy, Will, and Elizabeth escape on the Interceptor without Jack. After the scene, Sora obtains an Isla de Muerta Map.
Targeted by Barbossa
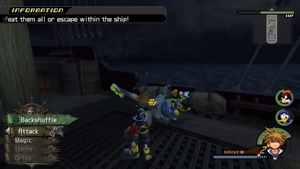
Back on the Interceptor, speak to Will to set a course for Port Royal. Pirates will hop onto the ship to attack in another encounter. Without Jack, this will be a bit more difficult. Start by luring them into the moonlight by having them chase after Sora. For the larger, shirtless pirates, this can also be accomplished by performing the Backshuffle reaction command when they're about to attack. You can use the following reaction command if you wish, but keep in mind that Sora's counterattack will only toss them back into the shade. You can also use magic, such as Blizzard, to forcefully push them into the moonlight. Once they're defeated, a scene will lead into another fight, this time with Barbossa's crew.
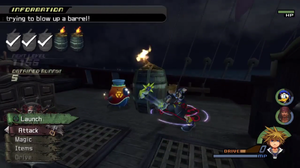
Defeat the pirates again, this time while protecting the medallion. When a pirate steals it, a little bubble will pop up over their head indicating that they have it and a timer will start. If you do not defeat the pirate within a minute (and subsequently retrieve the medallion, represented by a golden spark on the floor), it will be gone for good and Sora will fail the mission. For succeeding, Sora will earn Aerial Sprial, Donald will earn Draw, and Goofy will earn a boost in his maximum HP. After the scene, Jack will return to the party, this time mandatory. The next task will have the party deal with the explosives placed on their ship. Ignore the Heartless and focus on launching the barrels off the ship with the reaction command. With this strategy, the mission should be completed quickly (earning an item slot for Sora, an increase in maximum HP for Donald and Jack, and Second Chance for Goofy) and control of the ship will return to Sora and his allies.
Head through the Isla de Muerta Cave Mouth to the Powder Store, where pirates will pop out behind explosives to attack the party. Behind the first set of crates is a pirate and a chest containing an AP Boost. Past the next set of boxes are two more pirates on either side, and past those, behind the final set of explosives, is another AP Boost. In the final area before the boss, the Moonlight Nook, defeat the pirates and pick up the treasures afterward: the chest to the right contains a Mythril Shard, a chest to the left contains a Power Stone, and a chest by the exit contains a Serenity Gem. Head up the stairs to fight Barbossa at the Treasure Heap.
Boss: Captain Barbossa
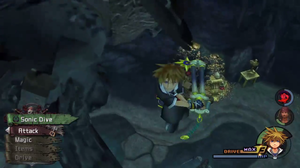
In this battle, you must watch out for Sora's health as well as Jack's; losing Jack will be considered defeat and you'll have to start the battle over. Begin the battle by going after the Illuminator Heartless that's crawling around the walls. Look for its glowing eyes in the darkness, then lock on and combo it. It should be defeated fairly quickly, which gives the party a large opening to go after Barbossa. As for Barbossa, he has two powerful attacks: one in which he charges and sends Sora flying, and another in which he shoots his pistol, both dealing a great amount of damage. However, both can be guarded against, so an opening to combo him can be found after blocking. He also has an advantage in that, like the other pirates, stepping into the shade makes him invincible. Fortunately, there is plenty of moonlight around, and he can easily be lured as well as fall to Jack's limit if Sora has the MP for it.
Two reaction command opportunities against Barbossa will also present themselves a while into the battle. Use them and continue to tap ![]() to perform a combo with Jack. With the use of Jack and the reaction commands, Barbossa should be defeated in no time. However, if you do not deal enough damage to Barbossa in time, the cycle will repeat itself, and Sora will once again have to chase after the Illuminator. Either way, this battle shouldn't prove too difficult compared to the hoards of pirates you've faced beforehand. For clearing the battle, Sora's drive gauge is powered up and he obtains Aerial Finish. Donald and Jack gain another increase in their maximum HP while Goofy obtains Teamwork and Auto Limit. For clearing the world, Sora obtains the Follow the Wind Keyblade. Continue to the next world, Agrabah.
to perform a combo with Jack. With the use of Jack and the reaction commands, Barbossa should be defeated in no time. However, if you do not deal enough damage to Barbossa in time, the cycle will repeat itself, and Sora will once again have to chase after the Illuminator. Either way, this battle shouldn't prove too difficult compared to the hoards of pirates you've faced beforehand. For clearing the battle, Sora's drive gauge is powered up and he obtains Aerial Finish. Donald and Jack gain another increase in their maximum HP while Goofy obtains Teamwork and Auto Limit. For clearing the world, Sora obtains the Follow the Wind Keyblade. Continue to the next world, Agrabah.
Second visit
Head to the Harbor from the Rampart and Jack will join the party in a fight against pirates. Exit to the Black Pearl, then speak to Jack to set a course for the Isla de Muerta. Fight off the encounter of Heartless and pirates, and a scene will follow. Exit back onto the ship's deck for your first fight against the Grim Reaper. It should pose no trouble at all with the use of aerial combos, as it will attack very infrequently and its attacks can even be broken. Nevertheless, defeating it will net you some nice bonuses: Horizontal Slash for Sora, an increase in maximum HP for Donald and Jack, and Draw for Goofy. After a brief scene in which the party meets Luxord, you will find yourself in the Ship Graveyard.
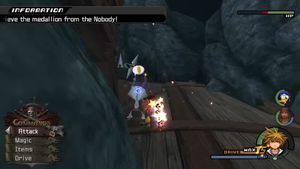
Open the chest for a Feather Charm, giving Sora the ability to summon Peter Pan. Exit to Seadrift Row, where you will encounter more pirates and Heartless. As before, use Jack's limit to draw the pirates into the moonlight, then open the chests; one to the right contains a Serenity Gem, and another one up ahead to the right for a King Recipe. Forward and to the left is a Mythril Crystal. Continue to Seadrift Keep and defeat the Gambler Nobody for a medallion. A scene will have the party return to the ship, where they agree that they must look for the rest of the medallions. Speak to Jack to return to the Ship Graveyard, where another Gambler holding a medallion should spawn on the lowest level of the area. Find it and defeat it within thirty seconds to obtain another medallion. If you don't happen to do so in time, you can leave the area and return immediately to make it respawn. You can now collect the treasures in the area.
Open the chest by the ledges leading up to the second level of the area for an AP Boost. Head to the corner of the ramp leading up for an Orichalcum. Finally, in the corner of the top level by the anchor, is a Meteor Staff. Return to the Black Pearl and sail back to Isla de Muerta to find the remaining Gamblers, one at the Cave Mouth and another hiding behind explosives in the Powder Store (for which you are given an increased time limit of two minutes). After all medallions are collected, speak to Jack to return to Port Royal for a boss fight.
Boss: Grim Reaper
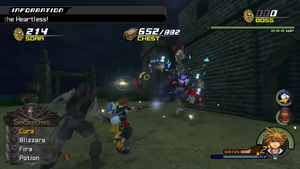
The Grim Reaper has returned, this time much more powerful. This Heartless cannot be damaged when it is holding even one of the cursed medallions, and it can only drop a group of the medallions at a time with the power of magic. Use whichever magic attack you prefer, though Blizzard may be the most useful as it freezes it, then run beside the Reaper to collect all of the medallions that it drops. When it is far enough away from you, return the medallions to the chest with the reaction command; if it attacks Sora while he is holding them, he will also drop them. Return all 882 medallions to the chest and the Heartless will finally become vulnerable to attack. Use this opportunity to perform as many combos as possible, as it will return to its invulnerable state shortly by once again absorbing all of the medallions.
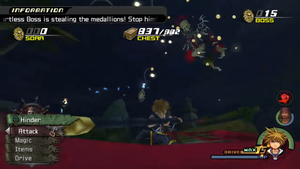
Once you return some medallions to the chest in the second round, the Heartless will attempt to take them back right away with a powerful whirlwind. Find an opening in the whirlwind to get close enough to the Reaper. This will trigger the Hinder/Loot Launch reaction command combo in which Sora steals the Grim Reaper's scythe and attacks it with the new weapon, resulting in a large amount of medallions dropped. Return them to the chest again to once again trigger the reaction command without the need for magic, continuing the cycle until it becomes vulnerable once again. Drain all of its health for an upgrade in Sora's Magnet magic, the new Flare Force limit for Donald, and an increase in maximum HP for Goofy and Jack. After the scene, you will also obtain Secret Ansem Report 6. After another scene, return to Agrabah.
