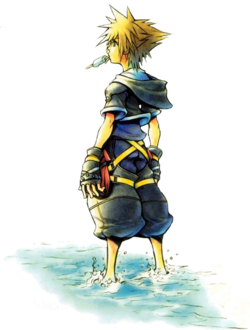
Dark City[edit]
Exit the Alley to Between. In the next area, Fragment Crossing, many Shadow Heartless will spawn, making this the perfect place to grind Wisdom Form. Make sure return to the Alley to Between while in Wisdom Form to restore your drive gauge without the need for a Drive Recovery. In the western corners of the second open space you come across, pick up the Mythril Stone and Mythril Crystal. Atop two short ledges are Orichalcum and an AP Boost. Exit to Memory's Skyscraper for some scenes and, if you're playing the Final Mix version, a boss fight.
Boss: Roxas (Final Mix only)[edit]
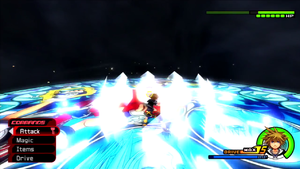
Wielding two Keyblades, incredible speed, and the power of light, Roxas is one tough opponent. As soon as the battle begins, Roxas will perform a whirlwind slash with a wide radius. Retaliate by performing a Reflega combo; doing so will not only guard Sora from the attack, but deal damage to Roxas as well. While he's stunned, perform a combo before dodging away as he begins his next attack. Roxas has a variety of scarily fast attacks that can hit Sora easily if he isn't constantly on the move. He'll usually start by moving across the ground in the form of light, essentially warping to Sora's position before returning to his original form. Use Reflega or dodge when he does so, as the assault begins here. He will either slash his Oatkeeper and Oblivion Keyblades in a combo with speed rivaling Master Form's or summon pillars of light which race across the ground, converging on Sora's location. Even more likely, he will do both. Make sure to keep your distance so as to keep your focus on dodging the pillars. If you did some leveling for Wisdom Form earlier, Quick Run should help (or Dodge Roll if Limit).
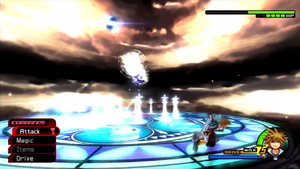
When the sky changes color, Roxas will float in the center, becoming invulnerable to attack. Stay on the outer edges of the platform and move along them in a circle, as Roxas will begin to summon spherical orbs that fly towards Sora, one after another. These can all be dodged easily with Quick Run or Dodge Roll (and can even be considered a break, as Sora's MP will keep recharging), but will require good timing if dodged by jumping. Continue to avoid Roxas after this sequence or use Reflega, as his attacks will be heavy. If you find yourself in critical condition, require MP, or simply want to do more damage, go into Limit Form. Sonic Rave and Ars Arcanum are effective against Roxas, so use whichever you prefer. Keep in mind that landing hits in Limit Form will restore a bit of Sora's health, so as long as you have enough MP, focus on attacking. Once you run out, you can either use Ethers (or an Elixir if available) to restore MP and continue using Sonic Rave or Arcanum, or revert and build your drive gauge back up again. Clearing the battle will earn Sora an increase in maximum HP and Combo Master. After the scenes, he will also obtain Secret Ansem Report 8 and the Final Mix-exclusive Two Become One Keyblade.
Post-Dive to the Heart[edit]
After the battle, fight some Heartless and pick up the treasures in the area. Keep in mind that, for defeating Roxas, you have gained access to Final Form, though you must unlock it first (doing so is recommended, particularly if you plan on fighting some optional bosses). It can be unlocked by going into any Drive Form, though the odds of it showing up are completely random. However, once it does activate, it earns a permanent place in the Drive menu. Equip Two Become One to increase the odds of summoning it, though this also greatly increases the odds of going into Anti-Form. To achieve it easily, head back to the beginning of Fragment Crossing and go into any Drive Form, then return to Alley to Between to restore your drive gauge. Repeat until Sora goes into Final Form.
Back to Memory's Skyscraper, to the right of the building itself is an AP Boost. To the left of it is a Mythril Crystal, and slightly ahead of it is a Mythril Stone. Continue forward to the Brink of Despair for some more scenes, including an update on Kairi, and open two chests to the left: one containing the Dark City Map, and another right on the edge of the cliff for Orichalcum+. Take the ramp to enter the Castle That Never Was.
The Castle That Never Was[edit]
At Nothing's Call, you'll do battle with Sorcerer Nobodies, which summon cubes that surround Sora before closing in and attack him. Leave just as they are about to attack to avoid them, and perform quick aerial combos on the Nobody to have them shatter for good. Open the first chest on the raised platform for Orichalcum and the second chest to the left of the exit for a Mythril Gem. After dispatching the Sorcerers, move on to the Crooked Ascension, where you will be blocked off from the exit until you defeat the Dragoon Nobodies. After doing so, enter the next area, Twilight's View, for a moment of reprieve (containing a save point and the world's moogle). Pick up the Cosmic Belt and continue forward when ready for a boss fight.
Boss: Xigbar[edit]
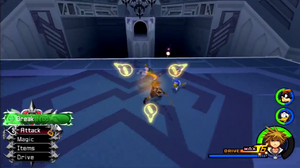
Xigbar will begin the battle by teleporting to a higher platform, out of reach of the party, which can now be seen from Xigbar's perspective. Xigbar's sniper reticle will follow Sora wherever he goes in an attempt to shoot him. Dodge until the target turns yellow, indicating that it is your cue to stop moving and use the Break/Warp Snipe reaction command combo. Sora will knock the bullets back at Xigbar, who will teleport back down to the ground and begin the main fight by shooting Sora while suspended in mid-air upside down. These shots can easily be blocked with Guard or Reflega, and any bullets that are blocked will hit him right back. Beyond this, he will give you in an opening to attack when he reloads (even giving himself away by announcing it), making this an easy fight as long as his attacks are avoided.
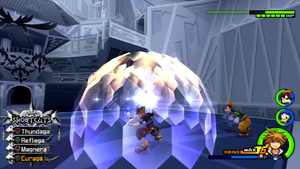
Eventually, Xigbar will make use of an attack in which he charges a mass of energy (he can be attacked while he does this), creating a large bullet that will ricochet across the walls. A new reaction command will become available when it comes close to hitting Sora, allowing him to knock it back at Xigbar just as in the first phase of the fight. When enough health is lost, Xigbar will begin to perform his desperation move, which has him trap the party on a small platform while he shoots out of their reach. Travel in a circle when he begins the barrage of bullets, as they will keep coming and can easily combo Sora into the air (in this case, the Once More ability comes in handy). Use Curaga, a Potion, or even a Drive Form if necessary (such as the newly-available and incredibly powerful Final Form, which blocks attacks when Sora jumps). Defeat Xigbar for an increase in Sora's maximum MP, an extra item slot for Donald, and an increase in Goofy's maximum HP, as well as Secret Ansem Report 3 after the scene.
Reunion[edit]
Enter the next area, Naught's Skyway, for battles with some lower-ranking Nobodies. To the left of the first platform is a Mythril Gem. Up the first ramp is a ledge holding Orichalcum. Up the second, in the corner, is a Mythril Crystal. Continue to the next area to finally be reunited with Riku and Kairi after over a year of separation. For this, you will obtain the Oblivion Keyblade and the Castle That Never Was Map. Exit to the next area to gain access to some more boss fights with the remaining Organization members. Enter the door with the card icon under it to be transported to a battle with Luxord.
Boss: Luxord[edit]
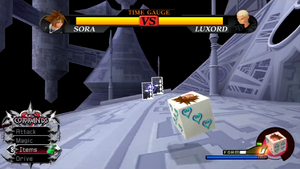
This battle is unique in that Sora is fighting alone and rather than having a health gauge, Luxord as a time gauge at the top of the screen. While Sora still has his health, he also has a time gauge, which will drop if he gets hit (and unlike his health, Cure or healing items can't restore it). Likewise, Luxord's time gauge will drop if he is hit; land combos on him or perform Limit Form attacks like Arcanum or Sonic Rave to have his time drop dramatically, putting him in danger of losing the battle. You can also drop Luxord's time by beating him in irritating mini-games, such as selecting the circle command as the deck quickly cycles between Xs and circles. However, Sora puts himself at great risk when he starts these mini-games, as losing them will have him transformed into a card or a die, not only wasting time but also putting his health in danger (to speed the process up, though not by much, Sora must keep moving in this form). Feel free to combo him instead of actually attempting these mini-games, as only two of them are mandatory, and it will become clear that they are when Luxord becomes invulnerable to attack.
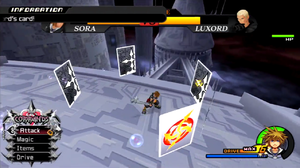
The first of the mandatory mini-games is one of the easier ones, as Luxord will transform into a card and hide himself among other cards. After the cards are shuffled, Sora must find the card that Luxord is hiding in and select it by using the Flip reaction command. He can easily be spotted by simply rotating the camera, as he will be turned away from Sora, but he can't hide from the camera. Successfully clear all rounds to drop his time. Another mandatory mini-game is his desperation move. The arena will go dark and he will begin by flinging cards every which way, attempting to hit Sora. Keep jumping or if you've leveled Final Form, use Glide. Eventually, Sora will be surrounded by giant cards, and thus begins the mini-game. Select circle for every slot in the command menu; the more slots Sora has cleared, the faster the cycle will go. Performing this mini-game successfully isn't necessary, but it will be extremely effective on Luxord's time gauge if it is, potentially defeating him. Clear the battle for an increase in maximum HP and an upgrade in Sora's Magnet magic. After the scene, you will also obtain Secret Ansem Report 9.
Boss: Saïx[edit]
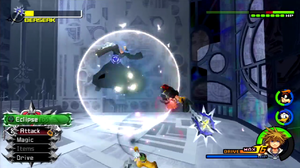
Walk into the next door with the claymore under it to be transported to a battle with Saïx. He will begin the battle in Berserk mode, indicated by the full Berserk gauge in the corner of the screen. After each combo of his, he will drop a claymore; pick it up with the Berserk reaction command just as you would for the lower-ranking Berserker Nobodies, and get close to Saïx to catch him with an Eclipse/Magna Storm reaction command combo, kicking him out of Berserk mode and allowing you to continue to combo him. There are a couple of ways to stun him out of the ability to use Berserk mode, the first being Donald's Comet limit and the second being Peter Pan; Saïx is incredibly weak outside of Berserk mode, making this battle much easier. Defeat him for increases in Sora's and Donald's max HP and an extra item slot for Goofy. After the scene, you will also receive Secret Ansem Report 12.
Ruin and Creation's Passage[edit]
Enter the newly opened passage to obtain Secret Ansem Report 11 and more importantly, Riku as a party member. His limit will come in handy for the coming boss battles, so make sure to set his Auto Limit ability. At the end of Naught's Approach is the entrance to Ruin and Creation's Passage, where the bridges connecting the platforms will be initially invisible. The first platform you cross to holds a Mythril Stone, the second an AP Boost, the third a Mythril Crystal and the fourth, Orichalcum. Exit the area to find yourself at the Alter of Naught, nearing the final confrontation. Climb the stairs to finally come face-to-face with Xemnas.
Final Boss: Xemnas[edit]
Phase I[edit]
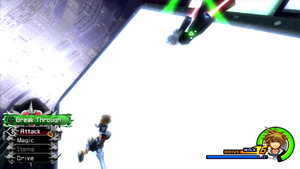
Xemnas will begin the battle by placing a curse on Sora. Rush to the front of the skyscraper for a reaction command to break out of it. Sora will then run up the building to reach Xemnas, and a Clash reaction command will pop up. Wait a few seconds for it to pass, giving you the Break Through reaction command. Perform this one, and the Finish that follows to start the battle with less health for Xemnas. Once back on the ground, Xemnas will warp to your location in a dark ball, either putting up a defensive wall in front of him that hurts Sora if he comes into contact with it, or performing a combo with his dual ethereal blades. In either case, you can use Reflega to counter him, as it will do a great amount of damage and stun him momentarily - an opening that's crucial against the big bad.
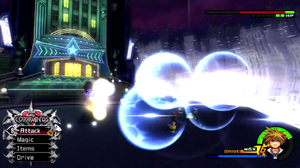
Reflega is such an integral part of this battle because unlike so many other bosses, Xemnas cannot be approached and hit with a combo normally (the exception being immediately after he swings his blade a second time, assuming you're out of his reach). If you attempt to attack him out of nowhere, he will simply warp away and hit you from behind. You can also use Guard in this case and attack him immediately after he staggers, but Reflega is the much safer option as it takes out a massive chunk of his HP in the process of defending. If the battle goes on long enough, Xemnas will once again place a curse on Sora, giving you another opportunity to deal the Break Through reaction command and finish him off for good. Doing so earns Sora an increase in both max HP and MP. After the scene, you will also receive the last of the Secret Ansem Reports, Secret Ansem Report 13. Feel free to save before entering the door to the final confrontation, as there will be no more breaks after this.
Phase II[edit]
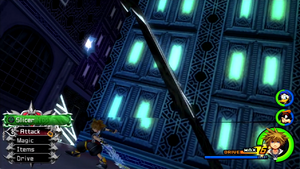
You'll have to start off by racing through the city to get to Xemnas. Use the Slicer reaction command when the buildings rising up out of the ground get close enough to Sora to slash through them, opening up the path to the next area (you can still get past this without reaction commands, but it will do damage to Sora's HP). In the next area, use the Sky Scraper reaction command as soon as building comes flying at Sora, and continue to use it until Sora reaches a new area with a new task.
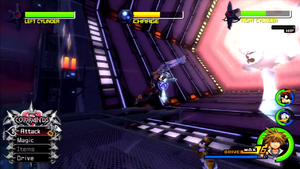
The power of this machine is represented by the Left Cylinder and Right Cylinder Gauges, while the length of time it takes to attack is represented by the Charge gauge. Start by hitting enemies, blowing them back into the core and ultimately dealing damage to the Cylinder's health gauge. One the Charge gauge fills up, it'll be time to move onto the next cylinder with a reaction command. If you do not finish in time, you can always return to one cylinder after the other is destroyed or if an attack is charged once again. This leads into the next task, which has you attack a door until it is blocked off. Clear the room of Nobodies to gain access to it again, and attack. It will inevitably be blocked off again, in which case you will repeat the cycle until the door's HP is depleted and you can approach it with the Proceed reaction command.
Phase III[edit]
Now that you've reached Xemnas, you will be battling him in his armor. This attack should be relatively easy considering his stationary positioning and lack of attacks. One of his moves, the barrier, carries over from the previous confrontation with Xemnas, but this can also be bypassed with Reflega. Otherwise, he will simply stab at you with his giant lance, and while its reach is long, it is a short attack that you can easily bounce back from if hit by it. Start the battle by performing the limit of your choice (though Riku's limit and Donald's Duck Flare limit should be most useful) and attack away with the benefit of invincibility, all while he sits and takes your attacks with no other choice.
Phase IV[edit]
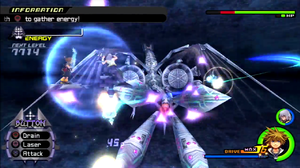
This part of the fight is entirely different from the others, fought on a vehicle that lets Riku and Sora follow Xemnas into the sky. Use ![]() Drain to collect the purple bullets shot by some enemies, collecting energy that allows Sora and Riku to perform a
Drain to collect the purple bullets shot by some enemies, collecting energy that allows Sora and Riku to perform a ![]() Megalaser special attack.
Megalaser special attack. ![]() will come in handy for shooting all other enemies as well as dealing damage to the main ship when the special attack is not available; make sure to keep your fingers on both
will come in handy for shooting all other enemies as well as dealing damage to the main ship when the special attack is not available; make sure to keep your fingers on both ![]() and
and ![]() throughout this battle. Dodging is also a necessity at times, as the ship will perform an attack that cannot be absorbed or broken by a laser after some of its parts are destroyed, sending blasts of energy across the screen in the form of its own lasers. Your best bet to avoid these is to move around the screen in a circle, as they will appear slowly but in quick succession. Destroy all of its parts to move on to the penultimate battle.
throughout this battle. Dodging is also a necessity at times, as the ship will perform an attack that cannot be absorbed or broken by a laser after some of its parts are destroyed, sending blasts of energy across the screen in the form of its own lasers. Your best bet to avoid these is to move around the screen in a circle, as they will appear slowly but in quick succession. Destroy all of its parts to move on to the penultimate battle.
Phase V[edit]
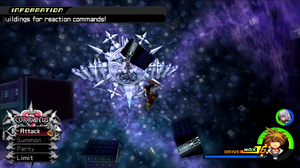
As part of the final stretch, you will have to do battle with Xemnas' armor once more, this time with a few more tricks up his sleeve. Start by using Riku's limit, Session, making sure to stay close to Xemnas at every step. After that's done, Xemnas will perform a heavy swipe with his lance, sending Sora and Riku flying out into space. Use ![]() to jump in mid-air and
to jump in mid-air and ![]() to glide. Many buildings will be flying at you, but ignore them (or rather, dodge them) in favor of one of the stationary buildings down below. Glide toward it and perform the Riding Shot reaction command once close enough, leading directly into Meteor Rain. You can now glide back toward Xemnas, but not without one more obstacle in your way; dodge the lasers that he sends by jumping continuously. Even when Sora can't go any higher, keep jumping over the lasers until they cease. Once you land, you should have enough MP to use Session again. Defeat him to be led into the final stage of the final battle, and the most difficult.
to glide. Many buildings will be flying at you, but ignore them (or rather, dodge them) in favor of one of the stationary buildings down below. Glide toward it and perform the Riding Shot reaction command once close enough, leading directly into Meteor Rain. You can now glide back toward Xemnas, but not without one more obstacle in your way; dodge the lasers that he sends by jumping continuously. Even when Sora can't go any higher, keep jumping over the lasers until they cease. Once you land, you should have enough MP to use Session again. Defeat him to be led into the final stage of the final battle, and the most difficult.
Phase VI[edit]
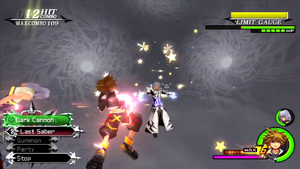
Start by using the Reversal reaction command continuously to avoid Xemnas' thorn attacks. Perform this successfully should lead to the Block reaction command, though there is a noted bug in the Final Mix version of the game in which the Reversal prompt doesn't always show up when necessary. Nevertheless, even if you are hit, use Curaga or a Potion (or even just let Riku heal you, as he tends to do often), then continue to use Reversal. An alternate option to avoid this attack entirely is to use Session as soon as it begins. While Xemnas will teleport constantly, you can continue to attack him by locking to him whenever he reappears.
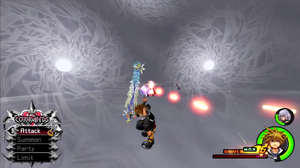
Now on the ground, Xemnas will continue to use his thorn attack every now and again, but not as frequently. Use Reversal on it to get close to him and attack, though he will have many new attacks of his own to mix this battle up. It is often that you will see two of him, one which attacks after the other (usually performing a spinning attack with his blades but also performing basic slashing combos). Eventually, he will begin to shoot laser-like bullets, albeit with delayed timing. He starts by shooting three at a time, which can be guarded easily with proper timing, and will finish off the sequence by circling Sora with them. He can avoid these by either guarding or jumping just as they're about to hit. The final laser attack he performs has him and a clone shooting lasers continuously with no break; guard or dodge around the arena to avoid them.
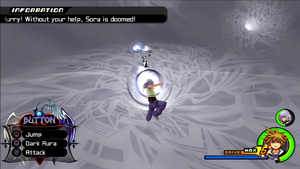
When Xemnas loses enough health, it is only a matter of time before he performs his desperation move, restraining Sora and making him unavailable to play. You will now control Riku as he attempts to save Sora. If you don't get to him before he loses all of his health (or even if Riku loses all of his health), you will fail the battle. Despite the stakes, there is a very easy solution in Riku's ![]() Dark Aura attack. For every couple of steps you take, use Dark Aura to halt the second Xemnas' advance. Walk around the walls he puts up and continue to use Dark Aura to reach Sora and the real Xemnas, in which case you can perform the Rescue reaction command. With control now returned to Sora, Xemnas' attack pattern will repeat. Use Session to push Sora and Riku to the exhausting end of the battle.
Dark Aura attack. For every couple of steps you take, use Dark Aura to halt the second Xemnas' advance. Walk around the walls he puts up and continue to use Dark Aura to reach Sora and the real Xemnas, in which case you can perform the Rescue reaction command. With control now returned to Sora, Xemnas' attack pattern will repeat. Use Session to push Sora and Riku to the exhausting end of the battle.
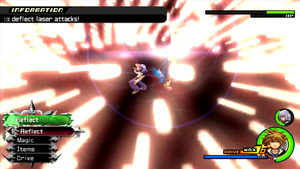
When Xemnas is down to one health bar, he will surround Sora and Riku with thousands of laser-like bullets. Press ![]() to Reflect the bullets away from Riku and
to Reflect the bullets away from Riku and ![]() for Sora; if you don't press the button for either of them in a short span of time, they will die and you will have to restart the battle, so bear the exhausting button-pressing for now. Afterwards, Sora and Riku will stab Xemnas with a laser of their own, all but finishing off. Hit him with one last combo to defeat Xemnas and clear the battle for good, earning Sora a powered up drive gauge for post-game activities. Enjoy the ending cinematic and the post-credits secret movie hinting at the next game, for you've defeated the most difficult boss required.
for Sora; if you don't press the button for either of them in a short span of time, they will die and you will have to restart the battle, so bear the exhausting button-pressing for now. Afterwards, Sora and Riku will stab Xemnas with a laser of their own, all but finishing off. Hit him with one last combo to defeat Xemnas and clear the battle for good, earning Sora a powered up drive gauge for post-game activities. Enjoy the ending cinematic and the post-credits secret movie hinting at the next game, for you've defeated the most difficult boss required.
If you'd like to obtain the Final Mix-exclusive Gold Crown for Sora, you can work on satisfying all of the Mushroom XIII, getting through the Cavern of Remembrance and fighting the Data Organization XIII at the end of it, as well as defeating the Lingering Will, which should appear upon reloading a cleared game save at Disney Castle. For now, congratulations on beating the game!
