First visit[edit]
| Bigg's Armor Shop | |
|---|---|
| Item | Price |
| Elven Bandana | 100 |
| Shadow Anklet | 150 |
| Jessie's Accessory Shop | |
| Item | Price |
| Ability Ring | 80 |
| Wallace's Weapon Shop | |
| Item | Price |
| Hammer Staff | 100 |
| Adamant Shield | 100 |
| Wantz's Item Shop | |
| Item | Price |
| Potion | 40 |
| Tent | 100 |
After Sora wakes up and gets his bearings, you'll appear in front of the mansion. Grab the treasures now to save you a trip; there's a chest containing a Potion in the northeast, and a chest containing a Mythril Shard in the southeast. Head into the Woods and grab more chests; a Potion can be found on the left as you face the exit towards Twilight Town itself, a Mythril Shard can be found on the right-hand side, and a Hi-Potion can be found by following the line of trees to the left as you exit the mission area. Exit and you'll be taken to the Usual Spot for a cutscene. Afterwards, you're free to wander around town to grab any treasures you wish to get. Note that you can't do any of the "Help Wanted" jobs until you return later in the game.
Find a Hi-Potion straight ahead as you exit from the woods, next to a building with a green roof. For the following chests, Master Form's Aerial Dodge may come in handy. The first of these chests is on a roof to the right as you exit the woods, containing an AP Boost, and another chest containing a Tent is on yet another roof. For the last rooftop chest, begin by climbing the set of steps opposite the synthesis shop. Follow the path to find a bridge. Grab the roof opposite the bridge to find a Mythril Shard. Now backtrack and, instead of jumping, head to the right where there's another path. Follow it for another Myhtril Shard. Continuing on the ground, directly south from the synthesis shop is a Potion, and for another Potion as well as the last chest in the area, follow the wall to the left as you exit from the woods.
When you're ready to move on with the story, head to the Station Plaza. There, Sora, Donald, and Goofy will suddenly be confronted with a great amount of Nobodies to fight. They will come in a continuous stream, so don't worry about trying to defeat all of them, as it's impossible to do so. However, you will easily be able to gain at least a couple of levels (as will Donald and Goofy). After a set period of time (or after losing 70% of Sora's total HP), King Mickey will save the day, and hand you the Munny Pouch, Secret Ansem Report 2 and the Crystal Orb.
When you're ready , head into the Station itself, watch the cutscenes, and grab the chests that are scattered about (a Tent between the two large doors to the left, a Hi-Potion below the previous chest, and a Mythril Shard opposite the only pair of steps to the right). Talk to Donald to continue the story. Your next location is the Tower.
The Tower[edit]
Once you have control of Sora, pick up the treasures scattered around the area. A Potion is on the east end and a Hi-Potion is on the west end, with an Ether close by. Then, simply approach the figure standing in front of the entrance to the Tower. After the conversation, Sora and co. will have to fight a few Shadows, a type of Heartless which should be familiar after playing the prequel. They remain the weakest of the Heartless, so this battle should be completed without any trouble. Once you've defeated them all, enter the Tower and save your game if you wish. Pilfer the two chests in the Entryway for an Ether and a Mythril Shard, then head up the stairs. Along the way, you will have the opportunity to randomly fight Shadows and Soldiers. You can skip them if you want to, but at two points in your climb, you'll be confined to a circular room. In this case, you must defeat all enemies to proceed.
Once you reach the top of the tower, a long and informative cutscene will follow. Yen Sid will suggest Sora read the book, but the content inside is entirely skippable. Simply speak to Yen Sid to conclude the information session. After opening the large chest here for a Tower Map, go into the Wardrobe area, where Sora will meet Flora, Fauna, and Merryweather. After a small argument, Sora will automatically receive new clothes, which contain the ability to adapt to various combat situations in the form of Drive Forms, beginning with the ability to use Valor Form. Valor Form also comes equipped with the Star Seeker, but you cannot equip this weapon until you receive a third Keyblade to swap it in with. Open the chest in this room for a Mythril Stone, then reenter the Sorcerer's Loft. In Final Mix, it as at this moment that you are introduced to the concept of puzzle pieces, collectibles scattered across every world that must be assembled once collected for special bonuses. Back in the Sorcerer's Loft, the trio's stay in this world will be concluded, and you obtain the ability to leave with your Gummi Ship.
When on the World Map, you can't enter the main menu, but you can save your game and access Jiminy's Journal with the ![]() button. For now, you can't enter any worlds apart from Hollow Bastion, so head there first.
button. For now, you can't enter any worlds apart from Hollow Bastion, so head there first.
Second visit[edit]
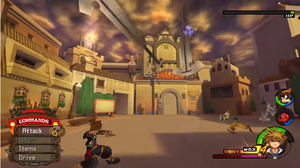
Once you regain control of Sora, head to the Sandlot for a battle against some tough Nobodies. The first round will consist of Dusks, an enemy you should be familiar with by now, but the next round will introduce a new Nobody: the Berserker. These Nobodies are entirely capable of killing Sora with one combo, becoming much more manageable only one they are attacked enough to drop their swords and open themselves to a reaction command (an incredibly useful one that has Sora pick up the sword himself and continuously bash any nearby enemies with it, defeating even the Berserkers in one combo). To make matters worse, the Berserkers will appear in groups, allowing them to trade blows before entering an invincible state that has them pounding their sword onto the ground in a line, then slashing it around before finally creating a shockwave. It is only after this sequence that the Berserkers are once again open to combos, making catching any one of them nearly impossible in the tight space.
Fortunately, this battle becomes much more manageable on all difficulties with the use of Wisdom Form. Enter Wisdom Form after the preliminary Dusks are out of the way, then perform Fire combos. In Wisdom Form, Sora will automatically move toward enemies after using magic, maximizing its effects. If you find yourself in trouble or lose Wisdom Form early, you can block the attacks of the Berserkers, then use a limit such as Comet, Knocksmash, or Trinity to stun them as well as do a significant amount of damage. An alternate (albeit riskier) strategy is to go in to Valor Form when the Berserkers arrive. Because Valor's hits are so quick, Sora can attack a Berserker enough to steal its sword with the reaction command before giving any of the Nobodies a chance to attack. He can then use the sword to attack all surrounding Berserkers, then continue the cycle by stealing another one of the Berserker's sword, and repeat until they're all defeated. Clear the battle for a scene and Seifer's Trophy, then head to Central Station to clear the world. For doing so, you will receive the Oathkeeper Keyblade and, in Final Mix, Limit Form. Return to Hollow Bastion.
Third visit[edit]
Exploring Underground and Sunset Terrace[edit]
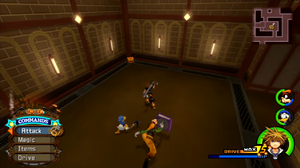
The Underground Concourse and Tunnelway areas are finally open for Sora to explore, and they contain many treasures. Exit Central Station and enter the passage with a large "5" over it. Make a left at the first fork and open a chest in the corner for a Mythril Crystal. Continue down the path and make a right turn at another fork into a room. Open the chest in the corner for an Orichalcum Backtrack and continue straight down the path. Up the first set of stairs is a Mythril Gem. Make a right at the next fork, then another right for an AP Boost. Head through the exit (which can be seen on the map, but can also be found by following the "2"s on the wall) to the Tunnelway. Open the chest in this room for an Orichalcum. Continue down the only path to find a Mythril Crystal and the exit to Sunset Terrace.
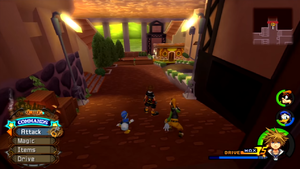
Make a left turn upon exiting the Tunnelway, and another left into an alley. Open the chest at the end of it for an AP Boost. Exit the alley and continue down the path, through the archway. Hop onto the tram using reaction commands to access an Orichalcum, and jump down to the left of it for a Mythril Crystal. Lastly, placed at the front door of a house to the left of the tram is a Mythril Shard. To save some time, head to Sunset Terrace's train for a save point, then warp back to Twilight Town's Central Station rather than taking the long way back. Back at the Station Plaza, exit to Station Heights and then down to the Tram Common. From here, head to the Old Mansion via the Woods. Defeat the Nobodies alongside King Mickey for an increase in maximum HP for Sora and Goofy, and Lucky Lucky for Donald. To progress the story, enter the Old Mansion.
Mystery of Twilight Town[edit]
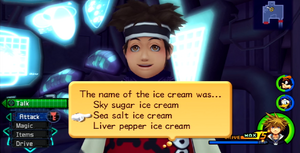
Open the chest by the windows in the back for a Mythril Crystal. Enter the Dining Room to the left for a Mythril Crystal and a Mythril Stone. Back in the Foyer, a Mythril Stone can be found midway up the stairs to the right and a Serenity Crystal can be found in the middle of the second floor. To the left is the White Room, containing a save point, and to the right is the Library. In the Library, pick up the Orichalcum to the left and head through the door down below. After the scene, head down the path through the next door, then through the next for an Ultimate Recipe between some pods. Through the final door is the Pod Room, where Sora rested for a year after Chain of Memories. Return to the computer and speak to Pence to give him the password: "sea salt ice cream." After the scene, use the reaction command to touch the beam that will take Sora, Donald, Goofy, and Mickey to an alternate Twilight Town. After another scene, you will receive Secret Ansem Report 10. Exit to the Basement Hall and enter the portal to meet another member of Organization XIII.
Battle the Nobodies with Donald and Goofy, and then alongside Axel. After a scene, you will receive the Bond of Flame Keyblade. After another series of scenes, you will find yourself in the World That Never Was.
